GelDoc-It®TS2 & ChemiDoc-It®TS2 Imagers Installation and User Instructions UVP, LLC 2066 W. 11th Street Upland, CA 91786 Phone: (800) 452-6788 Fax: (909) 946-3597 Ultra-Violet Products Ltd. Unit 1, Trinity Hall Farm Estate Nuffield Road, Cambridge CB4 1TG UK Phone: +44(0)1223-420022 Fax: +44(0)1223-420561 Web Site: www.uvp.
TS2 GelDoc-It TS2 and ChemiDoc-It Imagers 2 Table of Contents Introduction ..................................................................................................................................................................3 System Components ...................................................................................................................................................4 Optional Equipment .................................................................................
TS2 GelDoc-It TS2 and ChemiDoc-It Imagers 3 Introduction TS2 The GelDoc-It Imager is a high resolution imager capable of capturing, documenting and analyzing fluorescent gel images. TS2 In addition to gel documentation capabilities, the ChemiDoc-It Imager is equipped with a cooled, scientific-grade CCD camera allowing users to capture, document and analyze chemiluminescent blot images, including Western blots.
TS2 GelDoc-It TS2 and ChemiDoc-It Imagers 4 System Components Refer to the packing slip and pictured components for specific parts and components included with the system. 15.
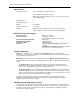
TS2 GelDoc-It TS2 and ChemiDoc-It Imagers 5 Specifications Power Requirements: 100/115V, 50/60Hz; 3.1 Amps at 120 Volts 230V, 50/60Hz; 1.
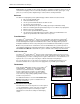
TS2 GelDoc-It TS2 and ChemiDoc-It Imagers 6 Additional filters are available for other specific fluorophores, including custom filters. Filters can also be removed when imaging non-fluorescent media (including chemiluminescent blots, protein gels, colony plates, etc.) in order to produce brighter images. Contact UVP for ordering information. Darkroom The darkroom is light tight to provide optimal imaging conditions.
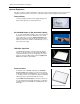
TS2 GelDoc-It TS2 and ChemiDoc-It Imagers 7 Optional Equipment UVP offers a variety of optional equipment to support the needs of varying laboratory environments. Refer to “Replacement Parts and Accessories” at the end of this manual for optional equipment part numbers. Thermal Printer The thermal printer provides archive quality, 256 grayscale prints and five optional cost-effective print sizes.
TS2 GelDoc-It TS2 and ChemiDoc-It Imagers 8 VisionWorks®LS Analysis Software TS2 The GelDoc-It can be configured with VisionWorksLS Software for analysis of gels, plates and membranes. The software features image enhancement, complete analysis tools and reporting capabilities, and is ideal for users who require image analysis functions in addition to the standard TS2 image acquisition capabilities of the GelDoc-It .
TS2 GelDoc-It TS2 and ChemiDoc-It Imagers 9 Setup Instructions Components TS2 When unpacking the GelDoc-It 1. 2. 3. 4. 5. 6. 7. TS2 and ChemiDoc-It TS2 , the following items will be included: TS2 GelDoc-It or ChemiDoc-It darkroom Ethidium bromide (EtBr) emission filter Transilluminator Power cable Keyboard and mouse TS2 VisionWorksLS Software (included with ChemiDoc-It only) Supporting documentation When unpacking and setting up the darkroom, two people are required to move the darkroom.
TS2 GelDoc-It TS2 and ChemiDoc-It Imagers 10 Installing Emission Filters 2 To install the 50mm ethidium bromide (EtBr) filter and any other emission filters: 1. Carefully remove the filter from the protective plastic case, holding the filter at the edges to prevent placing fingerprints on the glass surface. 2. The filter wheel is located on the user’s right side of the darkroom. Press in on the slide-out filter wheel door and the door will pop out slightly.
TS2 GelDoc-It TS2 and ChemiDoc-It Imagers 11 Using the System Powering Up the System Set the black power switch on the back of the system to the ON (I) position. Once plugged in to a wall outlet and the black power switch on the back of the system is placed in the ON (I) position, the TS2 TS2 GelDoc-It and ChemiDoc-It systems are always powered on.
TS2 GelDoc-It TS2 and ChemiDoc-It Imagers 12 Selecting Emission Filters See the “Installing Emission Filters” section of this manual for instructions on installing individual emission filters. Once all filters have been installed, select the Lighting and Filters menu in the TS2 Software and click the Reset Wheel button under the “Filters” tab to realign and calibrate the filter wheel within the system.
TS2 GelDoc-It TS2 and ChemiDoc-It Imagers 13 Image Zooming TS2 TS2 Both the GelDoc-It with the GelCam 310 camera and the ChiemiDoc-It with the BioChemi 510 camera are equipped with optical zoom lenses, meaning that the system uses the lens optics to make the sample appear closer on the screen. Optical zoom is adjusted using the Zoom button and slider bar on the main TS2 screen.
TS2 GelDoc-It TS2 and ChemiDoc-It Imagers 14 Touch Screen Interface Setting User Preferences The Preferences portion of the TS2 Software allows the user to select settings which are normally set once and rarely changed. Such preferences include image save format and image save location. Prior to capturing images, access the user preferences by touching the Preferences button in the upper-left corner of the main TS2 screen.
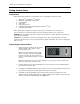
TS2 GelDoc-It TS2 and ChemiDoc-It Imagers 15 Active Camera: The name of the installed camera will be displayed in this area. For example, in this TS2 case the current camera is the Chemi 415 camera for the ChemiDoc-It Imager. Inactivity Light Shutoff: The Inactivity Light Shutoff will automatically turn off the transilluminator within the darkroom after a preselected period of time. From the drop down menu, select from 1, 5, 10, 15, 20, 25 or 30 minutes of inactivity time prior to shutoff.
TS2 GelDoc-It TS2 and ChemiDoc-It Imagers 16 Saving Tab Save Format: Touch the down arrow to select the desired file save format. Save images in JPEG, TIF, BMP, GIF or PNG file formats. Save Images To: Select the location where images are to be saved. The black dot within the radio button indicates which selection is activated. Select USB to save the file to the USB drive if one is currently inserted.
TS2 GelDoc-It TS2 and ChemiDoc-It Imagers 17 The following screen will appear: Lighting Tab Epi Illumination: Select the radio button corresponding to the required type of epi (overhead) illumination. Select from White, Accessory or Off. White lighting produces a glow of white light from overhead. Accessory lighting is only functional when optional epi UV modules are installed in the system darkroom. Off will disable all overhead lighting.
TS2 GelDoc-It TS2 and ChemiDoc-It Imagers 18 Accept or Cancel Settings Once all lighting and filter selections have been made, touch the OK button at the bottom of the Lighting and Filters screen to save all selections and go back to the main TS2 screen. Or, touch the Cancel button to go back to the main TS2 screen without saving selections.
TS2 GelDoc-It TS2 and ChemiDoc-It Imagers 19 To capture an image with an ideal exposure time automatically determined by the system prior to image capture, touch the Auto Capture button. For longer exposures, the amount of time remaining for the capture to complete will appear in the center of the image preview screen under the words “Capture Time Remaining”. This function is active when the button reads “Capturing…” in yellow lettering.
TS2 GelDoc-It TS2 and ChemiDoc-It Imagers 20 Touch the Open Image button to open a saved image. Touching this button will call up the Windows file/folder navigation screen. Select the desired file and press OK. Touch the Print button to print the current image on the default printer. If a default printer is not installed, touching the Print button will place the print request in queue.
TS2 GelDoc-It TS2 and ChemiDoc-It Imagers 21 Use the slider bar to adjust various camera and lens settings, including Exposure, Aperture, Histogram, Focus and Zoom (if applicable).
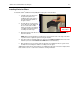
TS2 GelDoc-It TS2 and ChemiDoc-It Imagers 22 Touch the Aperture button to activate lens aperture adjustment. Use the slider bar to make adjustments to this setting. Note that the lower the aperture setting (the lower the f-number), the more light will pass through to the camera’s CCD sensor. The current aperture setting will be indicated below the word “Aperture” on the button (here, the aperture is set to “f/1.8”) as well as above the slider bar.
TS2 GelDoc-It TS2 and ChemiDoc-It Imagers 23 Touch the Focus button to activate lens focus adjustment. Use the slider bar to make adjustments to this setting. The current focus setting will be indicated below the word “Focus” on the button (here, the focus is “25%”) as well as above the slider bar. This function is active when the button reads “Focus” in yellow lettering and the word “Focus” appears below the slider bar.
TS2 GelDoc-It TS2 and ChemiDoc-It Imagers 24 Service Procedures Return Procedure A Returned Goods Authorization (RGA) number must be obtained from UVP Customer Service before returning any product. Replacement Parts and Accessories To order accessories or replacement parts for the GelDoc-It offices.
TS2 GelDoc-It TS2 and ChemiDoc-It Imagers 25 Inspect the thin wire within each glass fuse to see if there is a break in the wire. If so, replace the fuse(s). If fuses are blowing repeatedly, contact UVP Technical Support for additional troubleshooting. Transilluminator Will Not Turn On 1. In addition to turning on “UV transillumination” in the Lighting and Filters menu within the TS2 Software, the transilluminator itself has a power switch.