Installation Manual V1.05 V-A2412 / V-A2416 Wired Clock Valcom, Inc. 5614 Hollins Road Roanoke, VA 24019 540-563-2000 P. 540-362-9800 F. www.valcom.
Valcom, Inc. 5614 Hollins Road Roanoke, VA 24019 540-563-2000 P. 540-362-9800 F. www.valcom.
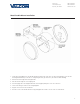
Valcom, Inc. 5614 Hollins Road Roanoke, VA 24019 540-563-2000 P. 540-362-9800 F. www.valcom.com Wall Mount Installation 12” Clock 16” Clock 1. IMPORTANT: If using a low voltage system (24 volt) make sure that the transformer is an isolated transformer. 2. Connect the wiring as shown on the wiring diagram. 3. Mount the back plate to a single gang box using the two (2) machine screws #6-32 included in the kit for 12” clock and 16” clock. The 16” requires the screw to connect to the ground wire. 4.
Valcom, Inc. 5614 Hollins Road Roanoke, VA 24019 540-563-2000 P. 540-362-9800 F. www.valcom.com Metal Double Mount Installation 1. Screw the mounting bracket to the double gang box using four (4) inner holes on the mounting bracket, or mount the mounting bracket directly to the wall or ceiling using the four (4) outer holes. (As shown in above drawing) 2. Insert the wires through the mounting bracket. 3. Fish the wires through the clock hanging rod. 4.
Valcom, Inc. 5614 Hollins Road Roanoke, VA 24019 540-563-2000 P. 540-362-9800 F. www.valcom.
Valcom, Inc. 5614 Hollins Road Roanoke, VA 24019 540-563-2000 P. 540-362-9800 F. www.valcom.com Plastic Double Mount Installation *For metal mounting bracket: Use anchor that can support 50 lbs with a maximum screw size of 10/1.5” q Install metal mounting bracket - First, remove the metal mounting bracket from the inside of the double mount base by unscrewing the two (2) 6-32 x 1/2” screws located on the underside of the base (save these screws for step #3).
Valcom, Inc. 5614 Hollins Road Roanoke, VA 24019 540-563-2000 P. 540-362-9800 F. www.valcom.com Plastic Double Mount Installation t Plug and secure wiring to clock - Loosen and slip excess wiring through provided wire clamp (comes attached to each clock adaptor) and tighten the clamp. After securing excess wiring, plug the jack at the end of the wiring into the appropriate jack on the back of the clock.
Valcom, Inc. 5614 Hollins Road Roanoke, VA 24019 540-563-2000 P. 540-362-9800 F. www.valcom.
Valcom, Inc. 5614 Hollins Road Roanoke, VA 24019 540-563-2000 P. 540-362-9800 F. www.valcom.
Valcom, Inc. 5614 Hollins Road Roanoke, VA 24019 540-563-2000 P. 540-362-9800 F. www.valcom.com Support Frequently Asked Questions Can the V-A2412 or V-A2416 clock run using a V-D11025 or V-D11040 digital clock as a master? Yes, a V-D11025 or V-D11040 digital clock can run a V-A2412 or V-A2416 clock. What happens if clocks are connected to power but the master clock has not been connected? When power is applied, the clocks will run, but will not show the correct time.
Valcom, Inc. 5614 Hollins Road Roanoke, VA 24019 540-563-2000 P. 540-362-9800 F. www.valcom.com Support Troubleshooting The clock is not running. What do I do? a) Make sure the pin is removed. b) Measure the voltage between the (black) power wire and the (white) neutral wire. For 24 volt models, the voltage should measure 14 - 28 VAC, unless the 2 wire digital communication system is being implemented. Then the meter should read a pulsating 24 volts DC.
Valcom, Inc. 5614 Hollins Road Roanoke, VA 24019 540-563-2000 P. 540-362-9800 F. www.valcom.com Diagnostic Testing Diagnostic Testing - Overview To enter the diagnostic testing, press the diagnostic switch located on the right hand side of the movement, or use a master clock to send the diagnostic tests to the V-A2412 or V-A2416 clocks. (Please refer to your specific master clock’s installation manual for complete details and instructions.
Valcom, Inc. 5614 Hollins Road Roanoke, VA 24019 540-563-2000 P. 540-362-9800 F. www.valcom.com Diagnostic Testing Diagnostic #2 - Comprehensive Test Purpose: To test the gearbox and electrical components. The second hand will display the protocol that was detected, the minute hand will display the software version number, and the hour hand will display how much time has passed since the clock last received communication signal.
Valcom, Inc. 5614 Hollins Road Roanoke, VA 24019 540-563-2000 P. 540-362-9800 F. www.valcom.com Diagnostic Testing Diagnostic #3 - Manufacturing Default Purpose: To bring the clock to 12:00:00 and reset to manufacturer’s default. Holding the switch for 5 seconds will enable you to enter into Diagnostic #3. This can be verified by the green diagnostic LED flashing 3 times with a five (5) second break between flashes.
Valcom, Inc. 5614 Hollins Road Roanoke, VA 24019 540-563-2000 P. 540-362-9800 F. www.valcom.com Compliances FCC Part 15b Industry Canada FCC Statement: Information to the user (for U.S. only) This equipment has been tested and found to comply with the limits for a Class B digital device, pursuant to part 15 of the FCC Rules. These limits are designed to provide reasonable protection against harmful interference in a residential installation.