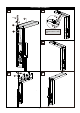
VALORE SEVEN Version No.:V1.
7 19 8 " 3 4 " 4 5 1 " 8 9" 1 26 2 " 7 24 8 " 1 78" 1 2 " 8 3 28" • (H) 26.49" x (W) 8.26" x (D) 8.85" • Hand shower hose: 59.
BEFORE INSTALLATION • Before and during installation, read and familiarize yourself with all installation instructions for this product. • Keep all components, parts and accessories of this product away from small children and minors. During installation, all screws, tools and small parts should be supervised so that they do not fall into the hands of children. • Use caution at all times when installing this product.
Qty Description Bottom Shower Panel Casing 1 Set Top Shower Panel Casing 1 Set 1 Pc Shower Head 2 Pcs Ring Clamp 1 Pc White Top Hose 6 Psc Screws 1 Pc Top Cover Shower Head Outlet Connector Cover 1 Pc Elbow Connector 1 Pc Filter Gasket 2 Pcs Brass Extender Joint (1-7/8"&2-3/4"x1/2") 2 Pcs 1 Pc Flow Regulator Base Plate Cover with Tape ( for Shower Head Outlet Connector Cover) 1 Pc Gray Main PVC Supply Line 1 Pc Screws 4 Pcs Nut 4 Pcs 17 Brass Nut 2 Pcs 18 Rubber Washer( 1-1/
11 13 12 10 9 8 4 7 6 14 15 5 20 4 19 2 17 18 3 16 5 21 1 24 27 17 28 9-2 18 22 25 26 24 10 10 24 23 17 -5-
HAND SHOWER AND CRADLE ASSEMBLY a 25 24 7 22 10 23 1 b 25 25 18 25 17 17 24 25 -6-
TOP COVER ASSEMBLY e f PH + PH + 2 15 4 5 Note: The hose connecting the shower head is in white color.
INSTALLATION INSTRUCTIONS • Before Installation, ensure there is sufficient clearance to accommodate the shower panel. A minimum of 12.5" is required between the shower outlet and top of your existing valve. Min 12.5Inch Ensure that the water line to the overhead shower pipe is completely shut off prior to performing any work. • Remove your existing shower head.
INSTALLATION INSTRUCTIONS Bracket installation options: When the overhead shower outlet is located outside shower surface, use the Method 1 (Drilled installation). When the overhead shower outlet is located inside the shower surface, use the Method 2 (Drill-less installation). Method 1: Drilled installation instructions 1. Place shower panel against the wall in its desird permanent location. 2. Mark Line 1 ane Line 2: - Mark the bottom of the panel with a pencil or erasable marker.
INSTALLATION INSTRUCTIONS Method 1 Note: Before drilling make sure you have the correct drill bit for your shower surface. 5. Drill the 2 screw holes with a 6mm bit suitable for the wall surface. Warning: Ensure your shower water line is not directly behind the drilling points A and B. Drilling into the water supply line may cause extensive damage. 6. Install the anchors(Part #20), Seal the wall around the nipple and the anchors with waterproof . silicone. B B 7.
INSTALLATION INSTRUCTIONS 9.Connecting the Supply Line Elbow (Part #9) to the main PVC Supply Line (Part #14): a 4 a. Insert the Ring Clamp (Part #4) onto the end of Gray PVC Supply Line (Part #14). 9 14 b. Fully insert the grooved end of the Elbow Connector (Part #9) into the Gray PVC Supply Line (Part #14). 4 b c. With a Phillips head screwdriver, tighten the bolt and nut on the Hose Clamp (Part #4) until the Gray PVC Supply Line is secured to Elbow Connector (Part #9). 9 4 d.
INSTALLATION INSTRUCTIONS 11. Install the shower panel: After all connections have been completed inside the shower panel, it is ready to be hung on the shower wall for installation. a. Place the shower panel on the desired bracket position you previously selected. b. Raise the shower panel and rest it againg the bracket until the support strut is resting sungly in the desired bracket position. c.
INSTALLATION INSTRUCTIONS Note: Prior to applying bracket clean all residues from the wall bond properly. Recommend to use, cider vinegar, alcohol, or mineral dissolve. • Peel off the paper backing to the adhesive on the back side of the Bracket (Part #21). a c b • Place the adhesive side to the wall and apply pressure to secure the Bracket(Part #21).
INSTALLATION INSTRUCTIONS 3.Connecting the Supply Line Elbow (Part #9) to the main PVC Supply Line (Part #14): a 5 4 a. Insert the Ring Clamp (Part #4) onto the end of Gray PVC Supply Line (Part #14). 14 b. Fully insert the grooved end of the Elbow Connector (Part #9) into the Gray PVC Supply Line (Part #14). b c. With a Phillips head screwdriver, tighten the bolt and nut on the Hose Clamp (Part #4) until the Gray PVC Supply Line is secured to Elbow Connector (Part #9). d.
80 20-80 psi 80 0 a b • Dual Spray Modes • Jet Spray Position When the selector knob is placed in between two operating, this will result in a to simultaneous operation of both adjustment spray modes. A slight reduction in water pressure may occur due to the shared water flow between the two spray modes. When the position knob is placed in “d”, the handshower and the top hydro jets will work simultaneously.
Diverter Valve Structure 5 Diverter valve 4 3 1 2 How to Remove the Diverter Valve 1 2 3 (2.5 mm) 1 3 1 2 • Remove the cover (Part #3) to open the set screw access hole. • Loosen the set screw (Part #1) from the valve stem and pull the knob (Part #2) straight out. 3 4 4 4 5 Diverter valve • Loosen and remove the gland nut (Part #4). • Remove the Diverter valve (Part #5) by pulling it straight out.
How to Install the Diverter Valve 22 1 4 5 4 Diverter valve • Tighten the gland nut (Part #4). Take precaution to avoid scratching the trim plate. Do not force the nut too tightly. • Place the Diverter valve (Part #5) into the valve body. Note the one pillar on the bottom of the Diverter valve (Part#5) must be aligned with the hole in the rear of the body. Adjust the knob with right position 3 • Place the knob (Part #2) on the valve stem.
How to Replace the Check Valve 1 2 14 10 • Loosen the nut securing the Gary PVC Hose (Part #14) to the brass valve body. • Disconnect the Gary PVC Hose (Part #14) from the valve body and remove the Filter Gasket (Part #10). 2 3 4 2 Check Valve Check Valve • Place the new check valve into the valve body. Observe the direction of the valve is correct. • Using needle nose pliers, grip the edge of the check valve and pull straight out..
- 19 -
Ten (10) years guaranteed from manufacture defects. Lifetime limited parts warranty on the diverter valve. Recycling: Most of the materials used to manufacture this shower fixture are recyclable. Please dispose of those materials properly in accordance to your local state laws. Improper disposing of this shower fixture can be harmful to the environment.