Vanguard Universal Software (VUS) VERSION 2.x SOFTWARE MANUAL For Use with Vanguard’s Auto-Ohm 200 S3, DMOM-200 S3, DMOM-600, CT-3500 S2, and VBT-80P Sub-Station Testing Instruments Vanguard Instruments Company, Inc. 1520 S. Hellman Ave.
VUS VERSION 2.x SOFTWARE MANUAL REV 1 TABLE OF CONTENTS CONVENTIONS USED IN THIS DOCUMENT ..................................................................................... 1 1.0 INTRODUCTION .................................................................................................................... 2 1.1 System Requirements ...................................................................................................... 2 2.0 SOFTWARE INSTALLATION .........................................
VUS VERSION 2.x SOFTWARE MANUAL REV 1 CONVENTIONS USED IN THIS DOCUMENT This document uses the following conventions: • • • • • • • Microsoft® Windows XP, Vista, 7, and 8 will be simply referred to as Windows in this manual Menu names are referred to as Menu Name Menu items are referred to as Menu Item Dialog boxes and their elements (buttons, options, etc.) are referred to as “Dialog Box Element” PC keyboard keys are referred to as [Key]. Key combinations are shown as [Key]+[Key].
REV 1 1.0 VUS VERSION 2.x SOFTWARE MANUAL INTRODUCTION The Vanguard Universal Software (VUS) is a Windows-based PC software application for use with Vanguard's Auto-Ohm 200 S3, DMOM-200 S3, DMOM-600, CT-3500 S2, and VBT-80P substation testing instruments. VUS can be used to retrieve test records from these units for further analysis or archival on a PC. It can also be used to export test results in XML, PDF, and Excel formats. 1.
VUS VERSION 2.x SOFTWARE MANUAL 2.0 REV 1 SOFTWARE INSTALLATION Follow the steps below to install the VUS on your PC. 1. Insert the installation CD in the PC’s CD or DVD drive and open the CD or DVD drive in Windows Explorer. The contents of the CD will be listed as shown below: Double click (or single click in some Windows configurations) on the “VUS Setup Rev 2.x.exe” file to start the installation process. 2. The VUS Setup Wizard will appear as shown below: Click on the "Next" button to continue.
REV 1 VUS VERSION 2.x SOFTWARE MANUAL 3. The following screen will be displayed showing the location on your hard drive where the software will be installed (C:\Vanguard\VUS): You may choose a different installation location by clicking on the “Browse…” button and then browsing to the location on your hard drive where you would like to install the software. If you would like to install the software in the default location, click on the “Install” button to continue. 4.
VUS VERSION 2.x SOFTWARE MANUAL NOTES REV 1 • The installation program will create a “Tests” sub-folder in the main installation folder. By default all test records will be stored in this folder. • You can later change the default test record storage locations. Please see section 3.2.2 for details.
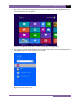
REV 1 3.0 VUS VERSION 2.x SOFTWARE MANUAL STARTING AND CONFIGURING THE VUS APPLICATION Windows XP, Vista, or 7: 1. Click on the Windows “Start” menu button to open the Start Menu. 2. Click on the All Programs menu item. 3. Click on the Vanguard menu item. 4. Click on the VUS menu item. The VUS main application window will appear as shown below: Windows 8: By default, the VUS application does NOT create an icon in your "Start" screen.
VUS VERSION 2.x SOFTWARE MANUAL REV 1 2. The "Start" screen will be displayed (icons will vary depending on what applications you have installed on your computer): Using your keyboard, type "VUS" to start searching for the application. 3. The "Search" sidebar will be displayed on the right side of the screen and will display the VUS application icon as part of the search results: Right click on the "VUS" icon.
REV 1 VUS VERSION 2.x SOFTWARE MANUAL 4. The following menu will be displayed: Click on "Pin to Start" and now the VUS application icon will be added to the Windows "Start" screen. You can re-arrange the icon to your liking on the "Start" screen. 5. Click on the VUS icon from the "Start" screen to launch the app. You do not need to repeat steps 2 to 4 the next time you launch the app.
VUS VERSION 2.x SOFTWARE MANUAL 3.1 REV 1 The VUS Application Workspace Older versions of the VUS application used a menu bar and drop-down menus. The latest version as of this writing (2.07) uses a command ribbon as shown below: Related commands are grouped together in the command ribbon. The "File" menu from previous versions has been replaced with the VUS Menu Button.
REV 1 3.2 VUS VERSION 2.x SOFTWARE MANUAL Configuring Default Application Settings The VUS application's default settings should be configured before attempting to use it for the first time. Follow the steps in this section to configure the communication parameters, default location for test records, the location for a logo image to use on reports, and export preferences. To access the application settings, click on the Settings icon in the Application command group on the command ribbon.
VUS VERSION 2.x SOFTWARE MANUAL REV 1 2. Connect the Vanguard unit to the PC via the RS-232C or USB port and turn on the power. VUS will automatically connect to the unit. 3.2.2. Configuring Default Folders and File Locations 1. The "Test Folder" input field shows the current default folder where test shots are stored. You can change this location by clicking on the folder icon to the right and then selecting the folder on your computer that you would like to use as the storage location for test shots.
REV 1 4.0 VUS VERSION 2.x SOFTWARE MANUAL WORKING WITH TEST RECORDS VUS can be used to retrieve test records from a connected Vanguard unit or from a storage location on your computer. Once a test record is retrieved, you can change the record header information, print the test record, export it in PDF, XML, and Excel formats, and save the record to a storage location on your computer. 4.1 Retrieving Test Records From Your Computer Use the steps below to retrieve a test record from your computer: 1.
VUS VERSION 2.x SOFTWARE MANUAL • REV 1 You can also search for a particular filename. You can start typing in the "Filename" input field and it will actively highlight the first matching filename. For example, in the listing below, typing VBT in the "Filename" field will highlight the "VBT4.test" filename as shown below: 2. Click on the file name you would like to open and click the "OK" button. The test record will be loaded and the tabulated test results will be displayed.
REV 1 4.2 VUS VERSION 2.x SOFTWARE MANUAL Retrieving Test Records from a Connected Unit Follow the steps below to retrieve one or more test records from a connected Vanguard unit: 1. Make sure the VUS application is running. Connect the unit to the PC via either the RS232C or USB port and turn on the power. 2. Click on the Retrieve icon in the Test command group in the Command Ribbon. 3.
VUS VERSION 2.x SOFTWARE MANUAL 4.3 REV 1 Viewing and Analyzing Test Records Whenever a test record is loaded from the PC, the VUS application will automatically export the test record in PDF, XML, and Excel (if the option is checked in Application Settings. See section 3.2.3) formats.
REV 1 VUS VERSION 2.x SOFTWARE MANUAL Once the test record is loaded and exported in the preferred formats, it will be displayed in the VUS application as shown below: 4.3.1. Page Navigation Options • To navigate to another page of the report, click on the blue left or right arrow for the previous or next page, respectively. • The bottom right corner of the window provides options for viewing multiple pages.
VUS VERSION 2.x SOFTWARE MANUAL REV 1 4.3.2. Panning and Zooming Options • You can quickly zoom in and out of the document by clicking on the green "+" and "-" buttons, respectively. You can also drag the slider between the two buttons to zoom in and out. • You can select a particular zoom percentage value by clicking on the drop-down menu to the left of the zoom buttons. • You can view the document at actual size by clicking on the "1:1" page icon.
REV 1 VUS VERSION 2.x SOFTWARE MANUAL o Loupe Tool The loupe tool works like a magnifying glass by showing the entire document and also showing a magnification of a selected area of the document as shown below: After selecting the tool, click on the area that you would like to magnify. A blue rectangle will be displayed highlighting the area that is being magnified. You can drag the rectangle around the document to magnify other areas.
VUS VERSION 2.x SOFTWARE MANUAL REV 1 4.3.3. Search Options You can search through the test report by using the tools on the search bar. Type the keyword you are looking for in the search text entry area and press the [ENTER] key. The first instance of the text will be highlighted in the document as shown below: Click on the binoculars with the green arrow to search for the next instance of the text. Click on the binoculars with the red arrow to search for the previous instance of the text.
REV 1 VUS VERSION 2.x SOFTWARE MANUAL 4.3.4. Editing the Record Header Information You can edit the test record's header information as well as the comments for each test by clicking on the Edit icon in the Test command group in the Command Ribbon. The following screen will be displayed: Make any changes to the test record header information as necessary (such as the Company name, Station Name, etc.).
VUS VERSION 2.x SOFTWARE MANUAL REV 1 4.3.6. Exporting Test Records Whenever a test record is loaded in VUS, the application automatically exports it to PDF, XML, and Excel formats (see section 4.3). You can also manually export the test record by clicking on the Export icon in the Test command group in the Command Ribbon. 4.3.7. Printing Test Records To print the test record to a connected printer, click on the VUS Menu Button and then click on the Print option.
REV 1 22 VUS VERSION 2.
1520 S. Hellman Ave • Ontario, CA 91761 • USA Phone: 909-923-9390 • Fax: 909-923-9391 www.vanguard-instruments.com Copyright © 2013 by Vanguard Instruments Company, Inc. VUS Version 2.