VAVA Chroma 4K UST Triple Laser Projector User Manual vava.
CONTENTS IMPORTANT SAFETY INSTRUCTIONS 01 KNOWING YOUR PROJECTOR 02 USING YOUR PROJECTOR 09 CLEANING AND MAINTENANCE 25 TROUBLESHOOTING 27
IMPORTANT SAFETY INSTRUCTIONS · Danger of explosion if battery is incorrectly replaced. Replace only with the same or equivalent type. · Disposal of a battery into fire or a hot oven, or mechanically crushing or cutting of a battery, that can result in an explosion. · Leaving a battery in an extremely high temperature surrounding environment that can result in an explosion or the leakage of flammable liquid or gas.
1.1 Package Contents VAVA Chroma *1 Remote Control *1 AAA Battery *2 59-inch Power Cord *1 Cleaning Cloth *1 User Manual *1 Quick Start Guide *1 1.2 Parts and Components PROJECTOR Front/Top 2 5 3 4 1 1. Speaker 4. PIR Sensor 2. Power Button 5. Lens 3.
REMOTE CONTROL Side Forward-Lower Forward-Higher BackwardsHigher BackwardsLower 2 1 4 5 8 9 6 3 7 6 12 10 11 13 14 15 7 6. Height Adjusting Wheels 16 7. Heat Dissipation Vents Rear/Bottom 8 9 10 11 1213 14 15 16 1. Power 9. Return 8. HDMI Input 1 2. Mic 10. Settings 9. HDMI Input 2 3. Voice Assistant 11. Home 10. HDMI 3 ARC 4. Up 12. Signal 11. USB Port 5. Left 13. Menu 12. Audio Output 6. OK 14. Volume - 13. AV Input 7. Right 15. Volume + 14. S/PDIF Port 8. Down 16.
1.3 Specifications Audio Projection System Display Type Light Source Throw Rate DLP RGB-Laser 0.233 Speaker Harman / Kardon, 60W (total) Bluetooth In Yes (connect with mobile phone) Bluetooth Out Yes (connect with Bluetooth speaker) DTS-HD Yes Dolby Audio Yes Projection Size Up to 150” Resolution 4K Brightness 2500 lumen (100% CLO) / 6000 lumen (Light Source) HDMI 3 ports (HDCP2.2, 1 with ARC) USB 1 (5V DC, 500mA) Luminance Uniformity > 80% Video In AV3.
2.1 Quick Installation Guide PREPARATION USING YOUR PROJECTOR Install the electrical outlet near the equipment. It should be easily accessible.
Parameters for Projection (100'' for example) Desk Length Image (L2) SD L2≥L L3(87. 2in) L1(87. 2in) Desk Width (W2) Desk Height (H3) Wall Width (H4) Wall Length (L3) Immobile Image Mobile Desk: Desk: center at L3≥L1 (W2≥W) (W2≥W+W1) 1.3m high H4≥H1+ H2+H3 ≥179.8cm / 70.8in 80" ≥45.3cm / 17.8in 53.9cm / 21.2in ≥177.1cm / 69.7in 90" ≥50.2cm / 19.8in 45.4cm / 17.9in ≥199.3cm ≥186.5cm / 73.4in / 78.5in 37.0cm / 14.6in ≥221.4cm ≥192.3cm / 75.7in / 87.2in SD H1 (49in) W1(7.2in) H3 (14.
Tips: 1) Conversion figures may have been rounded up or down. 2) Leave plenty of space around and under the projector for ventilation, and keep the vents unblocked in all directions. 3) Position the projector within reach of a grounded electrical outlet or extension cord. 4) The projected image size increases as the projector is placed farther from the wall. Move the desk for placing the projector as the distance requires. 5) For H3, the provided recommended value of the image center at 1.3 m./51.2 in.
3. DOLBY AUDIO AND DTS DECODING The projector supports Dolby Audio and DTS (dedicated to sound) 2.3 Operation Guide decoding, perfect for a home theater. 1) Manufactured under license from Dolby Laboratories. Dolby, Dolby Audio and the double-D symbol are trademarks of Dolby Laboratories. 2) For DTS patents, see http://patents.dts.com. Manufactured under 1. POWER ON/OFF Connect the projector to a power source. Press the Power button on the projector or the remote to power it on / off.
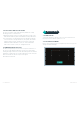
3. USER INTERFACE OVERVIEW RAW: No processing for the source audio. Recommended for Dolby There are 2 parts on the homepage: Inputs and Tools. Audio and DTS sources for better performance. ·Signal source: HDMI1, HDMI2, HDMI3 & AV - HDMI ARC: Output the sound via the HDMI ARC port ·Tools: File Manager, App Manager, Local Application, Setting and Help. On top you can see the Network, Bluetooth, and the time. 5. FILE MANAGEMENT In File Manager, you can manage the files in the internal flash drive and 4.
1) Internal Flash 7. PAIRING VIA BLUETOOTH You can save files to the projector storage, including the apps Select the Bluetooth icon at the top right corner to enter the Bluetooth interface. downloaded, files downloaded in the app, files in the USB drive, etc. 2) Using the USB drive Plug in the USB drive and view files on the interface. Tips: Support saving, viewing, copying, and deleting files through the All Files folder under these circumstances. 6.
8. NETWORK SETTING 9. SYSTEM UPGRADE Select the Network icon at the top right corner to enter the network setting interface. For wired connection, plug in the Ethernet cable. For wireless connection, find the network name on the drop-down list, select, and enter the password to connect. The software supports network anomaly detection. 1) Show Password cannot be selected when the keyboard is shown. Press the Return button to exit the keyboard and tick the box.
1) Image Settings You can select the image mode or adjust the brightness, contrast, chroma, hue and definition. 2) Advanced Settings You can select the MEMC mode or adjust the dynamic contrast, color temperature, refresh rate or reset to factory settings. 3) Light Source Settings You can select the light source mode or adjust the light source brightness. 4) Keystone Correction You can adjust the image. 11.
• Before cleaning, unplug the power cord from the socket. Wipe the exterior of the projector routinely with the provided cleaning cloth or a cloth designed for professional use. Do not apply abrasive detergent, solvent or other coarse chemicals to avoid scrapes. • Leave plenty of space around the vents for heat dissipation. CLEANING AND MAINTENANCE • Do not place anything blocking the speaker for better sound.
Q: Do I need to prepare a screen for projection? A: For optimal performance, project onto a flat wall with only one color, QA preferably white. However, using a recommended screen can provide the best experience. TROUBLESHOOTING Q: The motion detection is not working. A: Make sure the sensor is not blocked and the function is active in Settings. Q: The remote control isn’t working. A: · Press any button on the remote, if blue light flashes, the remote is still powered.
Q: The image isn’t clear/there is no image. A: · Make sure the original video is in high definition. · Check that the projector is in focus: go to Settings -> Image -> Electric Focus to adjust accordingly. · Power off the device and unplug the power cord. Plug it again after Q: The system prompts a message of high temperature and the device shuts off automatically.
Rev_1.1-EN WARRANTY AND SERVICE We will provide you with after-sales service based on specific local policies. Please contact your local sales representative or after-sales team for more details. If you have any questions, please feel free to reach us via email at support@vava.com. www.vava.com NORTH AMERICA E-mail: support@vava.com MANUFACTURER Manufacturer: Shenzhen NearbyExpress Technology Development Co.,Ltd.
NOTE: This equipment has been tested and found to comply with the limits for a Class B digital device, pursuant to part 15 of the FCC Rules. These limits are designed to provide reasonable protection against harmful interference in a residential installation. This equipment generates uses and can radiate radio frequency energy and, if not installed and used in accordance with the instructions, may cause harmful interference to radio communications.
This device contains licence-exempt transmitter(s)/receiver(s) that comply with Innovation, Science and Economic Development Canada’s licence-exempt RSS(s). Operation is subject to the following two conditions: (1) This device may not cause interference. (2) This device must accept any interference, including interference that may cause undesired operation of the device.