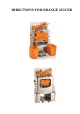
DIRECTIONS FOR ORANGE JUICER
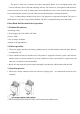
The juicer is made up of stainless steel shell, trans-parent plastic cover, food-grade plastic parts (Convex ball and Concave ball) and remaining collector. The structure is well-organized and rational. It is anti-corrosion, easy to wash. It could produce fresh and delicious juice in a few seconds after operation. It is an ideal machine to make juice and widely used in entertainments, restaurants and hotels. Ф40~Ф80mm oranges suitable for the juicer. The operation is simple and convenient.
. Pour the cleaned orange into the machine fruit basket. 4. Switch on the machine and prepares work. 5. Pressing the start switch (white 220V) or( green 110V) can feed the orange continuously into the feeding port (orange juicer needs artificial feeding), after out of the juice, the fresh orange juice will be discharged, and the fruit peel is automatically separated to enter into the fruit peel bucket. 6. When feeding, please do not insert the fingers or other objects into the feeding port.
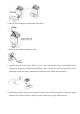
7. After the use of this machine is completed, turn off the switch, disconnect the power supply. 4. Maintenance and cleaning: 1. Before cleaning the product, the start switch must be turned off, disconnect the power supply, wait until the machine stops completely. 2. Clean the product immediately after using. 3. The external of the main body can be wiped with wet cloth, please do not wash it with water directly, and the unloaded parts can be directly put into the water to clean. 4.
(3) After the cleaning of the product is completed, re-install each part in the opposite order (especially pay attention whether the safety switch button is pressured).
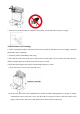
5. Production troubleshooting and maintenance instruction (1)Electrical fault 1. The safety switch does not work: (1)Check whether the safety switch is in good condition; (2)Check whether the safety switch is in the closed state. For orange juicer , pressure safety switch button form the top of the cover . 2. The starting switch does not work: (1)Check whether the starting switch is in good condition; (2)Check whether the starting switch socket end is plugged. 3.
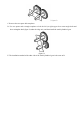
(figure1) C. Remove the two square hole templates. D. Use one square and a triangle template to lock the left (or right) upper four corner angle shaft and lower triangular shaft (figure 2) under the ridge axis, and then install the small cylindrical gear. (figure 2) E. The installation method of the other side of the small cylindrical gear is the same as D.