
User`s guide


38
6
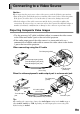
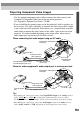
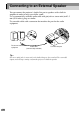
If more than one signal source has
been connected, use the remote
control or control panel buttons to
select the port which the signal
source that you would like to use is
connected to, while referring to the
following table.
Tip :
• If only one signal source has been connected, the signals from that source will be
projected without needing to press one of the above buttons.
• If the "No-Signal." message does not disappear, check the connections again.
• If a laptop computer or a computer with a LCD screen has been connected to the
projector, the images may not be projected straight away. After making the
connections, check that the computer has been set up to output signals.
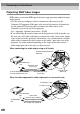
The following table shows examples of how to toggle output settings. For details, refer
to the section of the documentation provided with your computer under a heading such
as "External output", "Connecting an external monitor" or similar.
• If the same still picture is projected for a long period of time, the projected image may
become "burned in" on the computer screen. You should avoid leaving the same image
displayed for long periods.
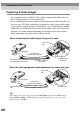
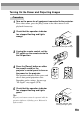
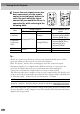
Port
Button to press
Display at bottom-left of
screen
Control panel Remote control
Computer1
[Computer/YCbCr]
[Comp1]
Computer1(Digital-RGB)
Computer1(Analog-RGB)
Computer1(RGB-Video)
Computer2/
Component
Video
[Comp2/YCbCr]
Computer2(Analog-RGB)
Computer2(RGB-Video)
Computer2(YCbCr)
Computer2(YPbPr)
S-Video
[Video]
[S-Video] S-Video
Video [Video] Video
NEC Panasonic Toshiba IBM Sony Fujitsu Macintosh
[Fn]+[F3] [Fn]+[F3] [Fn]+[F5] [Fn]+[F7] [Fn]+[F7] [Fn]+[F10]
After startup, change the
Control Panel adjustments
so that Mirroring is active.
Menu
Comp1
Source
Video
Auto
Preset
P in P
S-Video
Resize
Comp2/YCbCr
Help
Power
Sync+
Tracking - Tracking +
Menu Esc
Help
Computer/YCbCr
Video
Auto
Source
Projector
Remote control
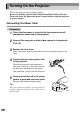
Turning On the Projector