
Operating instructions


46
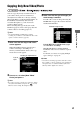
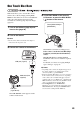
6 Press V or v to select a video or photo
you wish to copy and press the ENTER
button to mark.
z Hint
• When selecting a photo, the selected photo appears
with one press of the b button. The photo can be
rotated 90 degrees clockwise with each subsequent
press of the b button.
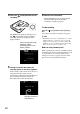
7 To select a video or photo stored in a
different shooting date folder, press B
and repeat steps 5 and 6.
To select different types of image, press B
repeatedly.
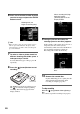
8 Press the (record) button to start
recording.
The DVDirect starts the recording process.
The (record) button lights up during
recording. The following appears in the
display window.
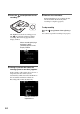
9 Change to a blank disc when the
message [Insert a new disc.] appears.
If the contents of the camera do not fit onto a
single disc, the disc will be ejected
automatically when it becomes full. Remove
the created disc and insert a blank one.
Recording will resume automatically.
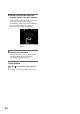
10 Remove the created disc.
If [Auto Finalizing] is set to [ON], the disc
will be finalized automatically when
recording is complete (page 67).
To stop recording
Press the (stop) button when replacing a
disc.
You cannot stop while recording is in progress.
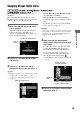
Shooting time (not
length of recording time)
When recording HD (High
Definition) videos,
[AVCHD] appears in the
display window.
Next disc/number of required
discs