OVERVIEW MANUAL
VECTOR SYSTEM B AND VECTOR SYSTEM B+S3 INSTALIATION, USE, AND MAINI'ENANCE PRELIMINARY MANUM. Revision A January 17, 1980 Copyright 1980 Vector Graphic Inc.
Since it is a preliminary release, there will be enhancements to this manual in the near future. In particular, the area of system maintenance, not covered herein, will be added. Copyright 1980 by Vector Graphic Inc. All rights reserved. Disclaimer Vector Graphic makes no representations or warranties with respect to the contents of this manual itself, whether or not the product it describes is covered by a warranty or repair agreement.
System B Installation, Use, and Maintenance Manual The System B or its variations sold hereunder is sold ftas is·, with all faults and without any warranty, either expressed or implied, including any implied warranty of fitness for intended use or merchantability. However, the above notwithstanding, VECTOR GRAPHIC, IN:.
System B Installation, Use, and Maintenance Manual Audience This manual is intended for dealers, distributors, salespersons, consultants, and service personel. It requires a minimll1l of technical knowledge. Scope It describes what the Vector Graphic system Band its variations do, what major canponents these systems consist of, how to install, how to use (generally), and how to maintain {generally} the systems.
System B Installation, Use, and Maintenance Manual Section Table of Contents I. Perspective 1.1 1.2 1.3 1.4 1.5 II. Introduction ••••••••••••••••••••••••••••••••••••••••••••••• 1-1 Standard hardware and .software ••••••••••••••••••••••••••••• 1-1 Optional hardware and software••••••••••••••••••••••••••••• 1-2 Micropolis floppy diskette subsystem specifications •••••••• 1-3 Pre-installation checklist ••••••••••••••••••••••••••••••••• 1-4 Installation and Checkout 2.1 2.
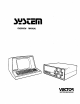
~stem B Installation, Use, and Maintenance Manual I. PmSP£Cl'IVE 1.1 Introduction A System B is a general purpose microprocessor based computer. It is delivered by Vector Graphic canpletely assembled and fully tested, including both hardware and operating system software, and including t'WO quad density mini-floppy disk drives. 1.
System B Installation, Use, and Maintenance Manual l0} Computer electronics consisting of: a) Chassis with heavy duty power supply and l8-slot fully shielded and terminated S-100 motherboard; b) High-speed (4 MHz) Z-80 CPU board; c) Bitstreamer II input/output board, featuring 3 serial I/O channels, 2 parallel I/O channels; d) 641< Dynamic RAM board; e) 12K PROM/RAM board, which includes 12K of PROM sockets and lK of scratch-pad RAM; f) Flashwriter II Video board featuring a replacable character set; g)
System B Installation, Use, and Maintenance Manual 1.
System B Installation, Use, and Maintenance Manual 1.5 Pre-installation check-list The System B or System BfS3 can be ordered for either llS or 22S volt power sources. Make sure that the system to be installed has the proper p::>wer supply for the power supply in your region. It is recanmended but not required that the power line to v.
system B Installation, Use, and Maintenance Manual 2.1 Installation of a system B 1. Inspect all cartons for external signs of damage. If any damage is observed, have the delivery agent note the damage on the shipping document. Some shippers may wish to be present when the container is opened if external damage is apparent. 2. Open all cartons, remove the packing material, and then withdraw the equipment and manuals. If present, remove plastic bags from the equipment. 3.
System B Installation, Use, and Maintenance Manual 7. Turn the power key in the front of the computer chassis. The RESET light sho uld go on and the fan at the back of the corrputer should begin turning. If the RESET light comes on but the fan does not, DO NOT operate the computer, but contact service personel. Also contact service if the RESET light does not go on but the fan does. If neither one goes on, check the power connection and the fuse at the rear of the cOlJ.l>uter chassis.
System B Installation, Use, and Maintenance Manual 12. Boot up the CP/M operating system by depressing B on the keyboard, following the MON> prompt. '!he red light on the right-hand drive should light up, an audible click should be heard from the disk drive, and then a message announcing the CP/M operating system should appear on the screen. If this does not occur within 5 seconds of pressing B, depress RESET on the computer chassis, then dismount the disk.
System B Installation, Use, and Maintenance Manual 15. At the end of the process, or earlier if an error occurs, you will see a message on the screen following the last line. This message tells you whether or not the copying process succeeded. Always look for it. If successful, you will see "Copy complete". If unsuccessful, you will see either "Bad source diskette" or "Bad destination diskette".
System B Installation, Use, and Maintenance Manual If it is a Sprint 3 printer from Vector Graphic, but not part of a System B+S3 from the factory, connect the printer as described in the instructions that come wi th the pr inter. If it is one of the above kinds of printers, remove the cover of the computer and check that the baud rate setting of Serial Channel C of the Bitstreamer II board matches the speed of the printer.
~ B 2~. Installation, Use, and Maintenance Manual After connecting and turning on the printer, you have to configure the Personalized CP/M 2 System Diskette to w:>rk with this system. First, mount the Personalized CP/M 2 System Diskette i~ drive A (right-hand drive). If you just turned the system on after connectirg the printer, boot up CP/M from this diskette by depressirg B. If, however, the system has been on all along, then just depress control-C after the A) prompt.
System B Installation, Use, and Maintenance Manual 22. If the printer cane wi til an add-on form-feed tractor, you may put it on the printer now. With the Sprint 3, or ().mle Sprint 5 printers, you must remove the top cover of the printer and snap the tractor mechanism over the platen axel, so that its gear meshes with the platen gear. 'Ib open the metal fingers which snap over the platen axel, press on the metallic levers on each side of the form feed tractor.
Syst:e:n B Installation, Use, and Maintenance Manual 2.2 Installing and using the Sprint 3 printer in a System Bf63 This section is only applicable if the internal interface comfX)nents of the Sprint 3 Subsystem have already been installed within the computer chassis - in other w:::>rds, it is a "System 8+53". UNPACKIKJ 1. If not already done, remove the printer from its carton and any plastic bag.
System B Installation, Use, and Maintenance Manual CONNECTIN3 If the canputer is on, unmount any diskettes in the drives (you do not have to ranove than fran the drives), and turn the computer off. 11. IMroRTANT: 12. Find the 5~-line flat ribl::x>n cable coming out fran inside the back of the canputer chassis. Plug the far end of this cable into the socket on the ri9ht side of the rear of the printer (\
Systen B Installation, Use, and Maintenance Manual TROUBLESHoorIOO If the Sprint 3 printer does not work: (1) Make sure that you are camnandin:J it correctly. (2) Check the R.l'lER light on the printer. If it is off, make sure the power connection to the computer is completed. If necessary, cheek the System B manual for a description of the cablill3. (3) Check the READY light on the printer.
System B Installation.. Use.. aD1 Maintenance ManUal MA.INTENANCE OF THE SPRINT 3 PRINTER 'the Sprint 3 is a highly reliable device that will ~rk well for long periods without attention. In a normal office environment, the Sprint 3 requires periodic lubrication and simple preventive maintenance every six months for optimal performance and to prevent more serious breakdowns. In very heavy use, this period should be shortened accordingly.