User manual
Manuals
Brands
Vector Manuals
Musical Instruments
CANboardXL Interface Family
11
12
13
14
15
16
17
18
19
20
Table Of Contents
1 Introduction
1.1 About this User Manual
1.1.1 Certification
1.1.2 Warranty
1.1.3 Registered trademarks
2 VN1600 Interface Family
2.1 Introduction
2.2 Accessories
2.3 Getting Started
2.3.1 Step 1: Driver Installation
2.3.2 Step 2: Device Installation
2.3.3 Step 3: Device Configuration
2.3.4 Step 4: Quick Test
2.4 VN1610
2.4.1 Main Features
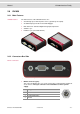
2.4.2 Connectors
2.4.3 Pin Assignment CH1 and CH2
2.4.4 Technical Data
2.5 VN1611
2.5.1 Main Features
2.5.2 Connectors
2.5.3 Pin Assignment CH1 and CH2
2.5.4 Technical Data
2.6 VN1630
2.6.1 Main Features
2.6.2 Connectors Bus Side
2.6.3 Connectors USB Side
2.6.4 Bus Configuration
2.6.5 Pin Assignment CH1/3 and CH2/4
2.6.6 Pin Assignment CH5
2.6.7 Replacing Piggybacks
2.6.8 Technical Data
2.7 VN1630A
2.7.1 Main Features
2.8 VN1640
2.8.1 Main Features
2.8.2 Connectors Bus Side
2.8.3 Connectors USB Side
2.8.4 Bus Configuration
2.8.5 Pin Assignment CH1…CH4
2.8.6 Pin Assignment CH5
2.8.7 Replacing Piggybacks
2.8.8 Technical Data
2.9 VN1640A
2.9.1 Main Features
3 Common Features
3.1 Time Synchronization
3.1.1 General Information
3.1.2 Software Sync
3.1.3 Hardware Sync
4 Driver Installation
4.1 Minimum Requirements
4.2 Hints
4.3 Vector Driver Setup
4.4 Vector Hardware Configuration
4.5 Loop Tests
4.5.1 CAN
4.5.2 FlexRay
4.5.3 MOST
4.5.4 Ethernet
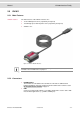
Manual
VN1600 Interface Family
©
Vector Informatik GmbH
Version 2.0
- 9 -
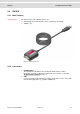
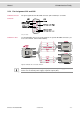
2.3.4
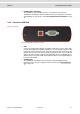
Step 4: Quick Test
Note:
Please execute the test de
scribed in section Loop Tests on page
50
.
1
...
...
9
10
11
12
13
...
...
57