
Portable/Cordless/Rechargeable Power Supply Owner's Manual


1
2
3
4
6
To Use The
Pocket Generator™
To Boost Vehicle’s
Low Battery System
WARNING: Be sure that the ON/OFF switch on the inverter is in the OFF
position, before using unit as Battery Booster. Failure to do so may cause damage
to the inverter, and will void manufacturer’s warranty.
Note:
The
Pocket Generator™
will not fully charge a completely dead battery, but it can be used to boost a
vehicle’s weak battery system, or to provide auxiliary power for the onboard
electrical systems and selected memory settings for electronics (A/C, seats, radio,
etc.). Using the adapter cord with two cigarette lighter-type plugs, insert one end
of the cord into the vehicle’s cigarette lighter receptacle, and the other end into the
corresponding receptacle on the
Pocket Generator™
. When power assist is
completed, disconnect the adapter cord’s plugs from the vehicle’s cigarette lighter
receptacle and the
Pocket Generator™
.
To Use The
Pocket Generator™
As A Memory Saver For
Onboard Systems And Pre-Sets
WARNING: Be sure that the ON/OFF switch on the inverter is in the OFF
position, before using unit as Memory Saver. Failure to do so may cause damage
to the inverter, and will void manufacturer’s warranty. When the vehicle’s battery
system is to be disconnected for repair or maintenance, the
Pocket Generator™
will provide auxiliary power to maintain the selected memory settings and other
onboard electrical systems, until power is restored. BEFORE the vehicle’s battery
system is disconnected: using the adapter cord with two cigarette lighter-type plugs,
insert one end of the cord into the vehicle’s cigarette lighter receptacle, and the
other end into the corresponding receptacle on the
Pocket Generator™
. Onboard
power will be maintained. AFTER the vehicle’s battery system is reconnected,
disconnect the adapter cord’s plugs from the vehicle’s cigarette lighter receptacle
and the
Pocket Generator™
.
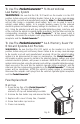
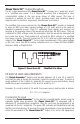
Fuse Replacement
Main Fuse
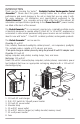
1. Open the top flap of the
Pocket Generator™
,
carrying case. The main fuse holder’s
screw-on/off cap will immediately be visible.
2. Unscrew the fuse holder cap and remove the fuse.
3. Replace with a new 10-amp fuse, if needed.
4. Screw fuse holder cap back on.
5. Close case securely.
Fig. B.