
Operation Manual


Front Cover
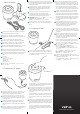
VSS-003W-X1
X-1 WiFi Speaker
Quick start guide
4. Using the extension dock/cradle
If your USB port is located at the back of your computer or you are
nding that the USB dongle is aecng wireless connecvity you
can aach the extension dock to a USB 2.0 port on your computer
and then connect the USB transmier dongle to the dock.
Si votre port USB est situé à l’arrière de votre ordinateur ou vous
trouvez que le dongle USB aecte la connecvité sans l vous
pouvez joindre le quai d’extension à un port USB 2.0 sur votre
ordinateur, puis connecter le dongle émeeur USB à la staon
d’accueil.
Wenn Ihr USB-Port an der Rückseite des Computers benden,
oder Sie bemerken, dass Ihr drahtloses Internet betroen ist,
können Sie die Erweiterung Dock an einen USB 2.0 Port Ihres
Computers legen und dann das USB-Dongle-Sender auf die
Anklagebank.
Se la porta USB si trova sul retro del computer o si stanno
scoprendo che il dongle USB sta interessando la connevità
wireless è possibile collegare il dock estensione a una porta USB
2.0 del computer e quindi collegare il trasmetore dongle USB
al culla.
Se a sua porta USB está localizado na parte de trás do seu
computador ou você está achando que o dongle USB está
afetando a conecvidade sem o, você pode instalar o suporte
de extensão para uma porta USB 2.0 no seu computador e
conecte o dongle USB do transmissor para o cais.
Si su puerto USB se encuentra en la parte posterior de su
computadora o que están descubriendo que el dongle USB está
afectando a la conecvidad inalámbrica se puede colocar la base
de extensión a un puerto USB 2.0 del ordenador y luego conectar
el adaptador USB del transmisor a la base.
Если ваш USB порт расположен на задней панели компьютера
или вы обнаружили, что ключ USB влияет беспроводной
связи вы можете прикрепить расширение док-станции к
порту USB 2.0 на компьютере, а затем подключить USB-ключ
передатчика на скамье подсудимых.
USBポートがお使いのコンピューターの背面に配置されている場合や、
USBドングル型トランスミッターがワイヤレスの接続に影響を与える
場合は、
コンピューターのUSB 2.0ポートに拡張ドックを接続し、
USBドングル型トランスミッターを拡張ドックに接続して下さい。
如果您的USB端口位于电脑背面,或您发现USB加密狗影响无
线连接功能。您可以连接延长基座到您的电脑上的USB2.0端
口,然后连接USB发射器加密狗到基座。
5. Play via line in cable
Press and hold the power buon to turn the speaker on. Connect
the line in cable to the speaker and to audio source.
Appuyez et maintenez enfoncé le bouton d’alimentaon pour
allumer le haut-parleur. Branchez le câble audio au haut-parleur
et de la source audio.
Specifications
Driver
Dimension 1.5 inch
Cone Material Paper
Magnet Material Ferrite
Impedance 4 Ohm
Power Rang 3W
Audio
Output Channel Stereo 2.0
Output Power (Max) 2.5W x 2
Total Connuous Power (RMS) 2W x 2@ 10% THD @ 60~20KHz
Wireless
Frequency Range 2.4 GHz GSM Band (2406~2472MHz)
Transmission Range up to 50m (line of sight)
Audio 3.5mm audio jack, RCA
Power
Baery Built in Li Polymer (800 mAh)
Playback Time 4 hours
Charging Power 5V 1.8A
Charging Time 3 hours
In the event you need to contact Veho for support or troubleshoong
for your Muvi X-Lapse
www.veho-world.com/main/support.aspx
Support / appui / Unterstützung / supporto / ayuda /
sustentação / помогать / サポート / 技术支持
X3 Mimi Wireless Speaker
Product code: VSS-005W-X3
Z1 Earbuds
Product code: VEP-003-360Z1BW
Other Veho Products
Drücken und halten Sie die Power-Taste, um den Lautsprecher
einzuschalten. Schließen Sie das Audiokabel an den Lautsprecher
und Audio-Quelle.
Premere e tenere premuto il pulsante di alimentazione per
avare l’altoparlante. Collegare il cavo audio al diusore e di
sorgente audio.
Pressione e segure o botão de alimentação para ligar o alto-
falante. Conecte o cabo de áudio para o alto-falante e para fonte
de áudio.
Mantenga pulsado el botón de encendido para encender el
altavoz. Conecte el cable de audio a los altavoces y la fuente de
audio.
Нажмите и удерживайте кнопку питания, чтобы включить
громкоговоритель. Подключите аудиокабель к докладчику и
источника звука.
ピーカーの電源を入れ、電源ボタンを押したままにしてスピーカーを
立ち上げます。
スピーカーと音源にラインインケーブルを接続します。
按住电源按钮器打开扬声器。把音频线连接到扬声器和音
频源。
6. Adjusting the volume
To increase the volume of the speaker, turn the volume control
wheel clockwise. To decrease the volume of the speaker, turn the
volume control wheel an-clockwise.
Pour augmenter le volume du haut-parleur, tournez la molee de
réglage du volume dans le sens horaire. Pour diminuer le volume
du haut-parleur, tournez la molee de réglage du volume dans le
sens anhoraire.
Um die Lautstärke des Lautsprechers erhöhen, drehen Sie
den Lautstärkeregler im Uhrzeigersinn. Um die Lautstärke des
Lautsprechers verringern, drehen Sie den Lautstärkeregler gegen
den Uhrzeigersinn.
Per aumentare il volume dell’altoparlante, girare la rotella
di controllo volume in senso orario. Per diminuire il volume
dell’altoparlante, girare la ruota di controllo del volume in senso
anorario.
Para aumentar o volume do alto-falante, gire a roda de controle
de volume no sendo horário. Para diminuir o volume do alto-
falante, gire a roda de controle de volume an-horário.
Para aumentar el volumen del altavoz, gire la rueda de control
de volumen en sendo horario. Para disminuir el volumen
del altavoz, gire la rueda de control de volumen en sendo
anhorario.
Для увеличения громкости динамиков, поверните колесо
управления громкостью звука по часовой стрелке. Чтобы
уменьшить громкость динамика, повернуть колесо
регулировки громкости против часовой стрелки.
スピーカーの音量を上げるには、ボリュームコントロールホイールを
時計回りに回します。
スピーカーの音量を下げるには、ボリュームコントロールホイールを
反時計回りに回します。
为了提高扬声器的音量,顺时针方向转动音量控制轮。要降
低扬声器的音量,就反时针方向转动音量控制轮。
FR
GB
DE
IT
J
CHN
ES
RUS
PT
FR
GB
DE
IT
J
CHN
ES
RUS
PT
FR
GB
DE
IT
J
CHN
ES
RUS
PT
Mul Region USB
Plug Adapter
Product code:
VAA-005
Pebble XT Portable
Baery Charger
Product code:
VCC-A008-XT