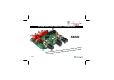
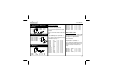
VOLUME AND TONE CONTROL - PREAMPLIFIER K8084 lways all), you a ol m s r o ig (b ntr amplifiers bly also a tone co r u o f o e ing on d prefera When us ontrol an c e m lu o need a v H8084IP-1
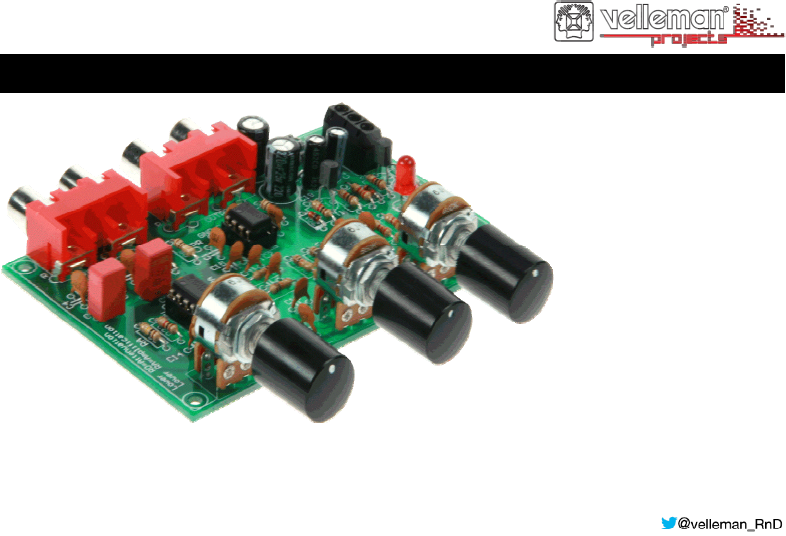
Features & specifications When using one of our amplifiers (big or small), you always need a volume control and preferably also a tone control. This kit comes complete with all input / output connections and potentiometers. Furthermore it is possible to amplify or attenuate the input signal.
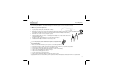
Assembly hints 1. Assembly (Skipping this can lead to troubles ! ) Ok, so we have your attention. These hints will help you to make this project successful. Read them carefully. 1.1 Make sure you have the right tools: A good quality soldering iron (25-40W) with a small tip. Wipe it often on a wet sponge or cloth, to keep it clean; then apply solder to the tip, to give it a wet look. This is called ‘thinning’ and will protect the tip, and enables you to make good connections.
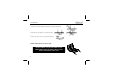
Assembly hints 1.3 Soldering Hints : 1- Mount the component against the PCB surface and carefully solder the leads 2- Make sure the solder joints are cone-shaped and shiny 3- Trim excess leads as close as possible to the solder joint REMOVE THEM FROM THE TAPE ONE AT A TIME ! DO NOT BLINDLY FOLLOW THE ORDER OF THE COMPONENTS ONTO THE TAPE.
Construction 1. Zenerdiodes. Watch the polarity ! ZD1 : 9V1 ZD2 : 9V1 CATHODE Hint for R2 and R4: To weaken the input (divide) E.g. to connect the input with an amplifier output. R16 R17 R18 R19 R20 : : : : : 10K 10K 10K 10K 10K (1 - 0 - 3 - B) (1 - 0 - 3 - B) (1 - 0 - 3 - B) (1 - 0 - 3 - B) (1 - 0 - 3 - B) ZD... Choose an inferior value for R2 and R4. 2. Diodes. Watch the polarity ! D1 : 1N4007 D2 : 1N4007 D3 : 1N4007 D4 : 1N4007 CATHODE D... 3. Resistors R...
Construction 4. IC sockets, Watch the position of the notch! IC1 : 8p IC2 : 8p C11 : C12 : C13 : C14 : C15 : C16 : 47nF 47nF 47nF 47nF 47nF 47nF (473) (473) (473) (473) (473) (473) 7. Transistors T1 : BC547 T2 : BC557 8. Terminal block 5. Capacitors. c... C...
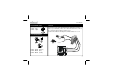
Construction 10. Dual RCA Jacks 12. Test SK2 : input SK3 : output Connect a 2 x 12V / min. 100mA transformer with power connector SK1 (e.g. our 212007C). This is a 2 x 12V 3-wire transformer, 1 wire is the common 0 and generally of another colour. A transformer without connecting wires will be marked 12 – 0 – 12. 11.
Test Connect the mains voltage to the transformer; mount a 100mAT security fuse in series with the transformer. Use a high-quality power cord and plug for the connection to the mains. When the transformer is live, the LED will light. Disconnect from mains. Mount the ICs into the socket (mind the position of the notch) Reconnect the mains. Check if the LED lights. Connect a device with the input e.g. MP3 player, CD player. Connect the output with a power amplifier.
Enclosure 13. Building into a enclosure To avoid hum, it is recommended to mount the K8084 and the transformer into a Metal housing. Drill the holes for the connections and the potentiometers. Hint:You can drill the holes for the knobs or the potentiometers and mount the knob afterwards. 1 hole in the print (next to RV3) is provided to connect the earthing to the housing through the metal spacers or bolts. Hint: Mount the transformer as far away as possible from the circuit to avoid humming.
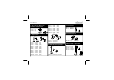
PCB 14.
diagram 15.
VELLEMAN NV Legen Heirweg 33, B-9890 GAVERE Belgium (Europe) Modifications and typographical errors reserved © Velleman nv. - H8084IP’1 - 2014 (rev.