K8097 ILLUSTRATED IL ILL LLU LUST STRA TRA RAT TED AS TED TE ASS ASSEMBLY SEMB SEMB SE BLY M MAN MANUAL AN NUA UAL AL H H8097IP’1 809 09 97I 7IP P’1 4- Channel USB stepper motor card With the K8097 4-channel stepper motor card you can drive 4 stepper motors via USB, and monitor and assign actions if needed to 5 dry contacts (for example an emergency stop signal, current limit detection).
Subscribing our newsletter?, visit www.vellemanprojects.
With the K8097 4-channel stepper motor card you can drive 4 stepper motors via USB, and monitor and assign actions if needed to 5 dry contacts (for example an emergency stop signal, current limit detection). There is 1 open collector output that can be switched via USB. Write your own application (.DLL included). Suitable for all positioning applications (for example plotters, printers, valves, automation, etc.).
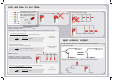
Leds and how to use them Leds feature a specific voltage drop, depending on type and colour. Check the datasheet for exact voltage drop and rated current ! Never connect leds in parallel How to Calculate the series resistor: Example: operate a red led (1.7V) on a 9Vdc source. Required led current for full brightness: 5mA (this can be found in the datasheet of the led) Supply voltage (V) - led voltage (V) required current (A) 9V - 1.7V 0.
assembly hints 1. Assembly (Skipping this can lead to troubles ! ) Ok, so we have your attention. These hints will help you to make this project successful. Read them carefully. 1.1 Make sure you have the right tools: • A good quality soldering iron (25-40W) with a small tip. • Wipe it often on a wet sponge or cloth, to keep it clean; then apply solder to the tip, to give it a wet look. This is called ‘thinning’ and will protect the tip, and enables you to make good connections.
DO NOT BLINDLY FOLLOW THE ORDER OF THE COMPONENTS ONTO THE TAPE.
Construction 1 Resistors R...
Construction 5 Trimmer RV... 12 Terminal Block 9 Board to wire RV1 RV2 RV3 RV4 : : : : 10K 10K 10K 10K Adjust trimmer for apropriate output current. 6 Ceramic Capacitors C17 ... C32 : 820pF (821) C... C33, C34 : 22pF (22) C... C35 : 470nF (474) SK1 : 4p SK2 : 4p SK3 : 4p SK4 : 4p SK7 : 2p SK8 : 2p SK9 : 2p SK10 : 2p SK11 : 2p SK12 : 2p (MOTOR 1) (MOTOR 2) (MOTOR 3) (MOTOR 4) (SW1) (SW2) (SW3) (SW4) (SW5) (SW6) SK14 : 2p (AC power 10 -30V) 13 Quartz crystal X. .
Construction 16 Electrolytic capacitors 18 Rubber feet Watch the polarity! C...
Software installation 19. SOFTWARE INSTALLATION After assembly of the circuit, it is now time to install the software. For software, visit www.vellemanprojects.eu Step 1: Download the software on our Step 2: open the file en select the software. Step 3: Select “next” to begin the installation procedure. Step 5: Select the type of installation, we recommend the full installation Step 6: Select “next” or browse to select a different folder. website or via the QR-code.
Software installtion Step 7: Select “install” for installing the software. Step 8: Select the additional tasks you would like, then click “next”. - 11 - Step 9 : Click “finish” to exit setup.
Driver installation 20. DRIVER INSTALLATION Connect the USB connector of the K8097 to your PC using an USB cable. With the first connection, you should install the USB driver of the Stepper Motor Card onto the PC first. Step 1: Select “specific location” Step 2: Choose the desired location on your hard drive (the default location is C:\Program Files\Velleman\ Step 3: Click “Continue Anyway” stepper motor cards\…). The screens can change depending the used Windows™ software version.
Connection diagram 21. CONNECTION DIAGRAM : OUTPUT - POWER SUPPLY - PC AC 10 ... 30V - 13 - ex.
Connection diagram 22. CONNECTION DIAGRAM : INPUTS INP INPUT ex. alert switch - 14 - ex.
Connection diagram 23. CONNECTION DIAGRAM : OPEN-COLLECTOR - OUT + external power supply + - Min.
Motor demo 24. MOTOR DEMO Start the program by clicking the icon on your desktop. Card Type: Select the type of motor card that you want to control* Port: Fill in the COM port number to which the card is connected. You can find this as follows: START CONTROL PANEL DEVICE MANAGER PORTS PORTS.. Disconnect: When closing the program or removing the card, always use Disconnect to guarantee a correct shutdown. Connect: You can connect to the card when “Card type” and “Port” are filled in.
PCB - 17 -
Diagram +100-30V 0V VR1 LM 25 75T-AD J FLOWL B0 3 OUT PUT R44 3K 9 (M A) 3 L2 COI L 330L 1 4 D1 L1 2 COI L 330L 1 D3 SB 130 5 GND C39 100μ/35-50V ON/0FF 1 FEED BACK VI N +5Vpi c C40 330μ/16V 1N 4007 C41 100μ/16-25V R43 1K 2 (M A) GND +10-30V VREF1 VREF2 1 1 2 3 4 OUT 1B 21 I C2 L6219 GND M 1 I 01 M 1 I 11 M 1 PHASE1 20 I 01 17 I 11 16 PHASE1 M 1 I 02 M 1 I 12 M 1 PHASE2 8 I 02 9 I 12 10 PHASE2 OUT2B SENS1 5 C30 820pF R17 1K 12MH z C33 22p OSC2/ C LKO/ RA 6 C34 22p 26 RC
Velleman N.V.
The new Velleman Projects catalogue is now available. Download your copy here: www.vellemanprojects.eu 5 410329 444761 Modifications and typographical errors reserved - © Velleman nv. H8097’IP Velleman NV, Legen Heirweg 33 - 9890 Gavere.