Veloteq Owner Manual 2008 Veloteq Corporation 2151 Richmond Avenue Shepherd Square Houston, TX 77098 www.Veloteq.
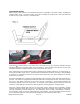
Veloteq 2008 Electric Bicycle Owner Manual To our customers, Forward Thank you for choosing Veloteq as your alternate energy vehicle for recreation and local commuting. We specialize in the design and manufacture of electric bicycles that incorporate the most advanced motor, electrical systems, suspension, and braking systems currently available use in the North American environment.
Electric Bicycle Manual Contents FORWARD….……………………………………………………………………………...1 FEATURES AND OPERATION ........................................................................... 3 NOTICE AND WARNING: (PAY PARTICULAR ATTENTION TO ANY TEXT HIGHLIGHTED IN RED.) ................................................................................... 4 HOW TO CHARGE YOUR VELOTEQ ELECTRIC BICYCLE ......................... 5 ASSEMBLY AND ADJUSTMENT .......................................................................
Features and operation Veloteq electric bicycles are equipped with a brushless DC, pulse wave modulated, 3 -phase electric motor powered by four VRSL colloided, sealed lead acid maintenance-free batteries enclosed in a heavy duty polypropolene case with associated hardware. The core electrical system contains an extra heavy duty controller and is equipped with a high quality automatic smart charger rated at 1.8-2A@20Ah.
protect both the charger and the power supply unit against overcharging and does not require supervision. It may be used over an input range of 110V/60HZ to 220V/50Hz. and carry CCC, CE, and cUL or cTUV safety certification. The charger, power supply, motor and electrical systems are protected by a high power circuit breaker. Notice and Warning: (Pay particular attention to any text highlighted in red.) The PSU (Power Supply Unit) is a key component of the electric bicycle power system.
and other electrical components to be submerged resulting in short circuiting and failure of the electrical system. The vehicle weight range of Veloteq electric bicycles is 132lbs (60kg) to 172lbs (78kg) depending on the model, with the PSU installed. They are designed in accordance with US Consumer Product Safety Commission regulations and brake testing standards to carry a 170lb (77kg) passenger. The vehicle frame is designed to exceed the designed passenger load by 100%, or 340lbs (154kg).
After insuring that the ignition key is removed, 1) connect the charger output plug to the input plug on the vehicle. 2) then connect the charger input plug to the AC electric source. The red indicator light will glow showing that the unit is properly attached to the power source. The indicator light will continue to glow red which will indicate that the PSU is charging. It will change to green after the PSU is fully charged.
wheel will spin freely without a brake damping effect. (See Fig. 2) Rear Drum Brake Adjustment: To adjust the rear drum brake turn the adjustment screw located at the end of the brake line forward of the brake assembly as above, test the travel of the brake handle and securely tighten the locking nut. (See Fig. 5) Take care to not over-tighten the rear brake! This will create drag on the motor which may result in failure of the controller.
Operational Check: Before riding, check that there is an adequate charge level available in the power supply. Recharge as required before using. The power supply unit must be installed in the PSU well in the lower deck and locked securely in place. See Fig. 5 and examples: Insert the key into the ignition, turn all the way to the right (see Fig. 6); the power indicator will light  there is a proper power source connection.
The Cavalier RSV-GT (500!-GT), Challenger RSV-GT (500C-GT) , Commander SHO-GT (500D-GT) and Commuter RSV-GT (500ZX-GT), Cougar XR8 (500XR) and Sorrento-GT (500B-GT) are equipped with both a speedometer and an odometer. Parking Your Electric Bicycle: When parking, grasp the brake handle to steady the vehicle while alighting, turn off the ignition and remove the key. Lower the kickstand and insure that the vehicle that the ebike is firmly in place. Turn the front wheel to the right after parking.
vice immediately. Pedal Installation: Insert the pedals in the pedal insertion holes as shown in the example below. The insertion hole is cut out at the factory. Take care to install the pedals correctly as marked Left and Right to the pedal arm and insertion hole. The pedals are shipped in the rear cargo carrier. Insert the gray caps included with the accessories.
Troubleshooting Guide Number Fault 1 Governor failure or 1. Battery voltage is too unable to attain maxi- low. mum speed. 2. Governor switch connections are loose. 3. Governor spring catches or fails. 1. Battery level insufficient, recharge. 2. Tighten connection after rechecking. 3. See your dealer for spring replacement. 2 When power is on, the rear wheel electric motor does not operate. 1. Possible loose electrical connection or PSU fuse. 2. Power failures around switches. 3.
Product Warranty for New Vehicles In order to protect your warranty rights and privileges, retain a copy of your original sales receipt with your serial number and date of purchase. Verify that the vehicle has been properly prepared and inspected for on road use by the dealer. Record complete contact information for your dealer. Electrical repairs MUST be performed by an authorized dealer or warranty repair station in possession of electrical circuit diagrams. 1. Repair or replacement scope and term.
Name of Purchaser Address, City, ST/ Prov. Model No. Zipcode Motor Ser. No. Frame Ser. No. Charger Supply Ser. No. Tel. No. Date of Purch. Invoice No. Quality control and after-sale warranty commitment. One year for vehicles sold in accordance with Schedule 1, above, breakdown or failure due to manufacturing defect in parts or materials, repair only by authorized dealers or warranty repair stations. This constitutes the entire warranty as stated in Sections 1-3 above.
OWNER RECORD OF SERVICE Note: It is a good idea to note when you have taken your electric bicycle out of seasonal service and insure that the power supply and charger are stored at above freezing temperatures. The power supply must be periodically recharged. We recommend that this be done at three week intervals to prolong the life of the batteries. DATE LOCATION Veloteq Owner Manual 2008 SERVICE PERFORMED P.
Lube-injection Auto-geared Electric Motor Installation and Oil Maintenance Gear oil Replacement After the first 300km of use, subsequently replace the gear oil after every 3000km. Use approximately 150ML of No.26 Universal Gear Oil, HQ-10 lubricating oil or SAE 10W/30 15W/40 Engine oil. With vehicle on the center stand, idle for three minutes to preheat the oil. Turn off the ignition. Unscrew gear case oiling screw and oil drain screw. Drain out the oil. Replace the oil drain screw and screw tightly.