
Troubleshooting guide


Veloteq Owner Manual 2008 P. 6 of 15 2/18/2008
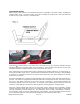
After insuring that the ignition key is removed, 1) connect the charger output plug to the input
plug on the vehicle. 2) then
connect the charger input plug to the AC electric source. The red
indicator light will glow showing that the unit is properly attached to the power source.
The indicator light will continue to glow red which will indicate that the PSU is charging. It will
change to green after the PSU is fully charged. The normal charging time is about 4-7 hours
depending on depth to which the PSU has been discharged.
When the battery is full charged, the indicator light remains green and the PSU automatically
changes into a constant float charge state. We recommend that the charger remain connected
for an additional 2-3 hours.
Note: If within the above time, if the indicator light does not change to green, the battery is
nevertheless fully charged. Momentary removal of the charger plug from the power source will
normally result in the change of the indicator from red to green.
After charging, first unplug the charger form the AC electric source, and remove the charger
from the PSU charging plug.
In the event of failure of the PSU to charge after prolonged attempts do not leave the charger
attached to the AC power source. Bring your vehicle or the PSU to your dealer for service.
Bicycle Frame: The electric bicycle frames are individually constructed to match the body fair-
ings, seats, and suspension and shock absorption systems. The finish is rust-proof, baked
enamel, and manufactured to motorcycle specifications to ensure many years of maintenance-
free use.
Assembly and Adjustment
Veloteq electric bicycles should be assembled only by personnel qualified to perform the neces-
sary mechanical and electrical set up, and adjustment of the wheel alignment and brakes.
Front-wheel Assembly and Adjustment:
The front wheel is attached to the inside of the front fork insuring equal separation and depth of
seating between the right and left fork extensions in relation to the center column. Attach the
front axle nuts tightly applying no less than 30N m. of torque between the front and rear nuts.
This must be performed only by authorized personnel. Refer to your dealer for service.
Front Drum Brake Adjustment:
Veloteq electric bicycles use motorcycle grade cushion drum brakes. To adjust the front drum
brake turn the adjusting screw located at the end of the brake line. When the brake is adjusted
for normal low sensitivity permitting a travel of 1-1.5” (25-35mm) of the brake handle the front