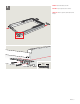
GPU/GGU/GXU + EDL/EDW VAS 453874-2015-01
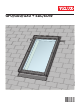
GPU 15°-55° 15°-90° GGU 15°-90° GXU 15°-55° 15°-90° ENGLISH: General information ESPAÑOL: Información general FRANÇAIS : Informations générales GPU is designed for roof pitches 15-55°. GPU está diseñado para techos con inclinación de 15-55°. GPU est conçu pour les pentes de toit 15-55°. For roof pitches from 55° to max 75°, special springs are available from your VELUX sales company. GGU is designed for roof pitches 15-90°. GXU is designed for roof pitches 15-55°.
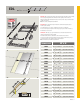
1 X EDED-XXXX XXX 3 15-120 mm 15°-90° 405520 X EDED-XXXX XXX 15-120 mm 15°-90° tIoNS for USe for GPL/G PU. ©201 1, 2012 VeLUX GroU P ® VeLUX aND tHe VeLUX LoGo are reGIS tereD traD eMar KS USeD UNDe r LIceN ce By tHe VeLUX GroU P m co x. le u v as tr e/ x 405520 DIrec 12 4:35:58 PM 11/15/20 Sil ico ne U GP L/ GP pį, į pusla ir netin ktusles. un inter produlaidė netā iju.
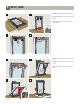
2 GPU / GGU 1 ENGLISH: Engage the ventilation flap as shown. 2 ESPAÑOL: Empalme la aleta de ventilación como se indica. FRANÇAIS : Engagez le clapet de ventilation comme indiqué. GPU 3 4 5 6 ENGLISH: Optionally, remove the sash as shown. ESPAÑOL: Puede optar por retirar la hoja, como se indica. FRANÇAIS : En option, enlevez le volet tel qu'illustré.
ENGLISH: Secure brackets as shown. 3 ESPAÑOL: Fije los soportes como se indica. FRANÇAIS : Fixez les équerres de fixation comme indiqué.
VELUX®
EDL EDW VELUX® 7
VELUX®
EDL max 5 ⁄16" ED L max 8 mm ED W ED M ENGLISH: EDL is designed for thin roofing materials (max thickness 5/16" (8 mm)). The rough opening provides the dimension of the opening in the roof deck. When positioning top and bottom headers, allow room for vertical and horizontal soffits, if necessary. Note: In Canada, underlayment is ZOZ 211. ED W ZOZ 216 ZOZ 216 ESPAÑOL: EDL está diseñado para materiales de cubierta delgados (grosor máximo 5/16" (8 mm)).
ENGLISH: Remove existing roofing underlayment around the rough opening as shown. 1 5 1/2" ESPAÑOL: Retire la lámina de soporte existente de la zona alrededor del hueco tal como se indica. 140 mm FRANÇAIS : Retirez la membrane de toiture existante autour de l'ouverture brute, tel qu'illustré.
3 GPU / GGU 1 2 ENGLISH: Replace sash, if removed earlier. The push button is automatically released when the sash is rotated to the closed position. ESPAÑOL: Vuelva a colocar la hoja si la desmonto anteriormente. El botón pulsador se suelta automáticamente cuando la hoja se gira hasta la posición cerrada. FRANÇAIS : Réinsérez le volet, si celui-ci avait été enlevé au préalable. Le pressoir est automatiquement libéré lorsque la fenêtre est placée en position fermée.
4a GPU / GGU ENGLISH: Adjust window to ensure that the distance between frame and sash is parallel along each side. ESPAÑOL: Ajuste la ventana para asegurarse de que la distancia entre el marco y la hoja sea paralela a lo largo de ambos lados. FRANÇAIS : Ajustez la fenêtre de façon que la distance entre le cadre et le volet soit parallèle. ENGLISH: If uneven rafters cause the frame to twist, adjust using the wedge supplied to ensure an even gap between bottom frame and bottom sash.
4b GXU ENGLISH: Adjust window to ensure that the distance between frame and sash is parallel. ESPAÑOL: Ajuste la ventana para asegurarse de que la distancia entre el marco y la hoja sea paralela. FRANÇAIS : Ajustez la fenêtre de façon que la distance entre le cadre et le volet soit parallèle. ENGLISH: If uneven rafters cause the frame to twist, adjust using the wedge supplied to ensure an even gap between frame and sash.
ENGLISH: Secure top brackets fully with 3 1 ⁄8" (80 mm) screws in the round holes. 5 ESPAÑOL: Fije los soportes superiores con tornillos de 3 1 ⁄8" (80 mm) en los orificios redondos. FRANÇAIS : Fixez les équerres de fixation du haut à l'aide de vis de 3 1 ⁄8" (80 mm) dans les trous ronds. 3 1 /8" 80 mm ENGLISH: For long windows with additional mounting brackets, secure these with screws as shown. 6 Small windows have no additional brackets.
ED L ED W ED M ENGLISH: To ensure waterproofing, window frames should be completely wrapped in underlayment. Your VELUX sales company recommends using VELUX ZOZ 216 adhehesive skylight underlayment. This underlayment must be applied before installing the flashing. 7 Note: If snow accumulation on the roof is likely, waterproofing is achieved by installing a continuous self-adhesive waterproof membrane beneath the roofing material and flashing material.
8 6" 150 mm ENGLISH: Wrap the side frames and corners of the window with VELUX adhesive skylight underlayment and create water-shedding laps over roofing underlayment. Note: Observe the measurements stated. ESPAÑOL: Envuelva las esquinas y lados del marco de la ventana con la lámina de soporte autoadhesiva VELUX para crear solapas impermeabilizantes sobre la lámina de soporte del techo. Nota: Respete las medidas especificadas.
ENGLISH: Attach clips to bottom frame as shown. a 11 ESPAÑOL: Fije sujetadores al marco inferior como se indica. a IGANG ENGLISH: Position sill flashing section tightly to the bottom frame and attach it by bending the flaps as shown (a). a 12 FRANÇAIS : Fixez les clips au bas du cadre, comme illustré. Install bottom frame cladding and secure with screws as shown (b).
14a GPU / GGU ENGLISH: Remove cladding parts shown (a). c 5 4 Install and engage cladding parts as shown (b, c). Long windows: Bend over frame flaps to secure. 5 4 a ESPAÑOL: Desmonte los perfiles de recubrimiento como se indica (a). Instale y empalme los perfiles de recubrimientos como se indica (b, c). Ventanas largas: Doble las solapas del marco para fijarlas. FRANÇAIS : Retirez les pièces du comme illustré (a). b a b c 18 VELUX® Installez et engagez les recouvrements comme illustré (b, c).
14b GXU ENGLISH: Remove cladding as shown. Install cladding as shown (a, b). Replace cladding. ESPAÑOL: Desmonte el recubrimiento como se indica. Instale el recubrimiento como se indica (a, b). Vuelva a colocar el recubrimiento. FRANÇAIS : Enlevez le recouvrement comme indiqué. Installez le recouvrement comme indiqué (a, b). 4 4 4 5 Replacez le recouvrement.
ENGLISH: Install and secure the two top frame cladding parts as shown. 15a GPU 6.2 6.1 Make sure the cladding parts engage correctly (1, 2, 3, 4) ESPAÑOL: Instale y fije los dos perfiles de recubrimiento superiores como se indica. Asegúrese de que los perfiles de recubirimiento estén correctamente empalmados (1, 2, 3, 4) FRANÇAIS : Installez et fixez les deux pièces d'en haut du recouvrement comme indiqué. Assurez-vous que les pièces du recouvrement s'enclenchent correctement (1, 2, 3, 4) 1 2 6.
ENGLISH: Install saddle flashing. Determine use of extension piece: use it if the saddle flashing is lifted up by the underlying roofing material and remove it if the saddle flashing fits tightly over the window. 16 7 Attach saddle flashing at the sides. Add screws for extra security, if necessary. Fasten saddle flashing to roof with roofing nails. Flatten down up stand, if necessary (a). ESPAÑOL: Instale la sección superior del tapajuntas.
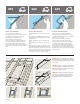
ENGLISH: Observe distance to roofing material. Do not nail through the saddle flashing when attaching the roofing material. 18 2 3/8 - 4" 60-100 mm ESPAÑOL: Mantenga la distancia con respecto al material de cubierta. No perfore la sección superior del tapajuntas cuando coloque el material de cubierta. FRANÇAIS : Respectez la distance par rapport au matériel de toiture. Ne pas clouer à travers le solin lors de l'installation du matériel de toiture.
19 GPU 1 2 ENGLISH: Connection of springs Close window using control bar. Then open window using handle on bottom of sash. Push sash outwards, ensuring that fittings and springs on both sides automatically connect. ESPAÑOL: Ensamblaje de resortes Cierre la ventana usando la barra de control. Luego abra la ventana usando la manija que se encuentra en la parte inferior de la hoja. Empuje la hoja hacia afuera, asegurándose de que las piezas de ajuste y los resortes de ambos lados se conecten automáticamente.
max 4¾" EDW max 120 mm ED L ED W ED M ENGLISH: EDW is designed for profiled roofing materials (tiles and cedar shakes). Attempt to position the rough opening (W x H) in relation to the roofing material in tile roof applications. A full course tile below rough opening will ensure ease of installation and proper performance of EDW sill flashing. ED W ZOZ 216 216 ZOZ When positioning top and bottom headers allow room for vertical and horizontal soffits if necessary.
ENGLISH: Clear away battens from rough opening to allow for proper installation of underlayment. 1 Remove existing roofing underlayment around the rough opening as shown. 12" 300 mm ESPAÑOL: Quite los rastreles del hueco para permitir la correcta instalación de la lámina de soporte. 5 1/2" Retire la lámina de soporte existente de la zona alrededor del hueco tal como se indica.
ENGLISH: Center roof window in rough opening and secure lower brackets to decking with two screws in the holes shown (a), and top brackets with one screw, loosely in slot to allow for adjustment (b). 3 b ESPAÑOL: Centre la ventana de tejado en el hueco y fije los soportes inferiores a la construcción del techo con dos tornillos en los orificios indicados (a), y sujete los soportes superiores con un tornillo, sin apretar para permitir ajustes (b).
4 GPU / GGU 1 2 ENGLISH: Replace sash, if removed earlier. The push button is automatically released when the sash is rotated to the closed position. ESPAÑOL: Vuelva a colocar la hoja si la desmonto anteriormente. El botón pulsador se suelta automáticamente cuando la hoja se gira hasta la posición cerrada. FRANÇAIS : Réinsérez le volet. Le pressoir est automatiquement libère lorsque la fenêtre est placée en position fermée.
5a GPU / GGU ENGLISH: Adjust window to ensure that the distance between frame and sash is parallel along each side. ESPAÑOL: Ajuste la ventana para asegurarse de que la distancia entre el marco y la hoja sea paralela a lo largo de ambos lados. FRANÇAIS : Ajustez la fenêtre de façon que la distance entre le cadre et le volet soit parallèle le long de chaque cote. ENGLISH: If uneven rafters cause the frame to twist, adjust using the wedge supplied to ensure an even gap between bottom frame and bottom sash.
5b GXU ENGLISH: Adjust window to ensure that the distance between frame and sash is parallel. ESPAÑOL: Ajuste la ventana para asegurarse de que la distancia entre el marco y la hoja sea paralela. FRANÇAIS : Ajustez la fenêtre de façon que la distance entre le cadre et le volet soit parallèle. ENGLISH: If uneven rafters cause the frame to twist, adjust using the wedge supplied to ensure an even gap between frame and sash.
ENGLISH: Secure top brackets fully with 3 1/8" (80 mm) screws in the round holes. 6 ESPAÑOL: Fije los soportes superiores colocando tornillos de 3 1/8" (80 mm) en los orificios redondos. FRANÇAIS : Fixez les pattes supérieures à l'aide de vis de 3 1/8" (80 mm) dans les trous ronds. 3 1 /8" 80 mm ENGLISH: For long windows with additional mounting brackets, secure these with screws as shown. 7 Small windows have no additional brackets.
ED L ED W ED M ENGLISH: To ensure waterproofing, window frames should be completely wrapped in underlayment. Your VELUX sales company recommends using VELUX ZOZ 216 adhehesive skylight underlayment. This underlayment must be applied before installing the flashing. 8 Note: If snow accumulation on the roof is likely, waterproofing is achieved by installing a continuous self-adhesive waterproof membrane beneath the roofing material and flashing material.
9 6" 150 mm ENGLISH: Wrap the side frames and corners of the window with VELUX adhesive skylight underlayment and create water-shedding laps over roofing underlayment. Note: Observe the measurements stated. ESPAÑOL: Envuelva las esquinas y lados del marco de la ventana con la lámina de soporte autoadhesiva VELUX para crear solapas impermeabilizantes sobre la lámina de soporte del techo. Nota: Respete las medidas especificadas.
ENGLISH: Replace battens, if removed earlier, and install support batten for sill flashing section. This will ensure correct drainage of water from the sill flashing section. 12 ESPAÑOL: Vuelva a colocar los rastreles si se desmontaron anteriormente, e instale rastreles de soporte para la sección de tapajuntas del alféizar. Esto asegurara el drenaje de agua adecuado de la sección de tapajuntas del alféizar.
ENGLISH: Position sill flashing section and dress apron over the roofing material. 14 Remove sill flashing section and bend the apron down as shown. This will ensure that the apron lies tightly against the roofing material. 1 max 45° ESPAÑOL: Coloque la sección de tapajuntas del alféizar y disponga el antepecho sobre el material de cubierta. Retire la sección de tapajuntas del alféizar y doble el antepecho como se indica.
ENGLISH: Install side flashing sections. 16 Slide side sections into retaining channels of sill flashing section. Engage and bend flap as shown. The sill flashing section must also be secured with a clip (a). Attach side sections to battens with frame flaps. Long windows: Bend over frame flaps to secure. 3 ESPANOL: Instale las secciones laterales del tapajuntas. 3 Deslice las secciones laterales dentro de los canales de retención de la sección de tapajuntas del alféizar.
17a GPU / GGU ENGLISH: Remove cladding parts shown (a). 5 c Install and engage cladding parts as shown (b, c). 5 Long windows: Bend over frame flaps to secure (c). ESPAÑOL: Desmonte los perfiles de recubrimiento como se indica (a). Instale y empalme los perfiles de recubrimientos como se indica (b). a Ventanas largas: Doble las solapas del marco para fijarlas (c). 4 4 b FRANÇAIS : Retirez les pièces du cadre comme illustré (a). Installez et engagez les recouvrements comme illustré (b).
17a GXU ENGLISH: Remove cladding parts shown. Install cladding parts as shown (a, b). Replace cladding. ESPAÑOL: Desmonte los perfiles de recubrimiento como se indica. Instale los perfiles de recubrimientos como se indica (a, b). Vuelva a colocar el recubrimiento. 4 44 3 b 5 FRANÇAIS : Enlevez les pièces du recouvrement comme indiqué. Installez les pièces du recouvrement comme indiqué (a, b). Replacez le recouvrement.
ENGLISH: Install and secure the two top frame cladding parts as shown. 18a GPU Make sure the cladding parts engage correctly (1, 2, 3, 4). 6.2 ESPAÑOL: Instale y fije los dos perfiles de recubrimiento superiores como se indica. 6.1 Asegúrese de que los perfiles de recubirimiento estén correctamente empalmados (1, 2, 3, 4) FRANÇAIS : Installez et fixez les deux pièces d'en haut du recouvrement du cadre comme indiqué.
ENGLISH: Install saddle flashing. 19 7 Install support battens at sides, if necessary, and under the saddle flashing (a). a c Attach saddle flashing by engaging and bending flaps as shown and secure with clips, if necessary (b). Install the optional tile support supplied with the flashing (c). a b ESPAÑOL: Instale la sección superior del tapajuntas. Instale rastreles de soporte en los lados, si fuera necesario, y por debajo de la sección superior del tapajuntas (a).
ENGLISH: Complete installation of sill flashing section. 20 Flatten down bottom edge of apron over roofing material as shown (a). Stretch out pleats at sides (b). Fold sides of apron over to hold back water (c). ESPAÑOL: Complete la instalación de la sección de tapajuntas del alféizar. Aplane el borde inferior del antepecho sobre el material de cubierta como se indica (a). Estire los pliegues a los lados (b). Doble los lados del antepecho para repeler el agua (c).
ENGLISH: Install tiles and maintain distance to frame as shown; cut tiles, if necessary. Trim and cut foam gasket for optimum contact to roofing material. 21 To allow the tiles to lie correctly, it may be necessary to remove a nib from the tile (a) and flatten down the upstand around the battens. ESPAÑOL: Instale las tejas y respete la distancia al marco como se indica. Si fuese necesario, corte las tejas. Recorte la empaquetadura de gomaespuma para lograr un contacto óptimo con el material de cubierta.
ENGLISH: Maintain distance to frame as shown; cut tiles, if necessary. Trim foam gasket to fit tiles. 22 Adjust the tile support and bend strips to hold it in place. 2 3/8 - 6" 60-150 mm ESPAÑOL: Respete la distancia al marco como se indica. Si fuese necesario, corte las tejas. Recorte la empaquetadura de gomaespuma para que coincidan con las tejas. Ajuste el soporte para tejas y doble las tiras para sostenerlo en el lugar.
23 GPU 1 2 ENGLISH: Connection of springs Close window using control bar. Then open window using handle on bottom of sash. Push sash outwards, ensuring that fittings and springs on both sides automatically connect. ESPAÑOL: Ensamblaje de resortes Cierre la ventana usando la barra de control. Luego abra la ventana usando la manija que se encuentra en la parte inferior de la hoja. Empuje la hoja hacia afuera, asegurándose de que las piezas de ajuste y los resortes de ambos lados se conecten automáticamente.
CN: VELUX Canada Inc. 1 800 88-VELUX (888-3589) www.velux.com INSTRUCCIONES DE INSTALACIÓN PARA GPU/GGU/GXU + EDL/EDW. ©2015 VELUX GROUP ®VELUX ET LE LOGO VELUX SONT DES MARQUES DE COMMERCE DÉPOSÉES ET EMPLOYÉES SOUS LICENCE DE VELUX GROUP INSTALLATION INSTRUCTIONS FOR GPU/GGU/GXU + EDL/EDW. ©2015 VELUX GROUP ®VELUX AND THE VELUX LOGO ARE REGISTERED TRADEMARKS USED UNDER LICENCE BY THE VELUX GROUP US: VELUX America Inc.