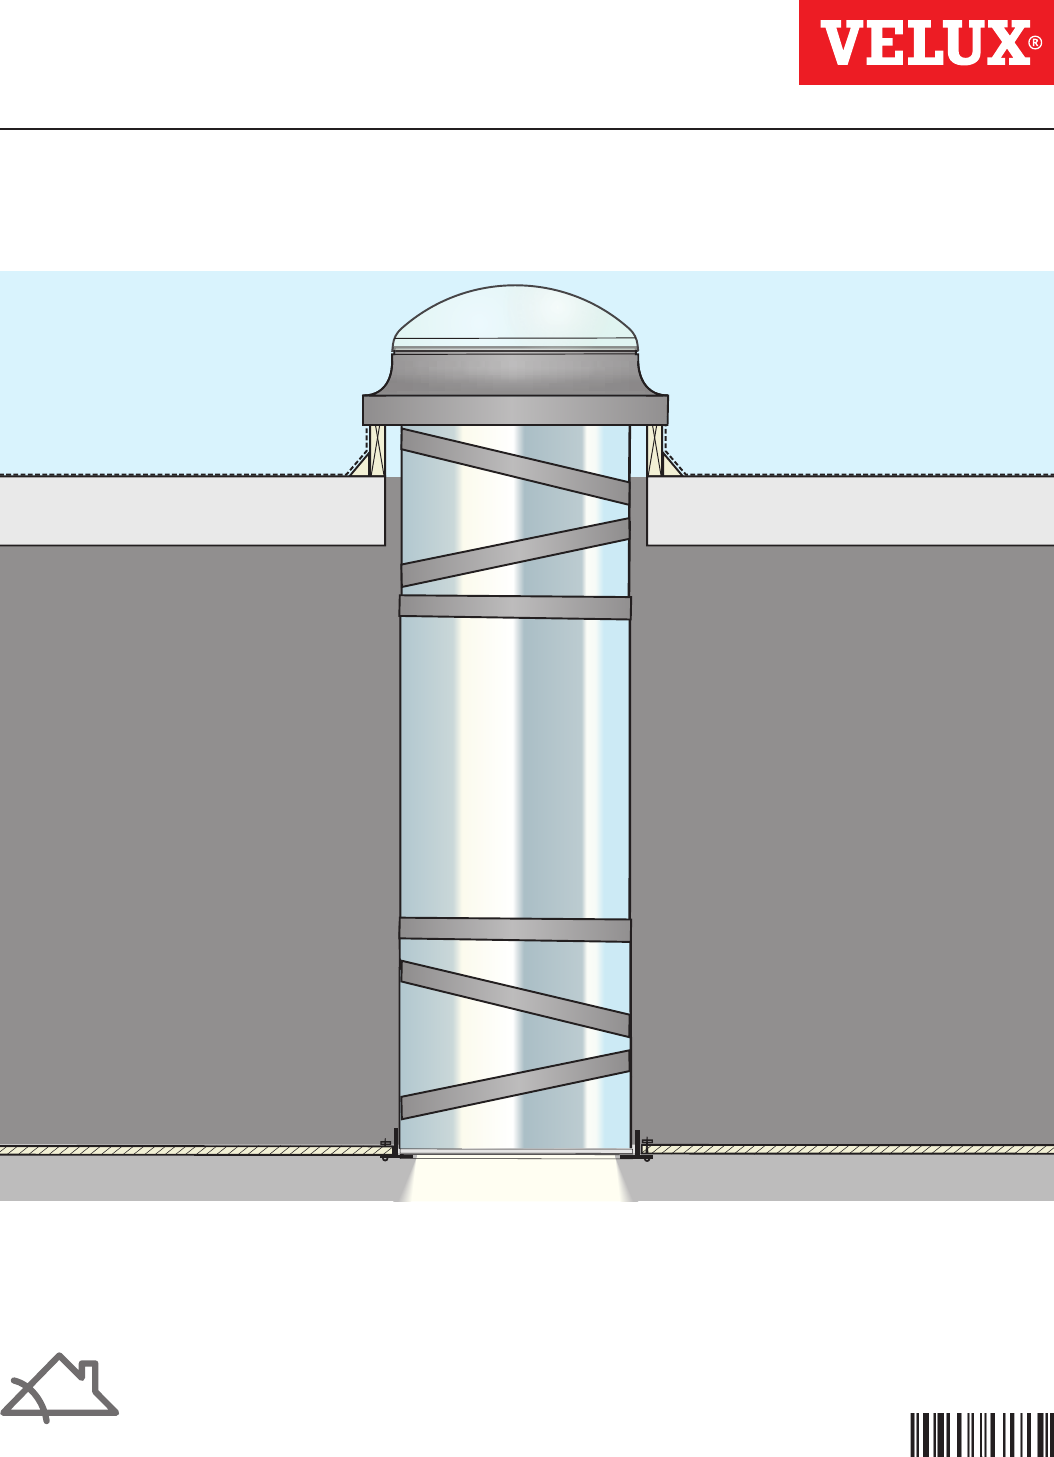
TCR 014 ENGLISH: Installation instructions for rigid sun tunnel TCR ESPAÑOL: Instrucciones de instalación para túnel solar rígido TCR FRANÇAIS : Instructions d'installation du tunnel de lumière rigide TCR 15°-90° 0°-60° VAS 454063-2019-12
ENGLISH: ESPAÑOL: FRANÇAIS : Read installation instructions carefully before proceeding. Lea las instrucciones antes de comenzar. Lisez attentivement les instructions avant de commencer. POTENTIAL FIRE HAZARD During installation, the reflective tunnels and components of VELUX® sun tunnels may focus sunlight causing intense heat or fire. Do not remove protective films until immediately before installation.
ENGLISH: ESPAÑOL: FRANÇAIS : Contents of packaging: 1 Dome 2 Flashing 3 Pivot ring 4 Upper elbow 5 Rigid tunnel sections (additional sections are available) 6 Lower elbow 7 Ceiling ring 8 Diffuser (primary and secondary) Contenido del paquete: 1 Cúpula 2 Tapajuntas 3 Anillo pivotal 4 Codo superior 5 Secciones de túnel rígido (secciones adicionales disponibles) 6 Codo inferior 7 Anillo del cielo raso 8 Difusor (principal y secundario) Contenu de l'emballage : 1 Dôme 2 Solin 3 Anneau pivotant 4 Coude s
Planning Planificación Planification ENGLISH: A A ecide desired location of the sun tunnel and mark the location with a wire so that it can D be seen from the attic. B For optimal performance keep the sun tunnel as short and straight as possible. Note: Tunnel length should not exceed 30 ft. (9 m). Exposure to the sun provides more light. For rigid sun tunnel assemblies, it is generally recommended to secure transmittance of loads to the roofing structure by using suspension kit ZTZ 203.
1 ENGLISH: Carefully remove the primary diffuser from the ceiling ring. Rotate the diffuser to disengage. ESPAÑOL: Con mucho cuidado, retire el difusor principal del anillo del cielo raso. Gire el difusor para soltarlo. FRANÇAIS : Désassemblez délicatement le diffuseur primaire de l'anneau de plafond. Effectuez une rotation du diffuseur pour le dégager. 2 ENGLISH: Attach lower elbow to the ceiling ring. Make sure all ceiling ring tabs engage with a click. Remove protective film from the lower elbow.
3 014: 15¼" (387 mm) ENGLISH: From the inside, locate the nail indicating the center of the sun tunnel in the ceiling, mark circle and cut rough opening in the ceiling as shown. CAUTION: Be careful not to damage any framing members. ESPAÑOL: Desde adentro, localice el clavo que indica el centro del túnel solar en el cielo raso, marque el círculo y corte un hueco en el cielo raso como se indica. PRECAUCIÓN: Tenga cuidado de no dañar ninguna parte del marco.
ENGLISH: Tip the plastic pins down into hidden position A . Insert the ceiling ring assembly. Avoid distortion of the ceiling ring causing the diffuser not to fit smoothly B . Secure the ceiling ring, insuring a tight joint between the ceiling ring and the ceiling C . Note: Be careful not to damage parts if using power tools. 5 ESPAÑOL: Gire los pasadores plásticos hasta que queden ocultos A . Inserte el conjunto del anillo del cielo raso.
ENGLISH: To make the flashing fit properly on the curb, the curb and roofing material dimensions must be less than the flashing clearance, ie 207/8" x 207/8" (530 mm x 530 mm). To install tunnel sections through the curb, inside curb dimensions must be no less than 16¾" x 16¾" (425 mm x 425 mm). Ensure that the height of the curb is in accordance and compliance with the local building code. To ensure a weathertight installation: Flash the curb with weathertight material up to upper edge of curb.
ENGLISH: Attach pile gasket to the pivot ring as shown. 9 ESPAÑOL: Sujete la empaquetadura al anillo pivotal, como se indica. FRANÇAIS : Apposez le cordon d'étanchéité à l'anneau pivotant, tel qu'illustré. ENGLISH: Attach the upper elbow to the pivot ring. Make sure all pivot ring tabs engage with a click. Remove protective film from the upper elbow. Note: Do not remove protective films until immediately before installation.
12 ENGLISH: Remove protective film from the rigid tunnel sections. ESPAÑOL: Quite la película protectora de las secciones de túnel rígido. FRANÇAIS : Enlevez le film protecteur des sections de tunnel rigide. 13 ENGLISH: Assemble the rigid tunnel sections with tunnel clips provided. ESPAÑOL: Arme las secciones de túnel rígido con los sujetadores del túnel suministrados. FRANÇAIS : Assemblez les sections de tunnel rigide avec des attaches de tunnel fournies.
ENGLISH: With one rigid tunnel section, cut the section to length. 14 For longer sun tunnels, use VELUX rigid tunnel sections ZTR. ESPAÑOL: Con una sección de túnel rígido, corte la sección de acuerdo con la longitud necesaria. Para túneles solares más largos, use las secciones de túnel rígido ZTR VELUX. X FRANÇAIS : Avec une section de tunnel rigide, coupez la section à la longueur désirée. Pour allonger les tunnels de lumière utilisez les sections de tunnel rigide ZTR VELUX.
ENGLISH: Remove the elbow and remove protective film from upper elbow. 15 ESPAÑOL: Retire el codo y quite la película protectora del codo superior. FRANÇAIS : Enlevez le coude ainsi que le film protecteur du coude supérieur. ENGLISH: Connect the rigid tunnel section with the upper elbow, fitting the rigid tunnel section to go on the outside of the upper elbow. Secure and tape joints with tunnel clips and tape provided 1, 2.
ENGLISH: Tape all joints. Note: For rigid sun tunnel assemblies, it is generally recommended to secure transmittance of loads to the roofing structure by using suspension kit ZTZ 203. 18 ESPAÑOL: Asegure todas las juntas con cinta. Nota: Para montajes de túneles solares rígidos, generalmente se recomienda asegurar la transmisión de carga a la estructura del techo mediante el kit de suspensión ZTZ 203. FRANÇAIS : Recouvrez tous les joints de ruban adhésif.
21 ENGLISH: Install the secondary diffuser disc onto the primary diffuser. ESPAÑOL: Instale el disco del difusor secundario en el difusor principal. FRANÇAIS : Installez le disque diffuseur secondaire sur le diffuseur primaire. 22 ENGLISH: Install the diffuser assembly by aligning the notches and rotate to secure. Note: If installing energy kit ZTC, use instructions enclosed with the kit. ESPAÑOL: Instale el conjunto del difusor alineando las ranuras y gírelo para sujetarlo.
ENGLISH: If vapor barrier is installed, insure a tight joint between the ceiling ring and the vapor barrier. Reposition the insulation material around the tunnel. In Canada it is necessary to form an air tight seal between the vapor barrier and the VELUX sun tunnel. This can be done by using a vapor barrier tape. It is important that the ceiling area (attic side) around the sun tunnel is well insulated.
AU: VELUX Australia Pty. Ltd. 1300 859 856 www.velux.com.au JP: CA: VELUX Canada Inc. 1 800 88-VELUX (888-3589) www.velux.ca KR: VELUX International (VELUX A/S) +45 7632 9240 www.velux.co.kr VELUX-Japan Ltd. 0570-00-8141 www.velux.co.jp VELUX New Zealand Ltd. 0800 650 445 www.velux.co.nz US: VELUX America LLC 1-800-88-VELUX www.veluxusa.com www.velux.com INSTALLATION INSTRUCTIONS FOR RIGID SUN TUNNEL TCR.