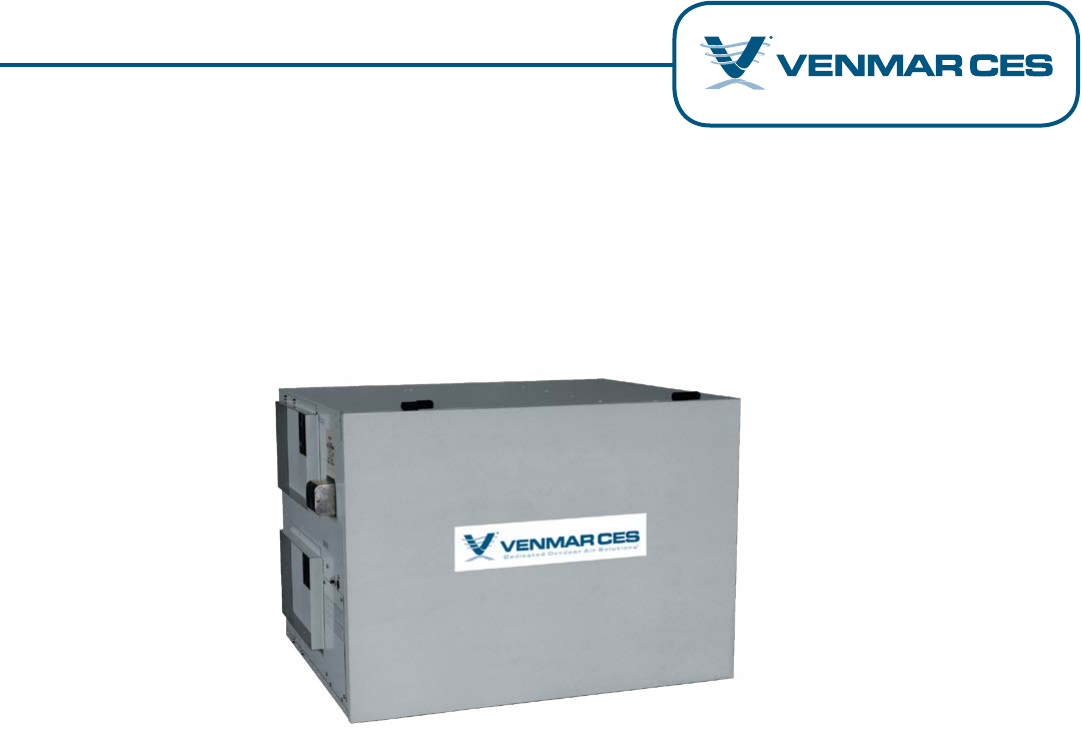
HRV Heat Recovery Ventilators Installation, Operation and Maintenance Instructions Manual Capacity: 300 to 1,260 cfm Model: HRV600i, HRV700i, HRV1200i ©2001 Venmar CES
Table of Contents Nomenclature.......................................................................................................................................................................3 Safety Considerations..........................................................................................................................................................4 General Information.....................................................................................................................
Nomenclature HRV600i Nomenclature (300–750 cfm) 1 2 3 4 5 6 1. FROST CONTROL D – Recirc defrost1 E – Exhaust only N – Non-defrost 6. LOW SPEED L – Reduced low speed N – Normal low speed 5. ACCESS DOOR S – Standard door R – Reverse door (right hand flow) 2. ENERGY RECOVERY P – Poly core A – Aluminum core H – HM core 4. MEF FILTRATION M – MEF supply filtration X – No MEF supply filtration 3.
Safety Considerations Warning, Caution and Important notes appear throughout this manual in specific and appropriate locations to alert Installing Contractors and maintenance or service personnel of potential safety hazards, possible equipment damage or to alert personnel of special procedures or instructions that must be followed as outlined below. ! Hazards may exist within this equipment because it contains electrical and powerful moving components.
Inspection on Arrival Inspect the equipment exterior and interior for any damage on arrival that may have occurred during unit shipment and for shipped loose parts. Ensure that there is no damage to any protruding exterior components such as the access door, door latches, door hinges, duct collars, cabinet, etc. or to internal components such as fans, motors, flat plate heat recovery module, dampers, actuators and drain pans. File a claim with the shipping company if the unit is damaged.
Internal Packaging Remove access panels and all packaging from the unit. Note that the reinforced rubber straps for ceiling mount are packaged and located inside the unit as may be other remote mounted options and/or accessories. Removal of all packaging is critical. Ceiling Mount The unit must be mounted level and may be hung with the reinforced rubber straps provided as shown in Appendix E. Check with local building codes regarding the use of rubber straps in commercial buildings.
Exhaust Dampers for Indoor Units An exhaust gravity backdraft damper is included for indoor units with the recirculation defrost option and shipped loose for field installation. An exhaust gravity backdraft damper or a motorized exhaust damper is available as an accessory for other defrost options or additional use and shipped loose for field installation. Gravity backdraft dampers are for horizontal airflow installations only.
Drains The drain fittings provided with the unit will accept a ¾” [19 mm] NPT coupler (supplied by others). The drain line for the unit must be fabricated on site and connected to the building main. A loop in the hose or trap in the copper or plastic pipe must be provided to prevent sewer gases from entering the unit when connecting to a drain as illustrated in Appendix D. IMPORTANT Consult local building code for plumbing requirements in your area.
Electrical Connections ! WARNING When installed, the unit must be electrically grounded in accordance with local codes or, in the absence of local codes, with the National Electrical Code, ANSI/NFPA70, and/or the Canadian Electrical Code CSA C22.1. Unit cabinet must have an uninterrupted, unbroken electrical ground to minimize the possibility of personal injury if an electrical fault should occur. Failure to follow this warning could result in the Installer being liable for personal injury of others.
Start-up Pre Start-up Procedure Before requesting start-up, check that the installation is complete and unit is ready. Complete the pre start-up check list below and in Appendix G for each unit as items are checked. 1. Check the electrical disconnect is in the ‘Off’ position. 2. Open access doors and check the unit for shipped loose parts, obstructive packaging, objects near or in fans, dampers, flat plate exchanger, etc. 3. Check that the fans and motors are rotating freely. 4.
! WARNING Only low or high speed contacts must be closed at any one time never both using dry contacts/jumper wires otherwise permanent damage to the motor and wiring will occur. Remote controls, if installed and connected, operate in conjunction with the dry contacts/jumper wires. When controlling units with remote controls, use extreme caution around moving mechanical components such as fans, belts and motors as they can lead to severe personal injury. 3.
Frost Control The unit functions are controlled by an integrated microprocessor control board included in the unit as per the frost control selected, the sequence of operation as described below and according to the options selected as described in Appendix F.
Remote Wall Control Remote mounted wall control options are solid state controls that can be used to control the ventilators from a remote location. The connection from the ventilator to the control is low voltage and requires a four conductor (24 gauge minimum) LVT cable. Models are available with a dehumidistat control and speed switching. The following three options are available: Standard Wall Control Dehumidistat to engage high speed exchange.
Balancing Procedure Before proceeding with balancing, all windows, overhead doors and walk-in doors should be closed and exhaust systems should be turned off. gauge and record it. Remove the FMS and place it in the supply duct. This process is not necessary if the FMS is to be permanently mounted. The connections between the flow stations and the ducts must be sealed with tape. Mount the magnehelic gauge in a convenient location where it is level and will not vibrate or be bumped. Zero the gauge.
Annual Maintenance ! WARNING Disconnect the main power switch to the unit before performing service and maintenance procedures. Annual maintenance should include: Air Filters Vacuum and wash standard foam filters. Replace medium efficiency filter if present. Drain Pans and Interior of Unit Wash the foil faced insulation surfaces and wipe the drain pans with a soft cloth and mild cleaning solution. Check the drain fittings to ensure they are draining freely.
! Figure 2: Blower assembly removal – HRV700i WARNING Disconnect the main power switch to the unit before performing service and maintenance procedures. If the motor functions normally, there is a problem with the wiring connections or the microprocessor control board. Check all wiring and replace microprocessor control board if necessary. If the blower does not run, it must be replaced. To replace the motor, remove the flat plate heat exchanger from the unit.
Appendix A: Equipment Data Table A1: Equipment Data HRV600i HRV700i HRV1200i 300 to to 750 CFM 300 to 800 CFM 700 to 1,250 CFM Direct drive Direct drive Direct drive Bearing Forward curved Ø7” x 6” [Ø178 x 152 mm] Sleeve direct drive Forward curved Ø9” x 7” [Ø229 x 178 mm] Sleeve direct drive Forward curved Ø7” x 6” (two) [Ø178 x 152 mm] Sleeve direct drive Housing Cold rolled Cold rolled Cold rolled ½” [13 mm] ½” [13 mm] ½” [13 mm] keyed ¼ 1⁄ 6 1⁄ 3 Airflow Range Fans Supply type Whe
VCES-HRV-IOM-1C – HRV600i, HRV700i, HRV1200i SA EA C A Front 19.207” [488] 34.000” [864] TOP VIEW 13.375” [340] 5.125” [130] D B RA OA Right 12.000” [305] Control box cover plate FRONT VIEW Note: A minimum of 12.000” [305] clearance from any obstruction is required for removal of the control box. FRONT VIEW Kg 17 11 24 15 67 RIGHT VIEW 14.103” [358] RA-E OA-E 14.000” [356] 23.500” [597] Aluminum Core PTS LBS Kg A 40 18 B 26 12 C 55 25 D 34 15 TOTAL 155 70 B Condensate drain 7.
VCES-HRV-IOM-1C – HRV600i, HRV700i, HRV1200i SA Front 5.125” [130] 12.000” [305] Control panel For recirc defrost only RA Right OA FRONT VIEW FRONT VIEW 3.530” [90] 8.000” [203] 8.000” [203] 24.500” 4.000” [622] [102] 4.000” [102] 1.750” [44] LEFT VIEW Reversed door option SA-E EA-E 14.000” [356] 28.120” [714] 15.000” [381] Control box RIGHT VIEW RA-E OA-E 7.100” [180] 14.100” [358] 14.
C VCES-HRV-IOM-1C – HRV600i, HRV700i, HRV1200i 2.000” [51] Right FRONT VIEW 24.736” [628] 31.080” [789] 51.000” [1,295] Control box SA PTS A B C D TOTAL Access door Heat recovery core RIGHT VIEW LBS 34 67 36 74 211 Kg 15 30 16 34 95 SA-E EA-E 20.750” [527] LEFT VIEW 15.250” [387] RA-E OA-E RIGHT VIEW 10.605” Low voltage terminal strips [269] 12.104” [307] 2.157” [55] A Power line input 8.000” [203] 40.500” 12.250” [1,029] [311] 8.000” [203] 3.750” [95] 14.000” [356] 1.
VCES-HRV-IOM-1C – HRV600i, HRV700i, HRV1200i SA EA C Front 19.207” [488] 34.000” [864] TOP VIEW 14.250” [362] Back 5.125” [130] D B RA OA Right 12.000” [305] Control box cover plate FRONT VIEW Note: A minimum of 12.000” [305] clearance from any obstruction is required for removal of the control box. FRONT VIEW Kg 25 18 25 18 86 LEFT VIEW SA-E 4.000” [102] Reversed door option EA-E 41.206” [1,047] 40.326” [1,024] 20.000” [508] 11.
VCES-HRV-IOM-1C – HRV600i, HRV700i, HRV1200i SA Front 5.125” [130] 12.000” [305] Control box cover plate For recirc defrost only RA OA Right FRONT VIEW FRONT VIEW Heat recovery core Access door 15.000” [381] RIGHT VIEW Reversed door option RA-E OA-E 10.000” [254] 20.000” [508] RIGHT VIEW B Condensate drain Access door Strap mounting location 20.000” [508] LEFT VIEW Reversed door option SA-E 4.000” 24.500” [102] [622] 8.000” [203] 3.530” [90] EA-E 10.000” [254] 8.000” [203] 1.
Appendix C: Flow Measuring Station and Balancing Damper Positions Figure C1: HRV600i and HRV1200i flow measuring station and balancing damper positions Reverse door option Balancing damper Flow measuring station (FMS) Exhaust air to outside (see Notes below) Min. 8” [203 mm] Flexible duct connection Fresh air from outside Supply air to space Min. 12” [305 mm] Min. 30” [762 mm] Exhaust air from building Flexible duct connection Min. 12” [305 mm] Notes: 1.
Appendix D: Drain Connections Figure D1: HRV600i and HRV1200i drain connections Plastic drain fitting Min. 3” [76 mm] Min. 1” [25 mm] Min. 3” [76 mm] ¾” NPT coupler Min. 4” Min. 1” [102 mm] [25 mm] Min. 4” [102 mm] Copper or plastic pipe Water trap Plastic hose To drain To drain Notes: 1. All hose, pipe and couplers to be supplied by others. 2. Slop drain lines minimum ¼” per foot. Figure D2: HRV700i drain connections Plastic.drain.fitting Min..3” [76.mm] Min..1” [25.mm] ¾”.NPT coupler Min..
Appendix E: Mounting Diagrams Figure E1: HRV600i and HRV1200i mounting Reinforced rubber strap Note: Diagrams show standard unit configuration. For units with the reversed door option, the door will be located here.
Appendix F: Terminal Control Diagrams Wall Control Connection Occupied Timer/Sensor Connection Three types of remote wall controls are available: Occupancy control is achieved by connection to the terminal interface shown below. These terminals require a dry contact which could be provided by a number of types of controls such as a timer, light sensor, occupancy sensor, Building Management System or other. The unit will not operate unless these contacts are closed! 1.
CO2 Ventilation Control Remote Fan Control HRVs can be controlled by a CO2 controller that can be connected to fan control Low–Com–High. As the CO2 levels exceed acceptable limits, the dry contact across High– Com is closed, raising high speed fan ventilation. Remote fan control can be achieved by connecting dry contact controls to the terminal interface at terminals labeled: Low–Com–High.
Smoke Detector Locate in a normally occupied area of premises. Recommended for compliance to NFPA-90A and IMC code 606. HRVs can be equipped with a duct mount smoke detector which will monitor the air when passing through the duct system into the HRV. When sufficient smoke is detected, an alarm condition is activated. By connecting the occupied timer/sensor contacts to the NC alarm auxiliary contacts on the duct sensor, an alarm condition will open the auxiliary contact and stop operation of the HRV.
Appendix G: HRV600i, HRV700i and HRV1200i Start-up Form and Checklist • • • • • IMPORTANT Complete this form for each unit and email, fax or mail to Venmar CES immediately after start-up to validate warranty and to provide valuable information for personnel performing future maintenance or for factory assistance to address below. Read the Installation, Operation and Maintenance Instructions Manual before proceeding.
Serial Number:______________________________________ Table G2: Start-up Checklist Checklist Item 1 2 Yes N/A Before proceeding, complete the pre start-up checklist. For the unit to start when the disconnect switch is turned on a ventilation and fan speed call is required. a.
Start-up Readings • • Serial Number:______________________________________ Allow unit to reach steady state before taking readings. Complete based on options included with the unit.
This page intentionally left blank.
Appendix H: Electrical Control Box and Wire Connections Figure H1: HRV600i and HRV1200i electrical control box and wiring connections Power line input junction box Low voltage terminal strips Microprocessor control board access plate Microprocessor controller terminal Control box HRV cabinet Control box cover plate Figure H2: HRV600i and HRV1200i low speed setting wire connections NO 6 B A 2 4 PJ2011 WARNING: Disconnect the main power source to the unit before changing low speed setting.
Appendix I: Components Figure I1: HRV600i exhaust only defrost components Item Description 2 3 4 1 7 1808149 3 Core damper actuator assembly 1808139 4 Core/defrost damper 5 Washable foam filter set (supply or exhaust airstream) – 2 per set 1608152 6 Supply damper 8 13 5 12 9 8 11 10 201586 1607720 7 14 Exhaust fan wheel – require 1 per unit Hinge kit (male/female) – require 2 per unit 2 1 1808144 Exhaust fan motor – require 1 per unit 5 6 Part Number Exhaust fan assembly – req
Figure I3: HRV700i components 2 3 Item Description 4 1 2 Latch/keeper kit – require 2 per unit 1607852 3 Recirc damper 1604178 Actuator 225855 4 Exhaust fan assembly – require 1 per unit 1608120P Exhaust fan wheel – require 1 per unit 120200 1 5 5 6 7 10 9 Part Number Washable foam filter set (supply or exhaust airstream) – 2 per set 1608700 Exhaust fan motor – require 1 per unit 1604169 Supply fan assembly – require 1 per unit 1608120P Supply fan wheel – require 1 per unit 12020
Figure I5: HRV1200i recirculation defrost components Item Description 1 2 3 4 5 2 3 1 4 12 11 9 8 7 4 6 1808148 Exhaust fan assembly powder coated – require 2 per unit 1808148P Exhaust fan wheel – require 2 per unit 201586 Exhaust fan motor – require 2 per unit 1808150 Hinge kit (male/female) – require 2 per unit 1607720 Core poly UL kit – 3 per kit 1607783 Core poly CSA kit – 3 per kit 1607784 Core aluminum kit – 3 per kit 1607780 Core HM kit – 3 per kit 1607787 Washable foa
Appendix J: Troubleshooting Table J1: HRV600i, 700i and 1200i Troubleshooting Symptoms Inside air is too dry. Persistent condensation on windows, walls, ceilings, etc. Unit stops functioning. Air from supply diffusers too cold. Possible Causes Solutions Over ventilation – speed setting too high. Improper ventilation rate. Adjust speed setting. Set dehumidistat control in a higher position (if applicable). Adjust dehumidistat control knob to a lower setting. Install a dehumisistat (option).
Appendix K: Make-up Heat Requirements Although the HRV600i, HRV700i and HRV1200i models have good efficiencies, the supply air could be colder than the ambient room air. It is possible to eliminate the discomfort associated with this temperature difference by installing an electric duct heater. This will temper the air before it is distributed throughout the building. The table below gives the heating requirements in kilowatts at different temperatures and airflows.
info@venmarces.com www.venmarces.com Venmar CES has a policy of continuous improvement and reserves the right to change design and specifications without notice.