
Installation Guide


3
2.
Post Location:
Measure the width of the fence panel (X) plus the
width of the post (Y). This is the common center-
to-center measurement (unless there is a cut-down
panel) for post hole location (Fig. 2).
Post Installation:
Dig the rst two post holes. Hole size should
be dug based on the following determination:
Depth is determined by your local frost line
measurements plus 6" for gravel/ ller (Fig. 3). Width
is determined by the post size. See chart below for
measurements:
Diameters based on post size:
10" for 5" x 5" post
8" for 4" x 4" post
Fig. 2
5x5 Post
5x5 Post
Example:Example:
Frost Line
Gravel/
Filler
6"
10"
X+Y
Y
X
Fig. 3
3.
Insert 6" of gravel/ ller into the bottom of both holes
and then set both posts into the ground and level
the rst post.
Add wet or dry concrete mix according to
manufacturer’s instructions to the top of the rst
post hole (Fig. 4). Make sure panel will be 2" above
the ground.
After setting rst fence section, proceed
systematically with post, panel, post, etc.
Fig. 4
Post
Concrete
Gravel
1.
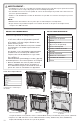
Mark the fence location using string and line
stakes (Fig. 1).
NOTE:
Plan gate placement, opening and hardware
clearance before installing fencing.
Fig. 1