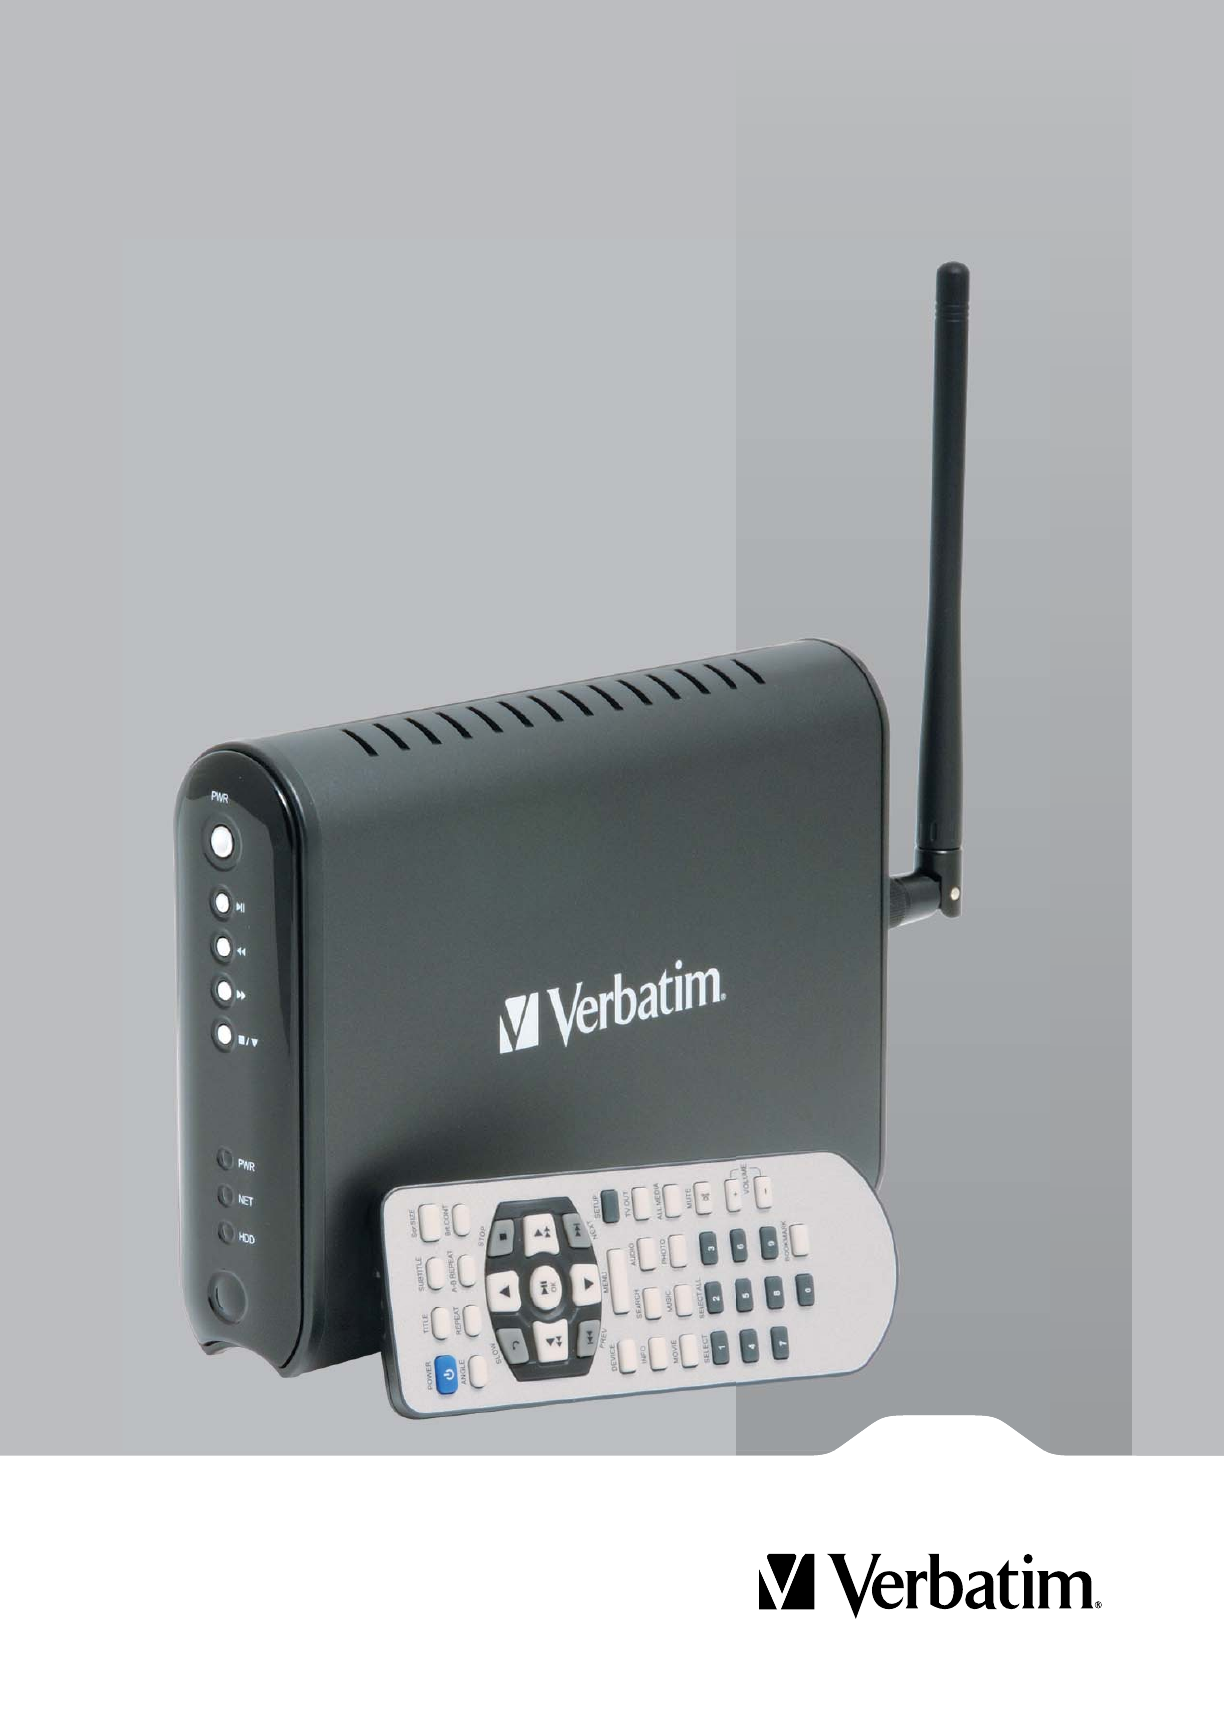
MediaStation Pro Wireless Network Multimedia Hard Drive User Guide English 1
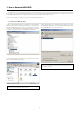
Contents Introduction 3 Precautions 3 Specifications 3 Package Content 4 Product Overview 4 1. Use as External USB HDD 5 1.1 Copy Data via USB 1.1.1 Windows 2000, XP 1.1.2 Linux 1.1.3 Mac 5 5 6 6 2. Connect to PC via Network 6 2.1 Wired LAN Connection 2.2 Wireless LAN Connection 6 7 3. Shared File Playback (Stream) 9 3.1 Windows 2000 3.2 Windows XP 3.3 Windows Vista 9 11 13 4. Use USB Host 15 5. Connect to External AV Device 15 5.1 Connect Video Cable 5.
Introduction MediaStation Pro fully supports HD (High Definition) files and can stream media files from a PC via wireless (802.11b/g) or wired LAN. It also has USB host that can support external USB storage devices and memory card readers.. • Wireless High Definition Multimedia Player • Features powerful media decoding chip -Sigma Design EM8621 Chip • Full HD file playback up to 1920 x 1080p • HDMI Video output • IEEE 802.11g(54Mbps) 802.
HDD File System NTFS / FAT32 (Preformatted to FAT32) TV Type NTSC / PAL Video Format AVI : MS-MPEG4v3/XviD/WMV9 (Not support XviD which has GMC option applied) WMV : WMV9 ASF : WMV9 MP4 : MPEG4 Video DAT : MPEG1 VOB : MPEG2 MPG/MPEG : MPEG1/MPEG2 TP/TS/TRP : HD-MPEG2/SD-MPEG2 ISO, IFO Audio Format MP3, OGG, WAV, WMA Photo Format JPG/JPEG, PNG, BMP Video Output COMPOSITE S-VIDEO HD COMPONENT Y, Pb, Pr (480p, 720p, 1080i) HDMI (480p, 720p, 1080i, 1080p) Audio Output STEREO L-R S/PDIF Digital Outp
1. Use as External USB HDD 1.1 Copy Data via USB It is possible to use as a external USB hard disk drive in case of inserting hard disk into MediaStation PRO. You can copy data from your PC to built-in HDD of MediaStation Pro via USB. It is possible to play media files at the hard disk on TV set. * When connecting PC, you have to connect power cable of MediaStation Pro 1.1.1 Windows 2000, XP, Vista 1) After connecting MediaStation Pro and plug power cable, Windows itself will install driver automatically.
1.1.2 Linux Manual Mount ✓ It can be available on Linux 2.4 higher. Connect MEDIASTATION PRO -> Power On MEDIASTATION PRO -> Check the detection with [fdisk] -> make Mount Pointer (ex. mediatest) at Folder Mount(/mnt) -> Edit [/etc/fstab] -> add the following; Automatic Mount After booting, do log-in. mount –t vfat /dev/sda /mnt/mediatest (in case of FAT32 HDD) Connect MEDIASTATION PRO -> Power On MEDIASTATION PRO -> Check the detection with [fdisk] -> make Mount Pointer (ex.
2.2 Wireless LAN Connection MediaStation Pro supports two types of wireless structure-Infrastructure mode & Ad-Hoc mode. Infrastructure Mode Wireless LAN connection type with Wireless Access Point. Ad-Hoc Mode 1:1 wireless LAN connection type between wireless adapter and MediaStation Pro without wireless access point. ✓ Note Wireless Access Point (Infrastructure Mode) or Wireless Adapter (Ad-Hoc Mode) is required for wireless connection. IEEE 802.
✓ Note: When connecting Ad-Hoc Mode, manual setting of IP Address and Subnet mask will be needed. Manual setting of IP address and Subnet mask of wireless adapter and MediaStation Pro will be required. Disable DHCP and enter “IP Address” and “Subnet mask”. IP address must be different between MediaStation Pro and wireless adapter, subnet mask must be the same for both MediaStation Pro and wireless adaptor. Example: MediaStation Pro: IP Address(192.168.10.2) Subnet(255.255.255.
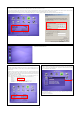
3. Shared File Playback (Stream) After connecting LAN cable, you have to set network configurations of both Computer and MediaStation Pro. *It is possible to assign IP address and Subnet Mask of MediaStation Pro as dynamic or static. 3.1 Windows 2000 1. Select a folder which you want to share. Right-click the folder and click ‘Sharing’ in pop menu. 2. Check ‘Share this folder’ and write ‘share name’. For example, “My Movie” 4. After that, the shared folder will be displayed as following picture.
6. Check ‘User cannot change password’ and ‘Password never expires’. For example, IP address: 192.168.1.3 Subnet mask: 255.255.255.0 7. Move to [Control Panel>Network and Dial-up Connections], and select Properties of ‘Local Area Connections’ by right click of mouse. ✓ If you have already been ‘obtained an IP address automatically’ from DHCP Server or IP Router on your local area network, you don’t need to write specific IP address absolutely.
3.2 Windows XP 1. Select a folder which you want to share. Right-click the folder and click ‘Sharing and Security’ in pop menu. 5. Check ‘User cannot change password’ and ‘Password never expires’. 2. Check ‘Share this folder on the network’ and write ‘Share name’. For example, “My Movie” ✓ Make sure to write ‘share name’ within 12 characters in English. 6. Move to [Control Panel>Network connections], and select ‘Local area connections’ properties by right click of mouse.
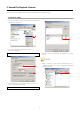
7. Double click ‘Internet Protocol (TCP/IP)’ that you want to use on your computer. 9. At above number 7) figure, click ‘Advanced’ Tab. Disable ‘Internet Connection Firewall’. ✓ If you use service pack 2, refer to the following figures. Click ‘Settings’ at ‘Windows Firewall’ 8. Check ‘Use the following IP address’, and write ‘IP address’ & ‘Subnet mask’ that you want to use. For example, IP address: 192.168.1.3 Subnet mask: 255.255.255.
10. Set the network configurations of MediaStation Pro. After writing, press [SETUP] again for saving configurations. ✓ If you have already been provided dynamic IP address from DHCP Server or IP Router on your local area network, you don’t need to write static IP address absolutely. Use ‘DHCP on’ or write IP address & Subnet mask that DHCP Server or IP Router provide. ✓ You have to connect MediaStation Pro to TV set for this setup. See “6.1 Connect Video Cable”.
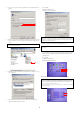
2. Disable “Firewall” c. make a folder you want to share. a. Click Start > Setting > Control Panel > Security > Windows Firewall on / off d. You will get a popup “Choose people to share with” then select “Everyone (All users in this list) and press “Add” button. b. Click at ‘Off (not recommended) e. After you register the user account, then click “Share” button. 3. Setup of Network and Sharing Center a. Click Start > Setting > Control Panel > Network and Internet > Network and Sharing Center b.
4. Using the USB Host ✓ Note: How to eject the tray of external USB ODD (Optical Disk Drive) Stop playback and press number [3] button in order to eject the tray of external USB ODD. In addition, original DVD title with CSS Lock should not be played when connecting with USB host, but it is possible to play other format like XviD. ✓ Note: It is not possible to guarantee compatibility with all USB devices available in the marketplace.
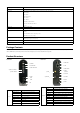
5.2 Connect Audio Cable MediaStation Pro supports 3 type of audio output; “Stereo, Coaxial, Optical”. Use the audio connection that your TV or Audio system supports. Normally TV supports stereo audio connection, and this package includes a stereo audio cable. ① Stereo L / R (Supplied) Red (right) Connect to Audio RED of TV White (Left) Connect to Audio White of TV Yellow (CVBS) Connect to Composite (CVBS) Jack of TV ② Optical ( ): Optical Cable for Digital 5.1 ch.
6. Basic Setup 6.1 Video Setup This is the guide for setting the video output of your MediaStation Pro. ✓ If you can not see a picture after connecting video cable, check the following: 1. “TV “– Switch to Video Input Mode: Turn on TV, and switch to video input mode same as video connection. See TV user manual. 2. “MediaStation Pro” – Switch to Video Output Mode: Press [TV OUT] button repeatedly. Whenever you press [TV OUT], video output signal is changed.
6.3 Network Setup It is possible to obtain an IP address automatically from DHCP Server or IP Router, or set the specific IP address. Check your network environment. ✓ Note DHCP On: You can use this option when it is possible to obtain IP address automatically from DHCP Server or IP Router. (Recommended for most users) DHCP Off: When it is not possible to obtain IP address automatically or you connect to your PC directly without DHCP Server or IP Router, you have to use this option.
6.4 Wireless Setup Refer to “2. Connect to PC via Network > 2.2 Wireless LAN Connection”. 6.5 Wireless Security Setup Refer to “2. Connect to PC via Network > 2.2 Wireless LAN Connection”. 6.6 LED Setup It is possible to turn on or off a backlight LED of arrow button on the front side. When the LED disturbs you in night, turn off the LED. ① Turn on MediaStation Pro and press [SETUP] on Mode Selection screen. ② Move to ‘LED’ icon and press [OK]. Setup box will be displayed under icon menu.
6.8 Language Setup It is possible to set the preferable language. This language setup option may not be supported. In addition, this language will be applied on OSD Language, not subtitle. 6.9 Screen Ratio Setup This is guide for setting TV Type. You can use 4:3 Letter Box, 4:3 Pan Scan, and 16:9. Setup Procedure ① Turn on MediaStation Pro and press [SETUP] on Mode Selection screen. ② Move to ‘Scr. Rate’ icon and press [OK]. Setup box will be displayed under icon menu.
6.11 Internet (How to setup the Internet) This is for how to connect MEDIASTATION PRO to the Internet. ① Turn on MediaStation Pro and press [SETUP] on Mode Selection screen. ② Go to the 2nd page and select [INTERNET] icon and press [ENTER] button then you will get the above page. ③ By using arrow buttons, go to the bottom setup. By using arrow & number keys, set the configuration and press [ENTER] for saving of the configuration. ④ Press [SETUP] button for the saving of the configuration. 6.
If “Off” option has been selected at the server list setting ✓ [Note] After you have created the “iradio” folder in the root directory in the HDD of MEDIASTATION PRO, it shows only the list saved in pls, m3u file. You can utilize play list creation software or media player software to create personal internet radio playlists. ① Press ◀ key at the main page, select “i-RADIO” icon and press [ENTER] button. ② Server lists saved in the “iradio” folder at the root directory are displayed.
How to setup ① Make “skin1” folder and save “GUI” or “Images” in the folder at the root directory in a HDD of MediaStation Pro ② At Setup page of SKIN, select [ON] of [SKIN Support] and select [SKIN folder]. Press [SETUP] button for saving the configuration. ③ Now you see the changed GUI. If you can not see the font, then change the font color. (Setup Page => SKIN=> Change Font Color) ④ As the above, it supports several font colors. 6.
6.15 Protocol Here you can set up data transfer protocol to access data stored on servers on your network How to setup ① After turning MediaStation Pro on, press [SETUP] button and go to [SETUP] page.
7. How to Play (Remote Control) 7.1 Basic Screen Menu 7.1.1 Mode Selection After turning on the MEDIASTATION PRO, you can see mode selection screen. In this screen you can select HDD, External USB device, LAN(wired network) or WIRELESS(wireless network) You can select one out of them. 7.1.1.1 Built-in HDD or external USB device Following example is in case of built-in HDD. External USB device is same as built-in HDD. ① [Mode Selection] Select ‘HDD’ icon and press [OK].
7.1.2 File Selection Select a file and press [OK] in order to play. Function and Button Descriptions Remote Control Function Descriptions MENU Menu Icon Menu Icon is displayed including ‘Play one, Play all and Play-list’. Press again for returning file selection screen. STWX Direction Key Direction key PREV IWW Move by page In case of two or more file list page, move to previous page. NEXT XXI Move by page In case of two or more file list page, move to next page.
7.2 Play Video Files When pressing [MENU] while playing a file, “Tool Box Menu” is displayed. Tool Box allows using detailed playback function. Select a file and press [OK]. Function and Button Descriptions Remote Button Function Description MENU Tool Box Tool Box is displayed. For returning to playback, press again. Playback Play file. Pause When pressing while playing a file, pause the playback. To resume playback, press again.
7.3 File Selection DVD manager function supports the playback of backed up DVD Files in the same way as the original DVD. Make a folder and then save all the DVD files into the folder. After connecting TV(or Monitor), select VIDEO_TS.IFO file at the folder. Make sure that all the DVD backup files including VIDEO_TS.IFO from one DVD title will be located in one folder ✓ √ Note If you can not find VIDEO_TS.IFO file among all the backed up files from an original DVD title, DVD manager function will not work.
7.4 Play Audio File When pressing [MENU] while playing a file, “Tool Box Menu” is displayed. Tool Box allows using detailed playback function. Move to the folder including backed up DVD files Function and Button Descriptions Remote Control Function Descriptions MENU Tool Box Tool Box is displayed. For returning to playback, press again. Playback Play file. Pause When pressing while playing a file, pause the playback. For returning to playback, press again.
7.5 Play Photo File When pressing [MENU] while playing a file, “Tool Box Menu” is displayed. Tool Box allows using detailed playback function. Select a file and press [OK]. Function and Button Descriptions Remote Control Function Descriptions Tool Box Tool Box is displayed. For returning to playback, press again. Playback Play file. Pause When pressing while playing a file, pause the playback. For returning to playback, press again.
③ Play List screen is displayed. -Play: Play the registered files. -Cancel: Close the Play List screen. -Move up, down: Change the file location.. -Shuffle: File location is mixed randomly. -Delete: Delete the selected file.. -Delete all: Delete all the registered files. 7.7 Create a Private Folder You can create your own folder of media content. This can be viewed by entering a PIN code during the device setup. ✓ Note The “private” folder access is only controlled during playback on a display.
8. Firmware Upgrade From time to time a firmware upgrade file may be available, please check www.verbatim-europe.com/support . You can check the version of firmware installed in your MediaStation Pro by pressing [INFO] button from main file selection screen. Download upgrade file from website and save to the root directory of MediaStation Pro hard disk. After connecting TV set, highlight the upgrade file and press [OK]. Upgrade will be completed automatically.
FCC Compliance This equipment has been tested and found to comply with the limits for a Class B digital device, pursuant to Part 15 of the FCC Rules. These limits are designed to provide reasonable protection against harmful interference in a residential installation. This equipment generates, uses and can radiate radio frequency energy and, if not installed and used in accordance with the instructions, may cause harmful interference to radio communications.