
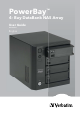
User guide


5
• LAN IP A
dd
ress is 192.1
68
.
0
.
32
• LAN
S
u
b
net Mas
k
is 2
55
.2
55
.2
55
.
0
F
actor
y
R
eset
B
utto
n
The device can be reset to the original factory default settings by using
a ballpoint or paperclip to gently push down the reset button in the
following sequence:
1. Ensure the device is
p
owered on.
2. Press and hold the reset button for a
pp
roximatel
y
5 seconds.
3. The factory reset process should take around 1 to 2 minutes.
Remember that this will wi
p
e out an
y
settin
g
s stored in fl ash memor
y
including user account information and LAN IP settings
.
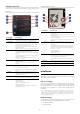
Basic Installation
Hardware Setu
p
This section
p
rovides un
p
ackin
g
and installation information for the
PowerBa
y
NAS arra
y
. O
p
en the shi
pp
in
g
carton for the PowerBa
y
NAS
array and care
f
ully unpack its contents.
1. Ensure that a hard drive cartrid
g
e is inserted into each of the
four mountin
g
racks and that the cartrid
g
e lockin
g
buttons are in
the le
f
t (locked)
p
osition.
2. Connect the su
pp
lied Ethernet cable to the LAN
p
ort located at
the back o
f
the device.
C
onnect the other end o
f
this cable to
y
our network, either via a switch/router or via direct connection
to
y
our com
p
uter for confi
g
uration.
3. Connect the supplied power cord to the rear of the PowerBay
NAS arra
y
and to an AC
p
ower rece
p
tacle
.
4. Press the Power button on the
f
ront o
f
the PowerBa
y
NAS arra
y
.
The green status LED will begin to
fl
ash to indicate that the unit
h
as initiated the
p
ower-on se
q
uence.
5. Wait
f
or the PowerBay NAS array to boot up and to auto
-
confi
g
ure its connection on the network. De
p
endin
g
on
y
our
p
articular LAN confi
g
uration and settin
g
s, this ma
y
take several
m
inutes. The followin
g
p
rotocols will be followed durin
g
auto
-
con
fi
guration:
a. DHCP client is enabled by de
f
ault. There
f
ore, your router
or ot
h
er LAN equipment t
h
at is provi
d
ing t
h
e DHCP service wi
ll
automatica
ll
y assign an IP a
dd
ress to t
h
e PowerBay NAS array
an
d
comp
l
ete t
h
e networ
k
connection.
b. I
f
no DHCP server is available on your network, then
the PowerBay NAS array will take its de
f
ault IP address o
f
1
92
.16
8
.
0
.
32
.
6. A
f
ter success
f
ully connecting to your network you will be able
to discover the PowerBay NAS array on your network. Its de
f
ault
n
ame is
“P
ower
B
ay
”.
7. Before you can see any PowerBay NAS array shared folders, you
m
ust fi rst set up user accounts, or at a minimum must assign
r
ead/write privileges for the default folder named Volume_1.
This process is explained further below. Once this is done, you
w
ill be able to discover shared folders in network workgroup
n
amed “Workgroup”. In Windows go to My Network Places /
Entire Network / Microsoft Windows Network / Work
g
rou
p
, or in
Mac OS X navigate to Go / Network
.
To set up other user accounts, and to con
fi
gure other basic system
settings, you should continue setup using the web-based administration
t
oo
l
desc
ri
bed
in th
e
n
e
xt
sec
ti
o
n.
Once the PowerBa
y
NAS arra
y
is connected to
y
our network and has
been confi
g
ured for
y
our network environment, it can be accessed
f
rom any computer within the same subnet on your LAN. Furthermore,
more advanced users may choose to con
fi
gure name servers (such
as WIN servers or DNS servers) in order to access the PowerBa
y
NAS
arra
y
from a different subnet
.
So
f
tware Setu
p
T
he included CD-ROM contains copies of the User Guide, as well as
two so
f
tware applications: 1) MagicalFinder, and 2) Acronis backup
so
ftw
a
r
e.
M
a
g
ical Finder - Network Setu
p
Utilit
y
W
hen fi rst powered on, during the initial boot sequence, the PowerBay
NAS array will wait to be assigned an IP address via DHCP. If it does
not receive a DHCP as¬signed IP address, by default it will have a self-
assigned IP address of 192.168.0.32.
If your router assigns addresses automatically, your router’s manual
w
ill describe how to view the DHCP Lease List so you can see your
drive’s assigned IP address. Alternatively, you can fi nd your drive’s IP
address usin
g
the included Ma
g
ical Finder utilit
y
that is
p
rovided on
the
p
roduct CD. If
y
ou are unfamiliar with the o
p
eration of
y
our router,
you may fi nd it easier to use the Magical Finder.
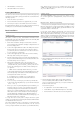
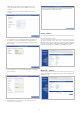
1. Open the Magical Finder Utility and allow it to search
f
or the
PowerBa
y
NAS arra
y
.
2. After fi nding the PowerBay NAS array the utility will list the
device’s IP address, MAC address and Device Name. (I
f
the
device is not listed on the initial scan you can press the Re
f
resh
b
utton to initiate a Re-Scan)
You have three o
p
tions:
• IP Setup Button: To enter t
h
e IP A
dd
ress Setup.
• Folder Button: To o
p
en Windows Ex
p
lorer to \\PowerBa
y
.
• Browser Button: To link to the device web con
fi
guration
.