
User manual


28
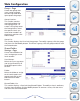
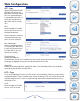
Web Configuration
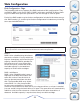
Enable / Disable Encryption:
During disk configuration, select Enable
or Disable. If Enable is selected, you will
be prompted to enter a password key
string. Also, you may optionally select
one of two additional encryption options.
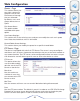
Password Key:
Enter a password key string of 6-10
characters. Safeguard this string so as
not to lose it.
Auto Unlock During System Reboot:
Check the Auto Unlock box if you
want the NAS always to power up in
the UNLOCKED state. Use the feature
with caution, since anyone who can
access the PowerBay NAS array to
power it off and back on can unlock a
locked array.
Store Key in USB Drive:
If you want to use a USB storage device to unlock a locked array, insert a USB Flash
Drive or USB Hard Drive in the front USB port and check this box. An encrypted key
file will be written to the USB device during configuration. A USB key device created
in this way can later be used to UNLOCK a LOCKED array. The USB key cannot be
copied although multiple USB keys may be created from the Key Management page.
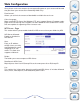
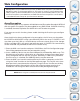
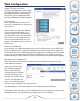
Managing the Encrypted Drive:
Once the NAS array has been encrypted, the Disk Configuration page will show
three additional buttons.
‘Lock’ will LOCK the array.
You will be prompted to
enter the password key
string to continue. A locked
array will not show up on
the LAN as a shared volume.
‘Unlock’ will UNLOCK the
array. You will be prompted
to enter the password key string to continue.
‘Key Management’ will present options for managing the password key.
‘Reconfigure’ will still allow you to reconfigure the array, although now you will be
prompted to enter the password key string before you can continue.
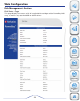
Product
Overview
Installation
Web
Configuration
Knowledge
Base