
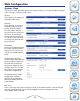
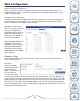
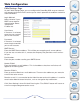
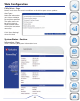
User manual

45
Knowledge Base
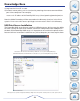
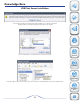
Browse My Computer
Open My Computer and double-click on My Network Places. Browse to Workgroup to find
the PowerBay NAS array shared folders.
Once you have located the attached shared folders of the PowerBay NAS array, you
can map a drive letter to a folder. [You must assign a drive letter in order to save files
to the PowerBay NAS array using the bundled backup software.] To do this, right-click
on the folder and select “map network drive.” Fill out the dialogue box that Windows
presents (input the logical drive letter and enter the path of a network share directory)
and then select Finish. Now you can log in using the Samba User Account credentials
that you created using the web configuration tool of the PowerBay NAS array. The
PowerBay NAS array will show up in My Computer under Network Drives.
Sharing files using Mac OS X
A Mac running Mac OS X can access a connected PowerBay NAS array. Click on Go
/ Network to open the Network window. Existing shares will show after expanding
the “Shared” list or by clicking on the PowerBay NAS array name in the list of at-
tached devices.
To login to specific shares, you many need to double-click on “PowerBay” located
in “Workgroup” to open the connection dialogue box. If prompted to “Select SMB/
CIFS shared volume you want to connect to” use the pull-down menu to select one
of the current shares. You will then be prompted to authenticate by entering your
user name and password. For “user name” use the Mac OS “Short Name” that you
used to create your account on the PowerBay NAS array.
After completing authentication your shared folder will appear on your desktop.
You can now drag and drop files to this folder like you can for any folder.
Sharing files using Linux
If you are primarily sharing files across Linux or UNIX computers, you should configure
the PowerBay NAS array to use NFS (Network File System) for file sharing instead of
SMB. While your Operating System documentation will explain the details of NFS file
sharing, the brief steps below will get you started.
1) Use the PowerBay NAS array web-based configuration tool to enable NFS by
checking the Enable box at:
Advanced Setup / NFS Server
2) Use the web-based administration tool to create a new share and define the
share’s NFS access properties using the settings for Allowed Host, Folder and
Root Squash.
Product
Overview
Installation
Web
Configuration
Knowledge
Base