
User manual


7
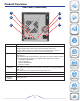
Factory Reset Button
The device can be reset to the original factory default settings by using a ballpoint
or paperclip to gently push down the reset button in the following sequence:
1. Ensure the device is powered on.
2. Press and hold the reset button for approximately 5 seconds.
3. The factory reset process should take around 1 to 2 minutes.
Remember that this will wipe out any settings stored in flash memory including
user account information and LAN IP settings.
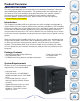
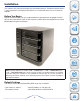
Basic Installation
Hardware Setup
This section provides unpacking and installation information for the PowerBay NAS
array. Open the shipping carton for the PowerBay NAS array and carefully unpack
its contents.
1. Ensure that a hard drive cartridge is inserted into each of the four mounting racks
and that the cartridge locking buttons are in the left (locked) position.
2. Connect the supplied Ethernet cable to the LAN port located at the back of the
device. Connect the other end of this cable to your network, either via a switch/
router or via direct connection to your computer for configuration.
3. Connect the supplied power cord to the rear of the PowerBay NAS array and to
an AC power receptacle.
4. Press the Power button on the front of the PowerBay NAS array. The green status LED
will begin to flash to indicate that the unit has initiated the power-on sequence.
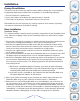
5. Wait for the PowerBay NAS array to boot up and to auto-configure its connection
on the network. Depending on your particular LAN configuration and settings,
this may take several minutes. The following protocols will be followed during
auto-configuration:
a. DHCP client is enabled by default. Therefore, your router or other LAN equip-
ment that is providing the DHCP service will automatically assign an IP address
to the PowerBay NAS array and complete the network connection.
b. If no DHCP server is available on your network, then the PowerBay NAS array
will take its default IP address of 192.168.0.32.
6. After successfully connecting to your network you will be able to discover the
PowerBay NAS array on your network. Its default name is “PowerBay”.
7. Before you can see any PowerBay NAS array shared folders, you must first set
up user accounts or at a minimum must assign read/write privileges for the de-
fault folder named Volume_1. This process is explained further below. Once this
is done, you will be able to discover shared folders in network workgroup named
“Workgroup”. In Windows go to My Network Places / Entire Network / Microsoft
Windows Network / Workgroup, or in Mac OS X navigate to Go / Network.
Installation
Product
Overview
Installation
Web
Configuration
Knowledge
Base