
User's Manual


Table Of Contents
- VX 520 Installation Guide
- Contents
- Preface
- Terminal Overview
- Terminal Setup
- VX 520 Setup
- Selecting Terminal Location
- Unpacking the Shipping Carton
- Examining Terminal Features
- Installing the Smart Battery (VX 520 GPRS Only)
- Establishing Telephone Line Connections
- Installing a Paper Roll in the Printer
- Installing/Replacing MSAM Cards
- Installing/Replacing SIM Card (VX 520 GPRS Only)
- Connecting Optional Devices
- Connecting the Terminal Power Pack
- Charging the Smart Battery (VX 520 GPRS Only)
- Privacy Shield (Optional)
- Using the Smart Card Reader
- Using the Magnetic Card Reader
- VX 520 Sprocket Setup
- Selecting Terminal Location
- Unpacking the Shipping Carton
- Examining Terminal Features
- Establishing Telephone and Line Connections
- Installing Paper Tray
- Installing Paper in the Tray
- Installing/Replacing MSAM Cards
- Connecting Optional Devices
- Connecting the Terminal Power Pack
- Privacy Shield (Optional)
- Using the Smart Card Reader
- Using the Magnetic Card Reader
- VX 520 Setup
- Specifications
- Maintenance
- Troubleshooting Guidelines
- VeriFone Service and Support
- Contact VeriFone
TERMINAL SETUP
VX 520 Sprocket Setup
42 VX 520 INSTALLATION GUIDE
V
E
R
I
F
O N
E
C
O
N
F I
DE
N
T
I
A
L
TE
MP
LATE
R
EV
F
d Three color-coded function keys below the
keypad (icons at right; from left to right: CANCEL,
BACKSPACE/CLEAR, ENTER). The Cancel key
also acts as the Power Off button, while the Enter key also functions as the
Power On button. Press the Enter key for at least three seconds to power
on the terminal, and press the Cancel key for at least four seconds to
power the terminal off
e An ALPHA key centered at the top of the keypad.
• A magnetic card reader, built into the right side. The icon at right
shows the proper swipe direction, with the stripe down and facing
inward, toward the keypad.
• An internal, sprocket-fed, serial dot-matrix printer.
• A smart card reader, built into the front of the terminal. The
icon shown at right indicates proper card position and insertion
direction.
• Three SAM (security access module) compartments, built into the side of
the terminal. The VX 520 Sprocket terminal contains MSAM cardholders to
support multiple stored-value card programs or other merchant card
requirements.
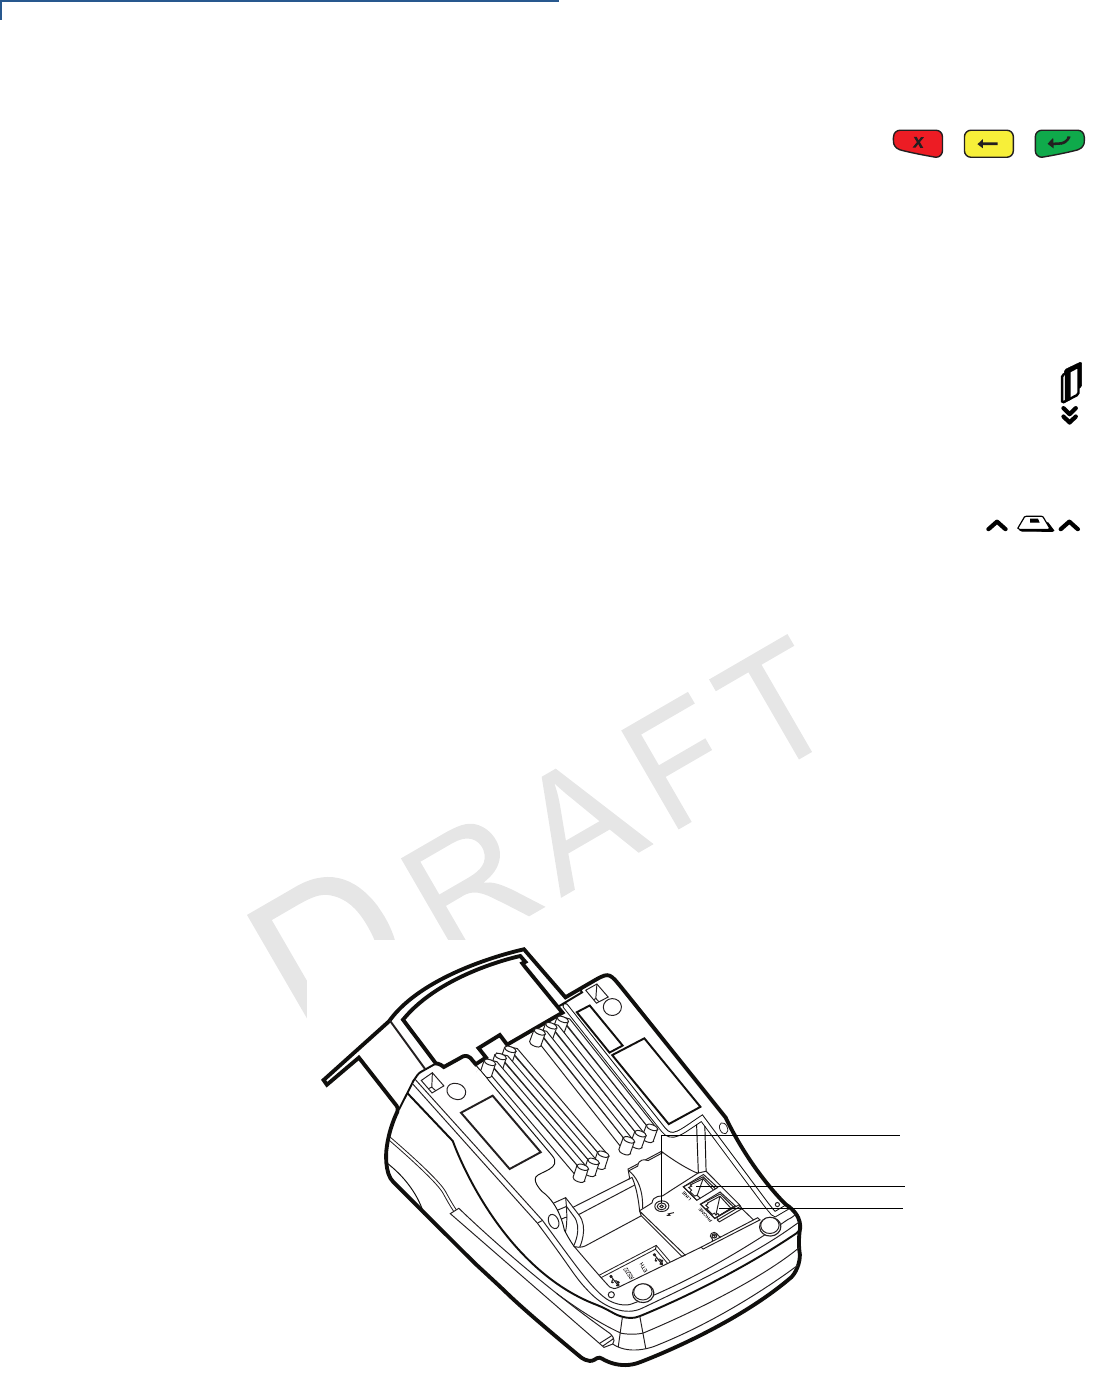
Connection Ports
Turn the terminal upside down to view the connection ports. Notice that the ports
are recessed. Different ports provide connections to a communications line,
optional peripheral devices, and the power supply.
Figure 35 and Figure 36 show the connection ports for the VX 520 Sprocket
terminal.
Figure 35 VX 520 Sprocket Power and Connection Ports
POWER PORT
RJ-11 (LINE)
RJ-11 (PHONE)