
User's Manual


Table Of Contents
- VX 520 Installation Guide
- Contents
- Preface
- Terminal Overview
- Terminal Setup
- VX 520 Setup
- Selecting Terminal Location
- Unpacking the Shipping Carton
- Examining Terminal Features
- Installing the Smart Battery (VX 520 GPRS Only)
- Establishing Telephone Line Connections
- Installing a Paper Roll in the Printer
- Installing/Replacing MSAM Cards
- Installing/Replacing SIM Card (VX 520 GPRS Only)
- Connecting Optional Devices
- Connecting the Terminal Power Pack
- Charging the Smart Battery (VX 520 GPRS Only)
- Privacy Shield (Optional)
- Using the Smart Card Reader
- Using the Magnetic Card Reader
- VX 520 Sprocket Setup
- Selecting Terminal Location
- Unpacking the Shipping Carton
- Examining Terminal Features
- Establishing Telephone and Line Connections
- Installing Paper Tray
- Installing Paper in the Tray
- Installing/Replacing MSAM Cards
- Connecting Optional Devices
- Connecting the Terminal Power Pack
- Privacy Shield (Optional)
- Using the Smart Card Reader
- Using the Magnetic Card Reader
- VX 520 Setup
- Specifications
- Maintenance
- Troubleshooting Guidelines
- VeriFone Service and Support
- Contact VeriFone
TERMINAL SETUP
VX 520 Sprocket Setup
VX 520 I
NSTALLATION GUIDE 43
V
E
R
I
F
O N
E
C
O
N
F I
DE
N
T
I
A
L
TE
MP
LATE
R
EV
F
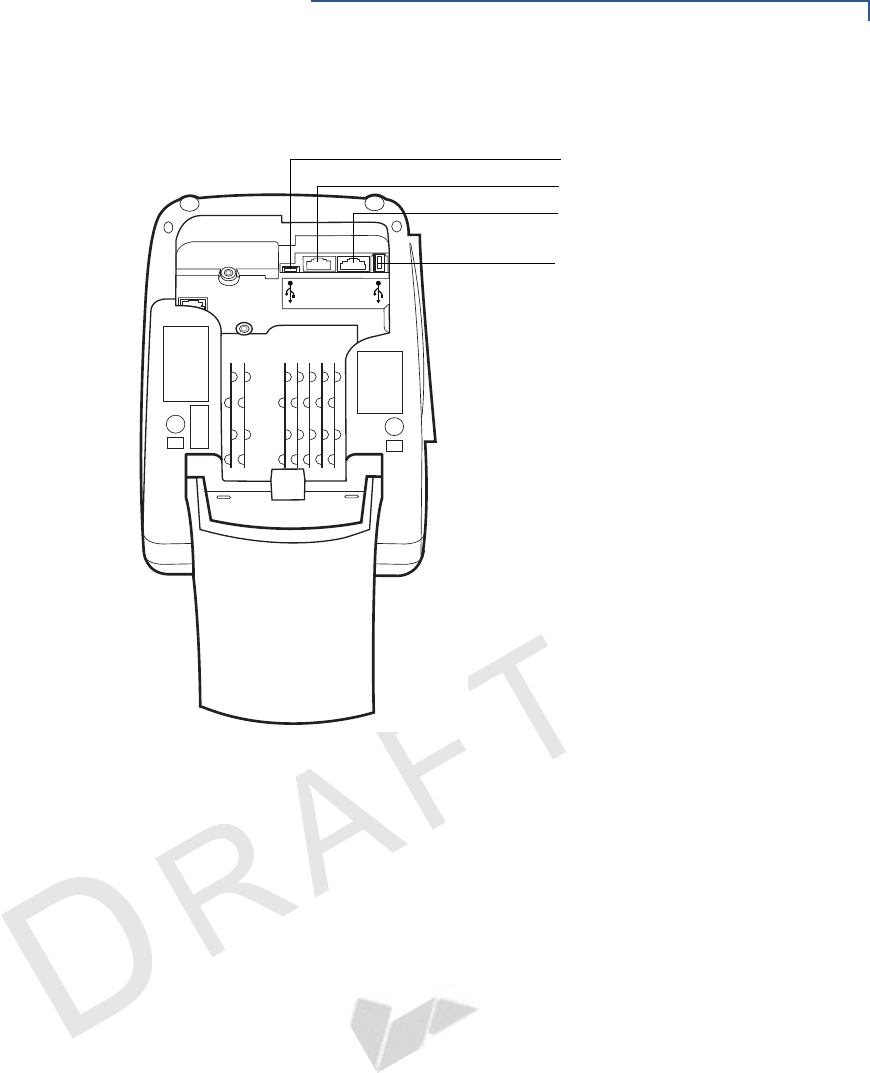
Figure 36 VX 520 Sprocket Additional Connection Ports
To use the
connection ports
The connection ports offer multiple connectivity for the VX 520 Sprocket terminal.
Please refer to the following list of peripheral devices for the connectivity options.
Host USB Port
• PP1000 USB
• V
x
810 USB
• Barcode reader
• Biometric reader
• USB flash disk
• USB keyboards
Ethernet Port
• Ethernet cable to router, hub or switch
Client USB Port
• PC
• ECR/Cash register
RJ-11 Ports
• Telephone
E
NO
HP
232SR
H
T
E
CLIENT USB PORT
RS-232 PORT
RJ-45 (ETHERNET) PORT
HOST USB PORT