User Guide Blitz™ 080625_TXT8010_ELVIS_M_EN_REV00.indd 1 2008.6.
CHAPTER 2. BASIC OPERATION BASIC OPERATION ......................................................................... 16 TURNING THE PHONE ON/OFF ..................................................... 16 ACCESSING THE MENU ................................................................ 16 MENU SUMMARY ....................................................................... 17 MAKING A CALL ......................................................................... 19 ANSWERING CALLS ............................
Contents CHAPTER 6. MESSAGING MENU MESSAGING .................................................................................102 WHEN A NEW MESSAGE ARRIVES ...............................................102 NEW MESSAGE ..........................................................................102 INBOX ......................................................................................105 SENT ........................................................................................105 DRAFTS .............
HANDSET DESCRIPTIONS 20 21 22 17 1 Standard Battery User Guide USB Cable 2 16 15 3 14 4 5 6 7 13 Handset Battery Cover 6 Chapter 1 − Before Using Blitz™ 080625_TXT8010_ELVIS_M_EN_REV00.indd 6-7 QRG (Quick Reference Guide) Wall Charger 23 24 18 25 19 26 27 12 8 Before Using Before Using INSIDE THE PACKAGE This package should include all items pictured below. If any are missing or different, immediately contact the retailer where you purchased the phone. 9 10 11 1. Display Screen 2.
KEYS DESCRIPTIONS 9. [ 1. Display Screen: This screen displays all the information needed to operate your phone. 2. [ ] Left Soft Key: Press to display the Message menu or access the function listed above the key. 3. [ ] SEND Key: Press to make or receive a call. In standby mode, press to access your All Calls list. 4. [ ] Speakerphone Key: Press to turn Speakerphone On or Off. 5. [ ] Voicemail Key: Press and hold to automatically dial your voicemail system. 6.
DISPLAY INDICATORS Before Using Icon Icon Discriptions Icon Discriptions Icon Icon Discriptions Recent Calls Icon TTY: TTY mode is active. All Sounds Off: Ringer volume is set to off. Dialed Call Alarm Only: Phone will alert you with an alarm tone. 1X Signal Strength: 1X service is available. Voice Call: A call is in progress. * No icon indicates the phone is in standby mode. Received Call Airplane Mode: Transmitting and receiving information is restricted.
12 Messages Icon New/Unread Message Opened Download Picture Message Multiple Message Incomplte Opened/Read Message Corrupt Message Multiple Message Pending Message Delivered Pending Message Send INSTALL BATTERY Incomplete Delivery Unread MMS 1. Remove the battery cover from the unit.
Before Using CHAPTER 2 DO’S • Only use the battery and charger approved for use with the Blitz™. • Only use the battery for its original purpose. • Try to keep batteries in a temperature between 41 °F (5 °C) and 95 °F (35 °C). If • • • • the battery is stored in temperatures above or below the recommended range, give it time to warm up or cool down before using. Completely drain the battery before recharging. Store the discharged battery in a cool, dark, and dry place.
Basic Operation ACCESSING THE MENU TURNING THE PHONE ON Your phone can be customized via the menu. Each function can be accessed by scrolling with the Directional Key or by pressing the number that corresponds with the menu item. 1. Press and hold the END Key until your display turns on and the tone sounds. • If “Enter Lock Code” appears on the display, enter your 4-digit lock code to unlock your phone. • The default lock code is the last 4 digits of your Mobile Telephone Number.
Basic Operation SETTINGS & TOOLS 2ND DEPTH 1. My Verizon 2. Tools 3. Bluetooth Menu 4. Sounds Settings 5. Display Settings 18 3RD DEPTH 1. Voice Commands 2. Calculator 3. Calendar 4. Alarm Clock 5. World Clock 6. Notepad 7. Stop Watch 1. Add New Device 1. Call Sounds 2. Alert Sounds 3. Keypad Volume 4. Service Alerts 5. Device Connect 6. Power On/Off 7. Open/Close Sound 1. Banner 2. Backlight 3. Wallpaper 4. Display Themes 5. Main Menu 6.
Basic Operation ANSWERING A CALL 3WAY CALLING 1. If your phone is set to “Slide Open” for “Answer Options,” simply open the phone to answer a call. If your phone is set to “Any Key” for “Answer Options,” press any key to answer a call. If your phone is set to “Auto w/ Hands-free” for “Answer Options,” calls are answered automatically with a 5 second delay. (“Auto w/ Hands-free” is available only when connected to a headset or handsfree device.
Basic Operation CALLER ID FUNCTION USING AUTO KEYPAD LOCK FUNCTION CONTACT LIST Caller ID displays the number of the person calling when your phone rings. If the caller’s identity is stored in Contacts, the name appears on the screen. The caller ID is stored in the Recent Calls Menu. When the Slide is closed, the Side Keys and the Directional Key are locked. To unlock them, press any key, “PRESS OK TO UNLOCK KEYPAD” displays, then press the OK Key [OK]. To view your Contact List during a call: 1.
Basic Operation 911 IN LOCK MODE NAMES TO BE DIALED To make an emergency call in Lock Mode: 1. Press the OK Key [OK] to unlock the keypad, then press the Right Soft Key [Options], then slide out the QWERTY keyboard, and press “5. Main Menu”. 1. Slide out the QWERTY keyboard, and then enter “911” and then press the SEND Key . Allows you to dial the number associated with a specific word. For example, to call “1-800-FLOWER”: 2. The call connects. 2. Press the Directional Key the menu screens. 3.
MEMORY FUNCTION Note This chapter addresses memory functions including: Storing a phone number Entering letters, numbers & symbols One, Two, Three-touch dialing 26 MEMORY FUNCTION CHAPTER 3 Chapter 2 − Basic Operation 080625_TXT8010_ELVIS_M_EN_REV00.indd 26-27 2008.6.
Memory Function ADDING A NEW CONTACT 1. From standby mode slide out the QWERTY keyboard, and then enter the phone number you want to save. 2. Press the Left Soft Key [Save]. Press the Right Soft Key options: • • • • • [Options] to access the following 2-Sec Pause: Insert a 2-sec Pause in the number. Wait: Insert a Wait pause in the number. New TXT Message: Send a text message to the contact. New Picture Message: Send a picture message to the contact.
Memory Function 1. From standby mode, press the OK Key [OK] to unlock the keypad, then press the Right Soft Key [Contacts], then press the Directional Key up or down to highlight an entry. 2. Press the Left Soft Key [Edit]. 3. Press the Directional Key up or down to highlight ”Picture”, [Set]. then press the Left Soft Key 4. Press the Directional Key up, down, left or right to select a picture, then press the OK Key [OK]. 5. When completed, press the OK Key [SAVE].
Memory Function 6. Press the OK Key [OK]. A confirmation message appears. 7. Press the OK Key [SAVE] to save. The Default Number cannot be deleted. The entire Contact entry can be deleted or another number can be assigned as the Default Number allowing you to delete the original number and keep the Contact entry. CHANGING THE DEFAULT NUMBER 1. From standby mode, press the OK Key keypad, then press the Right Soft Key Contacts display alphabetically. [OK] to unlock the [Contacts]. Your 2.
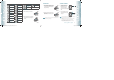
Memory Function Your device has dictionaries for English. The appropriate dictionary is activated automatically when you select a language on your device. 8 7 1 6 2 34 3 Your device uses the active dictionary to suggest corrections or complete the word you’re typing. 1. [ ] Mode Change Key: • When in idle mode : - Slide out the QWERTY keyboard, and then press to change between entering numbers and letters that appear on the same key. - Press and hold to lock in numeric mode or text entry mode.
Memory Function CHAPTER 4 411 : Speed Dial entry 411 (Directory Assistance) is already assigned to Directory Assistance. • Directory Assistance is a VZW Wireless Directory Assistance service that provides directory listing database information. MENU FUNCTION This chapter addresses accessing the menu and using its functions and features to customize your phone.
For additional details on how to add a new contact, see page 28. 6. Set As ICE Contact: To set as emergency number. 7. Call: To call the contact. 8. Erase All Contacts: To delete all contact list. NEW CONTACT CONTACT LIST To add a new number to your Contacts List: You can review all the entries stored in your Contact List or quickly find an entry by entering a name or its character string. 4. To call the selected number, press the Right Soft Key and then select ”7. Call” or press the SEND Key . 1.
3. Select “Rename”. 4. Enter the new group name, then press the OK Key [SAVE]. 1. From standby mode, press the OK Key [OK] to unlock the keypad, then press the OK Key [MENU], then slide out the QWERTY keyboard, and press 3. Groups. 2. Press the Directional Key up or down to select the existing group name that you want to erase, and then press the Right Soft Key [Options]. 3. Press “1. New TXT Message”. 4.
Contacts 98(#MIN), 99(#PMT) and 411 (Directory Assistance) are already assigned to Verizon Wireless Account Information. 8. Under “Name Card”, you can insert your name card. Press the Left Soft Key [Add], select “1. My Name Card” or “2. Contacts” then press the OK Key [OK]. Select the card you’d like to send then press the OK Key [OK]. • #BAL: #BAL is a VZW Customer Service VRU number (Free call) that provides customers information about their Verizon Wireless billing balance.
3. Select “1. Re-assign”, then select “1. From Contacts” to select a contact from your Contact List, or “2. New Contact” to enter a new contact. [OK]. A confirmation window appears. TO ERASE ASSIGNED EMERGENCY CONTACTS 1. From standby mode, press the OK Key [OK] to unlock the keypad, then press the OK Key [MENU], then slide out the QWERTY keyboard, and press 5. In Case of Emergency. 2. Select the contact you want to erase then press the Right Soft Key [Options]. 3. Select “2. Unassign”. Press the OK Key 4.
Contacts RECENT CALLS MISSED The Recent Calls menu is a list of the last phone numbers or Contact entries for calls you placed, accepted, missed, or blocked. It is continually updated as new numbers are added to the beginning of the list and the oldest entries are removed from the bottom of the list. Displays information about the 90 most recently missed calls. Place a call to a missed call by simply pressing the SEND Key . 2. Press the Right Soft Key [Send]. 3. Select “1. TXT Message”, “2.
Recent Calls DIALED ALL BLOCKED Displays information about the 90 most recently dialed numbers. Place a call to a dialed call by simply pressing the SEND Key . Displays information about the most recently received, dialed and missed calls. This menu appears only when “Incoming Call Restriction” is set. 1. From standby mode, press the OK Key [OK] to unlock the keypad, then press the OK Key [MENU], the Directional Key right once for RECENT CALLS, then slide out the QWERTY keyboard, and press 2.
Recent Calls BLUETOOTH MENU BLUETOOTH ON/OFF Bluetooth technology connectivity enables wireless connections between electronic devices. If connected with a Bluetooth Handsfree device, you can use your phone more freely. Since devices with Bluetooth connectivity communicate using radio waves, your phone and the other device do not need to be in direct line-of-sight. The two devices only need to be within 10 meters (30 feet) of each other.
Settings Select “Yes”, then press the OK Key [OK]. If you do not wish to confirm every time before connecting to the Bluetooth® device, select Always Connect, then press the OK Key [OK]. 4. The handset will prompt you with the following message on the LCD screen: “PLACE DEVICE YOU ARE CONNECTING TO IN DISCOVERABLE MODE”. Press the OK Key [OK]. 8.
2. Press the Right Soft Key [Options]. 4. Press the Directional Key up or down to select one of the following profiles, and then press the OK Key [VIEW]. Headset/Handsfree/Stereo AUTO PAIR HANDSFREE To set Auto Pair Handsfree On/Off: 1. From standby mode, press the OK Key [OK] to unlock the keypad, then press the OK Key [MENU], the Directional Key right twice for SETTINGS & TOOLS, then slide out the QWERTY keyboard, and press 3. Bluetooth Menu. 2. Press the Right Soft Key [Options]. 3. Press “4.
KEYPAD VOLUME 1. From standby mode, press the OK Key [OK] to unlock the keypad, then press the OK Key [MENU], the Directional Key right twice for SETTINGS & TOOLS, then slide out the QWERTY keyboard and press 4. Sounds Settings, 3. Keypad Volume. 2. Adjust the volume by pressing the Directional Key then press the OK Key [OK] to save the setting.
ERI BANNER 1. From standby mode, press the OK Key [OK] to unlock the keypad, then press the OK Key [MENU], the Directional Key right twice for SETTINGS & TOOLS, then slide out the QWERTY keyboard and press 5. Display Settings, 1. Banner, 2. ERI Banner. 2. Press the Directional Key press the OK Key [OK]. up or down to select “On/Off”, then BACKLIGHT To set the duration for backlight illumination for the Main Screen and Keypad: 1.
PHONE SETTINGS 1. From standby mode, press the OK Key [OK] to unlock the keypad, right then press the OK Key [MENU], the Directional Key twice for SETTINGS & TOOLS, then slide out the QWERTY keyboard and press 6. Phone Settings, 1. Airplane Mode. 2. Press the Directional Key press the OK Key [OK]. up or down to select “On/Off”, then SET SHORTCUTS Your phone offers you the option of assigning a shortcut key (Directional Key left, right, up, and down) to a favorite or often-used function.
• Tools / • Download Application Alphabet The “Download Application Alphabet” option only appears when you have downloaded Brew Applications. RESETTING THE DIRECTIONAL KEY SETTINGS 1. From standby mode, press the OK Key [OK] to unlock the keypad, then press the OK Key [MENU], the Directional Key right twice for SETTINGS & TOOLS, then slide out the QWERTY keyboard and press 6. Phone Settings, 2. Set Shortcuts, 2. Set Directional Keys. 2.
5. If “Phone Only” is selected, enter the new four-digit code in the “Enter New Code” field. Enter the new four-digit code again in the “Re-enter New Code” field. SECURITY The Security menu allows you to electronically secure the phone. The default lock code is the last 4 digits of your Mobile Telephone Number. 1. From standby mode, press the OK Key [OK] to unlock the keypad, then press the OK Key [MENU], the Directional Key right twice for SETTINGS & TOOLS, then slide out the QWERTY keyboard and press 6.
RESTORE PHONE 1. From standby mode, press the OK Key [OK] to unlock the keypad, then press the OK Key [MENU], the Directional Key right twice for SETTINGS & TOOLS, then slide out the QWERTY keyboard and press 6. Phone Settings, 6. Security. 2. Enter the four-digit Lock Code, then press the OK Key [OK]. 3. Press “5. Restore Phone”. 4. After reading the warning message that appears, press the Directional Key up or down to select “Yes”, and then press the OK Key [OK]. 5.
END CALL OPTIONS 1. From standby mode, press the OK Key [OK] to unlock the keypad, then press the OK Key [MENU], the Directional Key right twice for SETTINGS & TOOLS, then slide out the QWERTY keyboard and press 7. Call Settings, 2. End Call Options. 2. Press the Directional Key up or down to select “Slide Close”, then press the OK Key [MARK]. 3. Press the Left Soft Key [Done]. To end a call, press the END Key .
DELETING AND MOVING FILES To delete files stored in Phone Memory, and to move files from Phone Memory to Card Memory: 3. Press the Directional Key up or down to select one of the following settings, and then press the OK Key [OK]. Phone Memory/Card Memory 1. From standby mode, press the OK Key [OK] to unlock the keypad, then press the OK Key [MENU], the Directional Key right twice for SETTINGS & TOOLS, then slide out the QWERTY keyboard and press 8. Memory, 2. Phone Memory. PHONE MEMORY 2.
3. Press the OK Key [OK] to return to the previous screen. 2. Select “1. Status”. MY NUMBER ICON GLOSSARY CHECK NOW To view your phone number: To view all the icons and their meanings: To check Download Server for new Software updates: 1. From standby mode, press the OK Key [OK] to unlock the keypad, right then press the OK Key [MENU], the Directional Key twice for SETTINGS & TOOLS, then slide out the QWERTY keyboard and press 9. Phone Info, 1. My Number. 1.
1. To access Voice Commands from standby mode, press the OK Key [OK] to unlock the keypad, then press the OK Key [MENU], the Directional Key right twice for SETTINGS & TOOLS, then slide out the QWERTY keyboard and press 2. Tools, 1. Voice Commands. Shortcut: In idle mode, press and hold the CLR Key menu. to access the Voice Commands 2. The phone displays the Command menu and prompts you to say the name of the command you want to use. To complete your task, simply follow the voice prompts.
PLAY 1. You will hear “Please say a command” and the Voice Commands menu will be displayed. 2. Say “Play ”. Say “Play All Songs” (to playback all songs saved in your phone.) MY VERIZON 1. You will hear “Please say a command” and the Voice Commands menu will be displayed. 2. Say “My Verizon”. 2. Press the Right Soft Key VOICE COMMANDS SETTINGS DIGIT DIAL READOUT The Digit Dial Readout setting controls if digits are read out when you type in a phone number with the keypad. 1.
5. Repeat steps 1-4. When you are finished with a full session, you will reach a screen that reads “Adaptation Complete”. 1. From standby mode, press the OK Key [OK] to unlock the keypad, then press the OK Key [MENU], the Directional Key right twice for SETTINGS & TOOLS, then slide out the QWERTY keyboard and press 2. Tools, 1. Voice Commands. 2. Press the Right Soft Key [Settings], “5. Prompts”. 3. Select “1. Mode” or “2.
START TIME Use the keypad to set a start time and press the Left Soft Key for “am/pm”. END TIME Use the keypad to set a end time and press the Left Soft Key for “am/pm”. Tools RECURRENCE Press the Directional Key left or right to set the recurrence of the event (Daily, Weekly, Monthly, Yearly). For each recurrence setting, press the Directional Key down to set the “By Count” field. For “Daily”, set the number of days.
ALARM CLOCK 1. From standby mode, press the OK Key [OK] to unlock the keypad, then press the OK Key [MENU], the Directional Key right twice for SETTINGS & TOOLS, then slide out the QWERTY keyboard and press 2. Tools, 4. Alarm Clock. 2. Press the Directional Key up or down to highlight an Alarm (1, 2, or 3), then press the OK Key [OK]. 3. The setting field will be highlighted. Press the Directional Key down to select alarm options. ALARM Press the Directional Key left or right to select “On/Off”.
3. Under “Start Date”, use the keypad to change or enter the start date down. and then press the Directional Key 5. Under “End Date”, use the keypad to change or enter the end date and then press the Directional Key down. 6. Under “End Time”, use the keypad to set a end time and press the Left Soft Key for “am/pm”. 7. To save a DST setting, press the OK Key [SAVE]. NOTEPAD Your phone includes an internal notepad that can be used to compose and store reminders and notes. To create a note: 1.
CHAPTER 5 My Verizon 1. From standby mode, press the OK Key [OK] to unlock the keypad, then press the OK Key [MENU], the Directional Key right twice for SETTINGS & TOOLS, then slide out the QWERTY keyboard, and press 1. My Verizon. Shortcut: In idle mode, press the Directional Key left to access My Verizon. MEDIA CENTER Your phone provides a unique feature -Media Center- that enables you to download ringtones, wallpapers, games and more from your network to your phone.
USING THE microSD CARD microSD The microSD card is sold separately, it does not come in-box. INSTALLING THE microSD CARD To install your microSD card: 1. With the microSD card slot opened and the gold contacts facing down, insert the microSD card into the slot. 2. Push the card in until it clicks into place. “MEMORY CARD DETECTED” will appear on the display. Close the microSD card slot.
Media Center TO ASSIGN DOWNLOADED TUNES OR TONES: 1. From standby mode, press the OK Key [OK] to unlock the keypad. Press the OK Key [MENU], the Directional Key left twice for MEDIA CENTER, then slide out the QWERTY keyboard and press 1. Music & Tones, 2. My Ringtones. To select a desired ringtone, or download a new ringtone: 2. Select the tune or tone you want to erase then press the Right Soft Key [Options]. 3. Select “1. Erase,” then select “Yes” by pressing the OK Key [OK].
Media Center RECORDING NEW SOUNDS To record a new sound: 1. From standby mode, press the OK Key [OK] to unlock the keypad, then press the OK Key [MENU], the Directional Key left twice for MEDIA CENTER, then slide out the QWERTY keyboard and press 1. Music & Tones, 4. My Sounds. 2. Press “1. Record New”. 92 Chapter 5 − Media Center 080625_TXT8010_ELVIS_M_EN_REV00.indd 92-93 3. Press the OK Key [OK] to begin recording. When done, press the OK Key [STOP] to finish recording.
Media Center MY PICTURES GET NEW PICTURES To connect to MEDIA CENTER and download a variety of Pictures (images): In My Pictures you can view all the pictures you have taken, store selected images in your phone, send pictures to the Online Album, delete images and access additional picture options. 1. From standby mode, press the OK Key [OK] to unlock the keypad, left twice then press the OK Key [MENU], the Directional Key for MEDIA CENTER, then slide out the QWERTY keyboard and press 2. Pictures, 1.
Media Center ONLINE ALBUM To access Online Album: 1. From standby mode, press the OK Key [OK] to unlock the keypad, left twice then press the OK Key [MENU], the Directional Key for MEDIA CENTER, then slide out the QWERTY keyboard and press 2. Pictures, 4. Online Album. The browser launches, and the Online Album sign-on screen appears. 2. Follow the on-screen prompts. GAMES MOBILE WEB DOWNLOADING NEW GAMES To download games and applications from the MEDIA CENTER server: 1.
Media Center ADVANCED • • • • About: Displays the name of the supplier of the Browser and the Browser SW version. Refresh: Allows the user to reload the current URL. History: Displays the previous 20 number of visited URLs, where X=20. Encryption: Displays the following list of options. 1. Authentication: Gives the option to turn Authentication Caching ON or OFF. 2. Root Certificate: Shows the root security keys for TLS. 3. Current Certificate: Shows the current site security key for TLS (if applicable).
MESSAGING MENU Note This chapter addresses Voicemail, TXT, Picture, Voice Messaging functions including: When a new message arrives New message Inbox Sent Drafts Voicemail Mobile IM Email Chat Erase all Settings 100 MESSAGING MENU CHAPTER 6 Chapter 5 − Media Center 080625_TXT8010_ELVIS_M_EN_REV00.indd 100-101 2008.6.
WHEN A NEW MESSAGE ARRIVES 2. To display the message, select “View Now” and then press the OK Key [OK]. NEW MESSAGE TXT MESSAGE 1. From standby mode, press the OK Key [OK] to unlock the keypad, then press the Left Soft Key [Message], then slide out the QWERTY keyboard, and press 1. New Message. 2. Press “1. TXT Message”. 3. Under “To”, input the phone number and then press the OK Key [OK]. • By pressing the Right Soft Key [Add], you can choose from the following: 1.
1. From standby mode, press the OK Key [OK] to unlock the keypad, then press the Left Soft Key [Message], then slide out the QWERTY keyboard, and press 1. New Message. 2. Press “3. Voice Message”. 3. To record a new Voice Memo, press the OK Key [OK] to start recording voice memo. Press the OK Key [STOP] to stop recording voice memo and save it. 4. Under “To”, input the phone number and then press the OK Key [OK], then press the Directional Key down.
• • • • • • • • [Options] to Play Again: Select to play sent MMS message. Forward: Select to forward the TXT or Picture/Voice message. Erase: To erase a sent message. Lock/Unlock: Select to lock or unlock the TXT, Picture or Voice message. Save Quick Text: Select to save sent text msg to “Quick Text”. Add To Contacts: Select to save number to contacts. View Name Card: To view include name card with in message. Message Info: Select to show received TXT/Picture/Voice message information. DRAFTS 1.
2. Select “Mobile Email” or “Mobile Web Mail” with the Directional Key up or down, press the OK Key [OK]. • Mobile Email: To connect Brew Smartlink. • Mobile Web Mail: To connect WAP Browser. 3. Browser launches. 4. Press the Directional Key up or down to select your Email provider, and then press the OK Key [OK]. 5. To send an Email, follow the on-screen prompts and functions. CHAT 4. To chat with Internet Messenger users, follow the on-screen prompts and functions.
SIGNATURE Create a signature that can be automatically inserted at the end of all TXT, Picture and Voice messages. Messaging 1. Select a message from the list then press the OK Key [EDIT]. 2. To add a new Quick Text, press the Right Soft key [New]. Enter the new text then press the OK Key [SAVE]. 3. To erase a saved Quick Text, press the Left Soft Key Press the OK Key [OK] to select “Yes”. [Erase]. VOICEMAIL# 1.
SAFETY INFORMATION FOR WIRELESS HANDHELD PHONES READ THIS INFORMATION BEFORE USING YOUR HANDHELD PORTABLE CELLULAR TELEPHONE Your wireless handheld portable telephone is a low power radio transmitter and receiver. When it is ON, it receives and also sends out radio frequency (RF) signals. In August 1996, the Federal Communications Commissions (FCC) adopted RF exposure guidelines with safety levels for handheld wireless phones.
obey all signs and instructions. Sparks in such areas could cause an explosion or fire resulting in bodily injury or even death. POSTED FACILITIES Areas with a potentially explosive atmosphere are often, but not always, clearly marked.
Before a phone model is available for sale to the public, it must be tested and certified to the FCC that it does not exceed the limit established by the government adopted requirement for safe exposure. The tests are performed in positions and locations (e.g., at the ear and worn on the body) as required by the FCC for each model. The highest SAR value for this model phone when tested for use at the ear is 1.19 W/Kg and when worn on the body, as described in this user guide, is 0.694 W/Kg.
FDA CONSUMER UPDATE 1. Do wireless phones pose a health hazard? The available scientific evidence does not show that any health problems are associated with using wireless phones. There is no proof, however, that wireless phones are absolutely safe. Wireless phones emit low levels of radiofrequency energy (RF) in the microwave range while being used. They also emit very low levels of RF when in the stand-by mode.
Safety 6. What is FDA doing to find out more about the possible health effects of wireless phone RF? FDA is working with the U.S. National Toxicology Program and with groups of investigators around the world to ensure that high priority animal studies are conducted to address important questions about the effects of exposure to radiofrequency energy (RF). FDA has been a leading participant in the World Health Organization International Electromagnetic Fields (EMF) Project since its inception in 1996.
Safety • Federal Communications Commission (FCC) RF Safety Program (http://www.fcc.gov/oet/rfsafety) • International Commission on Non-Ionizing Radiation Protection (http://www.icnirp.de) • World Health Organization (WHO) International EMF Project (http://www.who.int/emf) • National Radiological Protection Board (UK) (http://www.hpa.org.uk/radiation/) 12.
FCC COMPLIANCE INFORMATION This device complies with Part 15 of FCC Rules. Operation is subject to the following two conditions: (1) This device may not cause harmful interference, and • Consult the dealer or an experienced radio/TV technician for assistance. CAUTION: Changes or modification not expressly approved by the party responsible for Compliance could void the user’s authority to operate the equipment. Connecting of peripherals requires the use of grounded shielded signal cables.
Warranty THE EXTENT OF THE COMPANY’S LIABILITY UNDER THIS WARRANTY IS LIMITED TO THE REPAIR OR REPLACEMENT PROVIDED ABOVE AND, IN NO EVENT, SHALL THE COMPANY’S LAIBILITY EXCEED THE PURCHASE PRICE PAID BY PURCHASER FOR THE PRODUCT. ANY IMPLIED WARRANTIES, INCLUDING ANY IMPLIED WARRANTY OF MERCHANTABILITY OR FITNESS FOR A PARTICULAR PURPOSE, SHALL BE LIMITED TO THE DURATION OF THIS WRITTEN WARRANTY.
Index List N NAMES TO BE DIALED 25 NOTEPAD 84 128 Chapter 7 − Safety and Warranty 080625_TXT8010_ELVIS_M_EN_REV00.