
Security Camera User Manual


VerteX RTH Series H.8 and H.16 Series
65
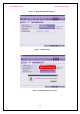
[Figure 5-57. Firmware Upgrade Progressing Window]
※ Downgrading to a previous version is not supported.
※ It is recommended that the DVR ID should be the same as the remote controller ID.
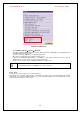
※ The upgrade information window will then appear within 15 seconds.
Read the information and select {Yes} to start the upgrade gradually. Select {No} to return to {System}
mode.
After the update is completed, the system will be rebooted.
The system will automatically start. Upgrade is then completed.
Move to {Status} Æ {Product Information} Æ {Software Version} to check the version.
※All setup data are a fixed value in {Menu}Æ{Setup}Æ{System}Æ{6.
Upgrade}Æ{Setup}
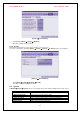
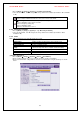
6-7-8. Factory Setup
Move to {Menu} Æ {Setup} Æ {System} Æ {7. Factory Setup}.
Select {Yes} when Initialization (Yes/No) Window appears.
Note that all setting data will be initialized and it goes back to Factory Default Value.
6-7-9. RS232C Port
Move to {Menu} Æ {Setup} Æ {System} Æ {8. RS232C Port}.
On the selection window, select the device using the arrow keys and the Select button.
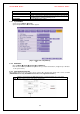
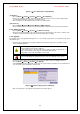
6-7-10. Error Alarm Action
Alarm is to notify occurrences such as events [Sensor, Motion and Audio] and system incidents [Video Signal
disconnected/ HDD full/ FAN fail/ HDD fail/ HDD warning] to [Alarm/ E-mail/ Relay01/ System check].
Move to {Menu} Æ {Setup} Æ {System} Æ {9. Error Alarm Action}.
Select [Alarm/E-mail/Relay01/System Check]. The user can select all by ticking as shown below.
[Figure 5-58. Error Alarm Action]
※ System Check
System Check is to pop up the System Check Window on the monitoring screen. It indicates [Buzzer /