
Product Manual


6
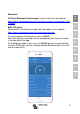
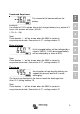
Setup wizard
(alternatively, use the VictronConnect app and smart phone):
1.1 Battery capacity (preferably use the 20 hour capacity rating (C
20))
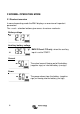
a) After inserting the fuse the display will show the scrolling text
If this text is not shown, press SETUP and SELECT simultaneously during 3
seconds to restore factory settings or go to section 4 for full setup details
(setting 64, Lock setup, must be OFF to restore factory settings, see
section 4.2.5).
b) Press any button to stop scrolling and the factory default value
Ah
will appear in edit mode: the first digit will blink.
Enter the desired value with the + and – buttons.
c) Press SELECT to set the next digit in the same manner.
Repeat this procedure until the required battery capacity is displayed.
The capacity is automatically stored in non-volatile memory when the last
digit has been set by pressing SELECT. This is indicated with a short beep.
If a correction has to be made, press SELECT again and repeat the
procedure.
d) BMV-700 and 700H: press SETUP or + or – to end the setup wizard and
switch to normal operating mode.
BMV-702: press SETUP or + or – to proceed to auxiliary input setting.
1.2 Auxiliary input (BMV-702 and -712 only)
a) The display will show
scrolling.
b) Press SELECT to stop scrolling and the LCD will show:
Use the + or – key to select the required function of the auxiliary input:
for monitoring the starter battery voltage.
for monitoring the mid-point voltage of a battery bank.
for using the optional temperature sensor
Press SELECT to confirm. Confirmation is indicated with a short beep.
c) Press SETUP or + or – to end the setup wizard and switch to normal
operating mode.
The BMV is now ready for use.