
User Manual

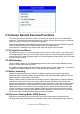


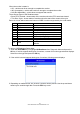


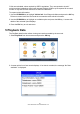
Table Of Contents
- General Notice
- Safety Precautions and Warnings
- 1 Getting Started
- 2 Diagnostic Operations
- 3 Common Special Services/Functions
- 3.1 Oil Light Service/Reset
- 3.2 ABS bleeding
- 3.3 Battery matching
- 3.4 Electronic Parking Brake (EPB) Service
- 3.5 Diesel Particulate Filter (DPF) Regeneration
- 3.6 TPS(Throttle Body Alignment)
- 3.7 Steering Angle Sensor (SAS) Calibration
- 3.8 TPMS Adaptation
- 3.9 Immobilizer
- 3.10 Injector Coding
- 3.11 Gear Learning
- 3.12 Suspension Match
- 3.13 Sunroof Initialization
- 3.14 Gearbox Match
- 3.15 Ajuste Fuel
- 3.16 Odometer Calibration
- 3.17 AFS (Adaptive Front Lighting System)
- 4 OBDII/EOBD Diagnostics
- 5 Playback Data
- 6. Software Update and Printing
iAuto Series Scan Tool User Manual V1.0
22
●
Custom Data
●
Unit of measure (Please refer to Chapter 1.5.2)
NOTE
There are two types of trigger methods used.
●
Manual Trigger---triggers recording whenever operators press the OK key.
●
DTC trigger--- automatically triggers recording when a code is detected by vehicle. DTC Trigger
is not available on all vehicles. Some vehicles need to be driven for a long period of time to store
a code after a drivability fault occurs. If DTC trigger is selected to make a recording, there might
not be drastic change in the data before and after trigger.
To record data:
1. Select Record data from the menu and press the OK key.
2. Refer to View Data to set up Complete Data Set or Customer Data Set to record.
3. If the recording is to be overwritten, selected Yes; if data is not to be overwritten, pick No to
return to Select Memory screen and choose another one.
4. If Manual Trigger is selected, following screen displays:
5. If DTC Trigger is picked, following screen displays:
6. Press the OK key to start recording or wait codes to trigger.
NOTE
Different vehicles communicate at different speeds and support a different number of PIDs.
Therefore, the maximum number of frames that can be recorded varies.The code reader keeps
recording data until
●the memory is full.
● the operator presses the ESC key.
7. After recording, the code reader displays a prompt to Playback.
8. Select YES to view recorded data; pick NO or press the ESC key to return to Record Data.
4.3.3 Playback Data
The Playback Data is used to playback recorded PID data.
1. Scroll with the up and down arrow key to select Playback Data from the Menu.
2. Use the UP/DOWN key to select a memory area that is marked with an asterisk (*) and press
the OK to confirm.
4.4 View Freeze Frame
Freeze Frame menu displays freeze frame data, a snapshot of critical vehicle operating
conditions automatically recorded by the on-board computer at the time of the DTC set. It is a
good function to help determine what caused the fault.
1. Select View Freeze Frame from the Diagnostic Menu. Details of freeze frame data displays.
2. Use the up and down arrow keys to scroll through data to select lines, and left and right arrow
keys to scroll back and forth through different screens of data. If no freeze frame detected, the
message “No freeze frame data stored!” is displayed.
3. Use the ESC key to return to Diagnostic Menu.
4.5 Read I/M Readiness Status Data
I/M Readiness option allows to view a snapshot of the operations for the emission system on
OBDII/EOBD vehicles.
I/M Readiness is a useful function used to check if all monitors are OK or N/A. The vehicle’s
computer performs tests on the emission system during normal driving conditions. After a specific
amount of drive time (each monitor has specific driving conditions and time required), the
computer’s monitors decide if the vehicles emission system is working correctly.