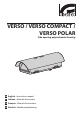
VERSO / VERSO COMPACT / VERSO POLAR Side opening polycarbonate housing EN English - Instructions manual IT Italiano - Manuale di istruzioni FR Français - Manuel d'instructions DE Deutsch - Bedienungslanleitung
VERSO / VERSO COMPACT / VERSO POLAR Side opening polycarbonate housing EN English - Instructions manual
Contents ENGLISH 1.1 Typographical conventions................................................................................................................................. 5 2 Notes on copyright and information on trademarks................................................. 5 3 Safety rules.................................................................................................................... 5 4 Identification.................................................................................
EN - English - Instructions manual 9.3.3 Electrical...................................................................................................................................................................................13 9.3.4 Environment...........................................................................................................................................................................13 9.3.5 Certifications...................................................................
3 Safety rules Before installing and using this unit, please read this manual carefully. Be sure to keep it handy for later reference. hh 1.1 Typographical conventions DANGER! High level hazard. Risk of electric shock. Disconnect the power supply before proceeding with any operation, unless indicated otherwise. gg WARNING! Medium level hazard. This operation is very important for the system to function properly. Please read the procedure described very carefully and carry it out as instructed.
EN - English - Instructions manual 4 Identification 4.1 Product description and type designation Innovative and stylish housing, entirely built in technopolymer, and designed to simplify installation and servicing, the VERSO/VERSO COMPACT ensures total protection against all environmental conditions. Due to opening from its side, accessibility to the camera, lens and all its connections is made far easier.
6 Installing and assembling 01 03 EN - English - Instructions manual 02 Only specialised personnel should be allowed to install and assemble the device. hh The housing where this device is installed must be powered by 12Vdc or 24Vac voltage. hh Turn off the power before performing any operations. hh 6.1 Installation 6.1.1 How to open the housing To open the housing, loosen the 2 screws on the side, turn the cover and the upper half of the body about the opening hinge axis. Fig.
EN - English - Instructions manual 6.1.3.2 Attaching the housing The housing must be attached using suitable means, such as brackets or supports. The fastening means must guarantee the mechanical seal when a force equal to at least four times the weight of the device is applied. Insert the 2-pin connector at the end of the cable into the correspondent support circuit socket, identified by J2 HEATER (Fig. 05, page 8 and Fig. 06, page 8). J2 - Heater J6 - Blower 6.1.
6.1.5 How to install the camera power supply When the circuit is powered by an external source care must be taken to the type of voltage used and, depending on requirements, to the correct power supply kit. When installing the optional camera power supply it is not necessary to remove any previously installed component. hh This chapter describes how to install the camera power supply option into the housing. There are 2 types of camera power supply depending on requirements.
Install the camera power supply supplied with the blower kit as described in the chapter "6.1.5 How to install the camera power supply", page 9. To guarantee the IP44 weatherproof, install the housing on the support following the inclination limits as shown in the picture. Close the housing. 6.1.6.
7 Maintaining and cleaning 6.1.8 Configuration for low temperatures 7.1 Window and plastic cover cleaning (PC) We suggest to use neutral soap diluted with water or specific products for lens cleaning applied with a soft cloth. Avoid ethyl alcohol, solvents, hydrogenated hydrocarbide, strong acid and alkali. Such products may irreparably damage the surface. hh 8 Disposal of waste materials Fig. 14 The version with triple heating is supplied completely wired directly by the manufacturer.
9.1.2 Mechanical EN - English - Instructions manual 3xM16 cable glands Polycarbonate window (WxH): 105x64mm (4.1x2.5in) Internal usable area (WxH): 70x70mm (2.7x2.7in) Internal usable length with and without accessories: 270mm (10.6in) 9.2 VERSO COMPACT 9.2.1 General Entirely constructed from technopolymer (polycarbonate) Sunshield in ABS Unit weight: 1.5kg / 3.3lb RAL9002 Colour 9.1.
9.3 VERSO POLAR 9.3.4 Environment Indoor / Outdoor 9.3.1 General Sunshield in ABS Very good resistance to the following chemical agents: basics, alcohols, gasses, hydrocarbon RAL9002 Colour Good resistance: organic and inorganic acids, oils Stainless steel external screws Low resistance: solvents Supplied with instruction manual, desiccant bag, accessories for camera and lens mounting 9.3.5 Certifications 9.3.
63 USABLE AREA USABLE AREA A-A 400 63 210 B-B A 94 106 B 18 B A 15 94 135 Fig. 17 270 70 USABLE AREA USABLE AREA A-A 466 70 VERSO COMPACT B-B A B 156 Fig. 18 VERSO POLAR VIDEOTEC S.p.A. www.videotec.
VERSO / VERSO COMPACT / VERSO POLAR Custodia in policarbonato ad apertura laterale IT Italiano - Manuale di istruzioni
Sommario ITALIANO 1 Informazioni sul presente manuale............................................................................. 5 1.1 Convenzioni tipografiche..................................................................................................................................... 5 4.1 Descrizione e designazione del prodotto...................................................................................................... 6 4.2 Marcatura del prodotto.......................................
9.3.3 Elettrico.....................................................................................................................................................................................13 9.3.4 Ambiente.................................................................................................................................................................................13 9.3.5 Certificazioni...................................................................................................
1 Informazioni sul presente manuale 1.1 Convenzioni tipografiche PERICOLO! Pericolosità elevata. Rischio di scosse elettriche. Togliere l'alimentazione prima di procedere con le operazioni, salvo diversa indicazione. gg ATTENZIONE! Pericolosità media. L'operazione è molto importante per il corretto funzionamento del sistema. Si prega di leggere attentamente la procedura indicata e di eseguirla secondo le modalità previste. hh INFO Descrizione delle caratteristiche del sistema.
4 Identificazione IT - Italiano - Manuale di istruzioni 4.1 Descrizione e designazione del prodotto Custodia moderna ed innovativa, progettata per semplificare l’installazione ed il servizio, VERSO/ VERSO COMPACT garantisce una protezione totale a tutte le condizioni ambientali. La sua apertura laterale facilita ampiamente l’accessibilità alla telecamera, alle ottiche ed a tutte le sue connessioni.
6 Installazione e assemblaggio 01 03 02 L'installazione e l'assemblaggio vanno eseguiti solo da personale specializzato. hh Prima di eseguire qualsiasi operazione ricordarsi di togliere tensione al prodotto. hh 6.1 Installazione 6.1.1 Apertura della custodia Per l’apertura della custodia, svitare le 2 viti poste sul fianco, far ruotare tettuccio e corpo superiore attorno all’asse delle cerniere di apertura. Fig. 02 Riposizionare la slitta interna fissando le viti precedentemente allentate.
IT - Italiano - Manuale di istruzioni 6.1.3.2 Fissaggio della custodia La custodia deve essere fissata con mezzi adeguati mediante staffe o supporti. I mezzi di fissaggio devono garantire la tenuta meccanica applicando una forza pari almeno a quattro volte il peso complessivo dell’ apparecchiatura. Inserire il connettore a 2 poli posto all’estremità del cavo nel suo corrispondente sul circuito di appoggio, indicato con la scritta J2 HEATER (Fig. 05, pagina 8 e Fig. 06, pagina 8).
6.1.5 Installazione dell’alimentatore per telecamera Alimentando il circuito da una sorgente esterna è necessario prestare attenzione al tipo di tensione utilizzata e a seconda delle esigenze, il kit di alimentazione corretto. Per montare l’opzione alimentatore non è necessario rimuovere alcun componente preinstallato. hh Non applicabile nelle custodie munite di sistema per il raffreddamento installato. hh Fig. 07 Fig. 08 IN 100-240Vac - OUT 12Vdc. IN 230Vac - OUT 24Vac.
6.1.6.1 Tensione di alimentazione custodia 100-240Vac Chiudere la custodia. 6.1.6.2 Tensione d’alimentazione 12Vdc o 24Vac 45° 0˚ In questo caso viene fornito con il kit di ventilazione un connettore dotato di opportuni collegamenti per rendere compatibile il circuito di appoggio al funzionamento con la tensione di alimentazione presente. Questo connettore deve essere inserito nel suo corrispondente indicato con J5, sul circuito in dotazione.
6.1.8 Configurazione per basse temperature Oltre alle custodia standard esiste una versione con triplo riscaldamento idonea al funzionamento a basse temperature. 7 Manutenzione e pulizia 7.1 Pulizia del vetro e delle parti in plastica (PC) IT - Italiano - Manuale di istruzioni Si consigliano saponi neutri diluiti con acqua o prodotti specifici per la pulizia delle lenti degli occhiali con l’utilizzo di un panno morbido. Sono da evitare alcool etilico,solventi, idrocarburi idrogenati, acidi forti e alcali.
9.1.2 Meccanica 3 pressacavi M16 Finestra policarbonato (WxH): 105x64mm Dimensioni utili interne (WxH): 70x70mm IT - Italiano - Manuale di istruzioni Lunghezza utile interna con e senza accessori: 270mm Peso unitario: 1.5kg 9.1.
9.3 VERSO POLAR 9.3.4 Ambiente Interno / Esterno 9.3.1 Generale Temperatura d’esercizio con riscaldamento: -55°C / +60°C Costruita in resistente tecnopolimero (policarbonato) Resistenza molto buona ai seguenti agenti chimici: basi, alcoli, gas, idrocarburi Colore RAL9002 Resistenza buona: acidi organici e inorganici, olii Viteria esterna in acciaio Inox Resistenza bassa: solventi Fornita con manuale di istruzioni, sacchetto sale, accessori montaggio telecamera e obiettivo 9.3.5 Certificazioni 9.
63 AREA UTILE AREA UTILE A-A 400 63 210 B-B A 94 106 B 18 B A 15 94 135 Fig. 17 270 70 AREA UTILE AREA UTILE A-A 466 B-B A B 156 Fig. 18 VERSO POLAR VIDEOTEC S.p.A. www.videotec.
VERSO / VERSO COMPACT / VERSO POLAR Caisson en polycarbonate à ouverture latérale FR Français - Manuel d'instructions
Sommaire FRANÇAIS 1 À propos de ce mode d’emploi..................................................................................... 5 1.1 Conventions typographiques............................................................................................................................. 5 4.1 Description et désignation du produit............................................................................................................ 6 4.2 Marquage du produit.........................................
9.3.3 Électrique.................................................................................................................................................................................13 9.3.4 Environnement......................................................................................................................................................................13 9.3.5 Certifications............................................................................................................
1 À propos de ce mode d’emploi Avant d’installer et d’utiliser cet appareil, veuillez lire attentivement ce mode d’emploi. Conservez-le à portée de main pour pouvoir vous y reporter en cas de besoin. DANGER! Risque élevé. Risque de choc électrique. Sauf indication contraire, sectionner l’alimentation avant de procéder à toute opération. gg ATTENTION! Risque moyen.
4 Identification FR - Français - Manuel d'instructions 4.1 Description et désignation du produit Caisson moderne et novateur, étudié pour simplifier l’installation et la maintenance, VERSO/ VERSO COMPACT assure une protection maximum dans les environnements les plus difficiles. Son ouverture latérale facilite l’accès et la mise en place de la caméra, des optiques et des raccordements.
6 Installation et assemblage 01 03 02 L’installation et l’assemblage doivent exclusivement être effectués par un personnel spécialisé. hh Fig. 02 Avant d’effectuer toute opération, il est indispensable de couper l'alimentation. hh 6.1 Installation 6.1.1 Ouverture du caisson Pour l’ouverture du caisson, dévisser les 2 vis placées sur le côté, faire tourner le toit pare-soleil et le corps supérieur autour de l’axe des charnières d’ouverture.
6.1.3.2 Fixation du caisson Le caisson doit être fixé par des moyens adéquats à l'aide d'étriers ou de supports. Les moyens de fixation doivent garantir l'étanchéité mécanique et appliquer une force égale au moins à quatre fois le poids total de l’appareil. Insérer le connecteur à 2 pôles placé en bout de câble dans son emplacement sur le circuit d’appui, indiqué par J2 HEATER (Fig. 05, page 8 et Fig. 06, page 8). J2 - Chauffage J6 - Ventilateur FR - Français - Manuel d'instructions 6.1.
6.1.5 Installation de l’alimentateur pour caméra En alimentant le circuit à partir d’une source externe, il faut faire attention au type de tension utilisée et, selon les exigences, au bon kit d’alimentation. Pour monter l’option alimentateur, il n’est nécessaire d’enlever aucun composant déjà installé. hh Non applicable pour les caissons équipés de système pour le refroidissement installé. hh Fig. 07 Fig. 08 IN 100-240Vac - OUT 12Vdc. IN 230Vac - OUT 24Vac.
6.1.6.1 Alimentation 100-240Vac: Installer l’alimentateur fourni avec le kit de ventilation comme cela est décrit dans chapitre "6.1.5 Installation de l’alimentateur pour caméra", page 9. Pour garantir un degré de protection IP44, installer le caisson au support en respectant les limites d'inclinaison selon la figure. Fermer le caisson.
6.1.8 Configuration pour basses températures Outre le caisson standard, une version à triple chauffage est prévue pour un fonctionnement à basses températures. 7 Entretien et nettoyage 7.1 Entretiens de la vitre et des parties en plastique (PC) On doit éviter alcool éthylique, solvants, hydrocarbures hydro-génés, acides forts et alcali. L’emploi de ce type de produits abîme d’une façon irréparable la surface traitée. hh 8 Élimination des déchets Fig.
9.1.2 Mécanique 3 presse-étoupes M16 Fenêtre en polycarbonate (WxH): 105x64mm Surface intérieure utile (WxH): 70x70mm Longueur utile du caisson avec accessoires: 270mm Poids net: 1.5kg FR - Français - Manuel d'instructions 9.1.3 Électrique Chauffage Ton 15°C±3°C Toff 22°C±3°C -- IN 12Vdc/24Vac, consommation 20W max -- IN 115/230Vac, consommation 40W max Ventilateur à cycle continu pour assistance chauffage 9.2 VERSO COMPACT 9.2.
9.3 VERSO POLAR 9.3.4 Environnement Intérieur / Extérieur 9.3.
63 SURFACE UTILE SURFACE UTILE A-A 400 63 210 B-B A 94 106 B 18 B A 15 94 135 Fig. 17 270 70 SURFACE UTILE SURFACE UTILE A-A 466 70 VERSO COMPACT B-B A B 156 Fig. 18 VERSO POLAR VIDEOTEC S.p.A. www.videotec.
VERSO / VERSO COMPACT / VERSO POLAR Polykarbonat- Gehäuse mit Seitenöffnung DE Deutsch - Bedienungslanleitung
Inhaltsverzeichnis DEUTSCH 1 Allgemeines................................................................................................................... 5 1.1 Schreibweisen.......................................................................................................................................................... 5 2 Anmerkungen zum Copyright und Informationen zu den Handelsmarken............. 5 3 Sicherheitsnormen.............................................................................
9.3.3 Elektrik.......................................................................................................................................................................................13 9.3.4 Umgebung..............................................................................................................................................................................13 9.3.5 Zertifizierungen...................................................................................................
1 Allgemeines 3 Sicherheitsnormen Lesen Sie bitte vor dem Installieren und dem Verwenden dieses Gerätes die Bedienungsanleitung sorgfältig durch. Bewahren Sie sie zum späteren Nachschlagen auf. hh 1.1 Schreibweisen ACHTUNG! Mittlere Gefährdung. Der genannte Vorgang hat große Bedeutung für den einwandfreien Betrieb des Systems: es wird gebeten, sich die Verfahrensweise anzulesen und zu befolgen. hh ANMERKUNG Beschreibung der Systemmerkmale.
4 Identifizierung 4.1 Beschreibung und Bezeichnung des Produktes DE - Deutsch - Bedienungslanleitung Als modernes und innovatives Gehäuse, das zur Vereinfachung von Installation und Service konzipiert wurde, bietet VERSO/VERSO COMPACT totalen Wetterschutz. Seine Seitenöffnung erleichtert erheblich den Zugriff auf die Kamera, die Optiken und sämtliche Anschlüsse.
6 Installation und Zusammenbau 01 03 02 Installation und Zusammenbau sind Fachleuten vorbehalten. hh Die mit dieser Einrichtung ausgestatteten Gehäuse-versionen können nur mit Spannungswerten von 12Vdc oder 24Vac versorgt werden. hh 6.1 Installation 6.1.1 Öffnung des Schutzgehäuses Zur Öffnung des Gehäuses die beiden an der Flanke befindlichen Schrauben abdrehen, nun die Haube und den oberen Korpus um die Achse der Öffnungsscharniere drehen.
6.1.3.2 Befestigung des Gehäuses Das Gehäuse muss mit geeigneten Mitteln über Bügel oder Halterungen befestigt werden. Die Befestigungsmittel müssen die mechanische Festigkeit beim Anlegen von mindestens dem vierfachen Gesamtgewicht des Gerätes garantieren. Setzen Sie den 2- poligen Stecker am Kabelende an die vorgesehene Stelle der Trägerschaltung, gekennzeichnet durch die Aufschrift J2, HEATER (Fig. 05, Seite 8 und Fig. 06, Seite 8). J2 - Heizung J6 - Lüfter DE - Deutsch - Bedienungslanleitung 6.1.
6.1.5 Installation des Netzteil für Kamera Wenn der Schaltkreis von einer externen Energiequelle gespeist wird, muß auf die Versorgungsspannung geachtet werden. Verwenden Sie das für den Einzelfall geeignete Netzgerät. Für den Einbau des Zusatzspeisers braucht keine vorinstallierte Kom-ponente entfernt zu werden. hh Nicht anwendbar in Gehäusen mit installiertem Kühlsystem hh Fig. 07 6.1.
6.1.6.1 Betriebsspannung 100-240Vac Installieren Sie das mit dem Belüftungs- Kit gelieferte Netzteil, wie im Kapitel "6.1.5 Installation des Netzteil für Kamera", Seite 9. Das Gehäuse auf der Halterung gemäß den Neigungsbegrenzungen des Bildes installieren, um den IP44- Schutzgrad zu garantieren. Das Schutzgehäuse schließen.
6.1.8 Niedertemperaturausführung Neben dem Standardgehäuse gibt es eine für geringe Temperaturen ausgelegte Version mit dreifacher Heizleistung. 7 Wartung und Reinigung 7.1 Reinigung des Glases und der Kunststoffteile (PC) Es werden empfohlen verwässerte neutrale Seifen oder spezifische Produkte zur Reinigung der Brillenlinsen zusammen mit einem weichen Tuch. Zu vermeiden sind Äthylalkohol, Lösungsmittel, hydrierte Kohlenwasserstoffe, starke Säuren und Alkali.
9.1.2 Mechanik 3xM16-Kabelschellen Polykarbonatfenster (WxH): 105x64mm Innere Nutzabmessungen (WxH): 70x70mm Nutzlänge des Gehäuses mit oder ohne Zubehör: 270mm Einheitsgewicht: 1.5kg 9.1.3 Elektrik 9.2.
9.3 VERSO POLAR 9.3.4 Umgebung Für innere / äußere Installationen 9.3.
63 NUTZFLÄCHE NUTZFLÄCHE A-A 400 63 210 B-B A 94 106 B 18 B A 15 94 135 Fig. 17 270 70 NUTZFLÄCHE NUTZFLÄCHE A-A 466 70 VERSO COMPACT B-B A B 156 Fig. 18 VERSO POLAR VIDEOTEC S.p.A. www.videotec.
VIDEOTEC S.p.A. www.videotec.