User's Guide Guide de l'utilisateur Bedienungsanleitung Manual de instrucciones ® ViewSonic ViewSonic G773
User’s Guide ViewSonic G773 Color Monitor with Plug & Play 17" (16" Diagonal Viewable) ViewSonic® Corporation
Copyright © ViewSonic® Corporation, 1997. All rights reserved. IBM XT, AT, 386, 486, and PS/2 are registered trademarks and/or trademarks of International Business Machines Corporation. Pentium is a trademark of Intel Corporation. Macintosh and Power Macintosh are registered trademarks of Apple Computer, Inc. Windows is a registered trademark of Microsoft Corporation. ViewSonic, OnView, ViewMeter, ViewMatch, and Opti-Green are registered trademarks of ViewSonic Corporation.
LIMITED WARRANTY VIEWSONIC G773 MONITORS What the warranty covers: ViewSonic® warrants its products to be free from defects in material and workmanship during the warranty period. If a product proves to be defective in material or workmanship during the warranty period, ViewSonic will at its sole option repair or replace the product with a like product. Replacement product or parts may include remanufactured or refurbished parts or components.
Safety Guidelines Caution: Use a power cable that is properly grounded. Always use the AC cords listed below for each area: E N G L I S H USA . . . . . . . . . . . . . . . . . . . . . . . . Canada . . . . . . . . . . . . . . . . . . . . . Germany . . . . . . . . . . . . . . . . . . . . Switzerland . . . . . . . . . . . . . . . . . . Britain . . . . . . . . . . . . . . . . . . . . . . . Japan . . . . . . . . . . . . . . . . . . . . . . .
FCC Information This equipment has been tested and found to comply with the limits for a Class B digital device, pursuant to part 15 of the FCC Rules. These limits are designed to provide reasonable protection against harmful interference in a residential installation. This equipment generates, uses, and can radiate radio frequency energy, and if not installed and used in accordance with the instructions, may cause harmful interference to radio communications.
E N G L I S H v ViewSonic G773
CONTENTS Warranty Information . . . . . . . . . . . . . . . . . . . . . . . . . . . . . . . . . . . . ii Safety Guidelines . . . . . . . . . . . . . . . . . . . . . . . . . . . . . . . . . . . . . . . iii FCC Information . . . . . . . . . . . . . . . . . . . . . . . . . . . . . . . . . . . . . . . . iv 1. Introduction E N G L I S H Package Contents . . . . . . . . . . . . . . . . . . . . . . . . . . . . . . . . . . . . . . . . 3 Features . . . . . . . . . . . . . . . . . . . . . . . . . . . . . . . . . .
E N G L I S H 2 Contents ViewSonic G773
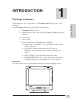
INTRODUCTION Package Contents 1 Congratulations on your purchase of a ViewSonic G773 high quality color monitor! Your ViewSonic G773 package includes the following: ● ViewSonic G773 monitor ● Attached video cable with 15 pin high density (HD) mini D-sub connector ● Power cord ● User’s guide ● Software diskette or CD-ROM which includes: ® ® Opti-Green for Windows 3.1x and DOS (monitor power saving software). ® ViewSonic monitor installation file (VS*.inf) for Windows® 95 (required for Plug & Play.
Features Superior Image ... E N G L I S H ● SuperClearTM screen treatment refracts light away from the user while maintaining the highest quality display image. ● Microprocessor-based controls save your adjustments for each video mode. There is no need to make adjustments every time you use your computer. Ergonomic Design ... ● Anti-glare and anti-static coating reduces eye strain. ● Tilt and swivel base allows 180o rotation horizontally and 20o vertically for greater user comfort.
System Flexibility ... ● Equipped with DDC1TM and DDC2BTM for Plug & Play compatibility. ● Monitor is compatible with VGA, SVGA, VESA, and high resolution video modes up to 1280 (H) x 1024 (V). ● Monitor may be used with IBM® or compatible PC's and Power Macintosh®*. ● Automatic universal power supply is built in permitting AC power input of 90 to 132V and 180 to 264V at 50 or 60 Hertz. E N G L I S H Environmentally Friendly ...
Specifications CRT E N G L I S H Type 17" (16.0" viewable screen diagonal), 0.26mm dot pitch with MicrofilterTM, 90° deflection Phosphor Glass surface RGB, P22, medium-short persistence SuperClearTM, anti-glare, anti-static Standard light transmission rate = 42% Input Signal Video Sync RGB analog (0.
Specifications, continued Misconvergence Display Area 0.30mm (max) at center 0.40mm (max) at corner Factory setting Large scan 300mm (H) x 225mm (V) typical 330mm (H) x 240mm (V) Operating Conditions Temperature Humidity Altitude 5°F to 95°F (10°C to 40°C) 5% to 90% (no condensation) To 10,000 feet Storage Conditions Temperature Humidity Altitude -40°F to +149°F (-40°C to +65°C) 10% to 90% (no condensation) To 40,000 feet Dimensions Physical 370mm (W) x 374mm (H) x 387mm (D) 14.6" (W) x 14.
Dimensions 370mm Width 370 mm (14.6") Height 308 mm (12.1") (without base) E N G L I S H Screen (diagonal viewable) 406mm 308mm Front View 406 mm (16.0") Side View Depth 387 mm (15.2") Height (with base) 374 mm (14.7") Base 287mm (11.
2 INSTALLATION Power Up Look for the serial number on the back of the monitor. Please write number in the space provided (page i, For your records) in front of the user’s guide. E N G L I S H Read the user's guide thoroughly before installing the monitor. Before connecting the monitor, be sure the computer is turned off. Is your computer an IBM® or compatible? No Macintosh users, see Chapter 4 for a telephone number in your area to get a ViewSonic® Macintosh® adapter (part No. VMA-1).
Removing/Replacing the Monitor Base If you want your monitor to rest flat on top of your desk or computer, you can remove the base. If necesary, you can easily replace it again at a later time. Place the monitor upside down on soft material, such as a folded towel. E N G L I S H Removing the Base With the front of the monitor facing you, push the catch and gently pull the base toward the front of the monitor until it releases.
3 OPERATION User Controls • Scrolls down Main Menu, highlighting control to be adjusted • Decreases value of selected control • Shortcut to Contrast and Brightness adjustment screens E N G L I S H • Scrolls up Main Menu, highlighting control to be adjusted • Increases value of selected control • Shortcut to Contrast and Brightness adjustment screens Front Control Panel ® • Displays OnView Main Menu • Exits adjustment screen and saves adjustments • Press once to display adjustment screen • (For some c
OnView® Main Menu E N G L I S H Examples of OnView Adjustment Screens CONTRAST 50 E X I T: 1 B R I G H T N E S S: 2 Notice that these screens are also an example of adjustment controls that are grouped in pairs. Press button [2] to toggle between them. Press button [1] to return to the Main Menu. Press button [1] again to clear the screen.
CONTRAST adjusts foreground white level of screen image. ▼ decreases contrast, ▲ increases contrast. BRIGHTNESS adjusts background black level of screen image. ▼ decreases brightness, ▲ increases brightness. HORIZONTAL SIZE adjusts the width of screen image. ▼ decreases width of screen image, ▲ increases width of image. E N G L I S H HORIZONTAL POSITION moves screen image left or right. ▼ moves screen image to left, ▲ moves screen image to right. VERTICAL SIZE adjusts height of screen image.
VIEWMATCH® COLOR provides three color adjustment modes: 9300K, 6500K and User Press button [2] to select color adjustment mode Adds blue to screen image for cooler white (used in most office settings with fluorescent lighting). Adds red to screen image for warmer white and richer, more vibrant red. E N G L I S H Individual adjustments for red (R), green (G), and blue (B) to meet personal preference. 1 To select color (R, G, or B) press button [2]. 2 To adjust selected color, press ▼ or ▲.
Timing Chart The ViewSonic G773 digital monitor can run at an extensive range of resolutions and refresh rates. Certain standard resolutions are factory preset. There are also fourteen timings which are user definable. For example, if your video card is set up to run 1024 pixels x 768 lines at an 75 Hz refresh rate, once you have adjusted the screen size and position to your preferences, the monitor will save this information to memory.
Factory Preset Timings The following table lists the factory preset timings: E N G L I S H Resolution Horizontal Frequency Vertical Polarity of SynFrequency chronizing Signal Timing Pixels x Lines kHz Hz Horiz/Vertical Ind. VGA 640x400@70Hz 640 x 400 31.47 70 -/+ Ind. VGA 640x480@60Hz 640 x 480 31.47 60 -/- VESA 640x480@75Hz 640 x 480 37.50 75 -/- VESA 800x600@75Hz 800 x 600 46.08 75 +/+ VESA 800x600@85Hz 800 x 600 53.67 85 +/+ VESA 1024x768@75Hz* 1024 x 768 60.
Plug & Play For Windows® 95 users Plug and Play is Microsoft®'s method of providing automatic peripheral connections in Windows 95. Because your new monitor features the VESA® (Video Electronics Standards Association) DDC (Display Data Channel) standard, the monitor's resolutions are simple to adjust when used with a DDC compatible video card in the Plug and Play environment.
DDCTM Diagnostic Utility For IBM computers and compatibles The ViewSonic G773 uses DDC (Display Data Channel) protocol to communicate with your computer's video card. The software diskette or CD included in the ViewSonic G773 package has a utility file called DDCTEST.EXE. This utility is useful for troubleshooting if DDC-related problems occur when using Windows® 3.1 or Windows® 95. E N G L I S H When you run the DDC Diagnostic Utility, one of two messages will appear: 1.
Power Management System This monitor meets VESA® DPMSTM (Display Power Management Signaling) standards. For the monitor’s power saving feature to work, the video board or computer must also meet VESA DPMS standards. State LED Power E N G L I S H Recovery Time On green <110 Watts N/A Standby yellow <15 Watts <3 sec Suspend yellow <15 Watts <10 sec Off orange <8 Watts <10 sec Note: The G773 complies with European NUTEK Power Management Standards.
4 TROUBLESHOOTING If your ViewSonic G773 monitor is not performing properly, use this troubleshooting chart for quick solutions to common problems. If the problem persists, call your monitor dealer. For further support or to order your free Macintosh adapter, call ViewSonic® customer support at the telephone number in your area: E N G L I S H U.S. and Canada only From outside U.S.
Problem... Possible Cause... Remedy... Image is scrolling or unstable Signal connector pin assignments incorrect? Use correct signal connector. Signal cable properly connected? Connect signal cable properly. Check for bent or missing pins. Graphics Board? Check your graphics board manual for the proper monitor setting. Scanning frequency outside acceptable range? Reconfigure the graphics board.
ADDITIONAL INFORMATION 5 Helpful Hints E N G L I S H ● Avoid exposing the monitor to direct sunlight or other heat source. The monitor should be facing away from direct sunlight to reduce glare. ● Choose a well ventilated area to position your monitor to allow adequate dissipation of heat. Do not place anything on top of the monitor. ● Ensure the monitor area is clean and moisture free. ● Keep the monitor away from magnets, motors, transformers, speakers, and televisions.
Care of Your Monitor ● When cleaning the monitor screen, use only non-ammonia based glass cleaners. Apply the cleaning solution to a clean, dry cloth, not directly to the screen. ● When cleaning the plastic case, use only a soft, dry cloth. If the plastic is very dirty, use a neutral, non-abrasive detergent. Do not use alcohol or ammonia based solutions. ● Avoid spilling liquid on the monitor. ● Always handle your monitor with care when moving it.
INDEX Brightness, 13 Buttons, 11 Connectors, input/output, 9 Contents of purchase, 3 Contrast, 13 Controls, user, 6, 11 Customer support, ii, 20 DDC, 18 Dimensions, 8 Degauss, 13 Display scan frequency, 4, 6 Factory settings, 16 FCC, iv Features, 4 Height (screen size), 13 Horizontal size (width), 13 Horizontal & vertical signals, 6 Horizontal centering (position), 13 IBM (PC), 6 Installation, 9-10 Language, 14 Macintosh, 6 Memory Recall, 14 Macintosh adapter, 6 Maintenance, 23 Operation, 11 E N G L I S H
ViewSonic® 381 Brea Canyon Rd.