
User Guide

28
Zoom out for detailed review
You may need to expand the image to inspect details in the projected image. Use the
arrow keys to move the images.
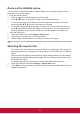
• Using the remote control
1. Press the
on the remote to bring up the Zoom Bar.
2. Press repeatedly to expand the image to the desired dimension.
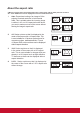
3. To browse the image, press [Enter] to switch to displacement mode and use the
arrow keys (, , , ) to move the image for browsing.
4. To shrink the image, press [Enter] again to return to the Zoom In/Out function and
press repeatedly to restore the image to its original size. You can also press the
[Auto Sync] button on the remote control to restore the image to its original size.
• Using the OSD menu
1. Open the OSD menu to enter Display > Zoom menu.
2. Press [Enter]. This will bring up the Zoom Slider.
3. Repeat Steps 2-4 listed above in the Remote Control Use chapter.
The image can only be inspected after zooming out. You can zoom out further to inspect details.
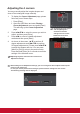
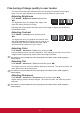
Selecting the aspect ratio
The 'aspect ratio' is the ratio of the image width to the image height. Most analog TV
and computers have a 4:3 aspect ratio, while digital TV and DVDs have 16:9 aspect
ratios.
With the advent of digital signal processing, digital display devices like this projector
can dynamically stretch and scale the image output to a dierent aspect than that of
the image input signal.
To change the projected image ratio (no matter what aspect the source is):
1. Open the OSD Menu and enter Display > Aspect ratio menu.
2. Press / to select an aspect ratio that suits the format of the video signal and your
display requirements.