
User Guide


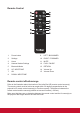


Table Of Contents
- Introduction
- Shipping contents
- Controls and functions
- Setting up
- Positioning your projector
- Using the menus
- Adjusting your projector’s settings
- Connect the projector to your device
- Different menu options
- M1+ FW Upgrade
- Wallpaper
- Image Settings
- About the aspect ratio
- Auto Keystone
- V Keystone
- Brightness
- Contrast
- Projector Position
- Harman Kardon - Adjusting the audio settings
- Muting the Sound
- Adjusting the Sound level
- Adjusting the Audio Mode
- Adjusting the Light source settings
- Reset All Settings
- Eye Protection
- Viewing different file
- Using the 3D function
- OSD Menu System
- Specification sheet
- HDMI Support Video Timing
- HDMI Support PC Timing
- 3D Support Timing
- USB-C Support Timing

6
Replacing the remote control battery
1. To open the battery cover, turn the remote control over to view its back, open the
cover in the direction of the arrow as illustrated.
2. Remove any existing batteries (if necessary) and install two AAA batteries observing
the battery polarities as indicated in the base of the battery compartment. Positive (+)
goes to positive and negative (-) goes to negative.
3. Ret the cover by aligning it with the base and pushing it back down into position.
Stop when it clicks into place.
Warning
• Avoid leaving the remote control and batteries in an excessive heat or humid environment like the kitchen,
bathroom, sauna, sunroom or in a closed car.
• Replace only with the same or equivalent type recommended by the battery manufacturer.
• Dispose of the used batteries according to the manufacturer’s instructions and local environment regulations
for your region.
• Never throw the batteries into a re. There may be danger of an explosion.
• If the batteries are drained or if you will not be using the remote control for an extended period of time, remove
the batteries to avoid damage to the remote control from possible battery leakage.