ViewSonic ® N2060w LCD TV - 使用手册 - 使用手冊 - User Guide Model No.
CONTENTS Important Safety Instructions -------------------------------------------------- 1 Copyright Information ------------------------------------------------------------ 2 Antenna Installation Instructions---------------------------------------------- 3 Cleaning the LCD TV ------------------------------------------------------------ 3 CONNECT PERIPHERAL EQUIPMENT Front Panel Control Knobs ---------------------------------------------------- 4 Preparation ------------------------------------------------
Important Safety Instructions 1. Read these instructions completely before using the equipment. 2. Keep these instructions in a safe place. 3. Heed all warnings. 4. Follow all instructions. 5. Do not use this equipment near water. Warning: To reduce the risk of fire or electric shock, do not expose this apparatus to rain or moisture. 6. Clean with a soft, dry cloth. If further cleaning is required, see “Cleaning the LCD TV” in this guide for further instructions. 7.
Copyright Information Copyright © ViewSonic Corporation, 2006. All rights reserved. ® ViewSonic, the three birds logo, OnView, ViewMatch, and ViewMeter are registered trademarks of ViewSonic Corporation. Disclaimer:ViewSonic Corporation shall not be liable for technical or editorial errors or omissions contained herein; nor for incidental or consequential damages resulting from furnishing this material, or the performance or use of this product.
Antenna Installation Instructions 1.
CONNECT PERIPHERAL EQUIPMENT FRONT PANEL CONTROL KNOBS Source(信号源)①: Press to select your input source. Volume(音 量)②③: Press to confirm your function selection (when the OSD main menu displayed) or adjust volume (without OSD main menu) Channel(频道)④⑤: Select the intended function by pressing the two keys (when the OSD main menu displayed), or switch the channels in the TV mode (without OSD main menu) Menu( 菜单)⑥: Press to show the OSD menu and exit OSD menu at the TV mode.
There is a wide range of video and audio equipment that can be connected to your TV. The following connection diagrams show you how to connect them. PREPARATION Lay the LCD TV with the screen down on a table, as it will be easier to connect your peripheral equipment. Please take precaution on page8 not to damage the screen. 1. VGA audio input 2. VGA input 3. AC power input terminal 4. Headphone outlet 5. AV signal input 6. Left audio track input (AV/S-Video) 7. Right audio track input (AV/S-Video) 8.
OPERATING INSTRUCTIONS USE OF THE REMOTE CONTROL POWER (电源) Press to turn on/off the TV. The TV is never completely powered off unless it is physically unplugged. Mute(静音) Temporarily interrupt the sound or restore it. Status(状态) (1) Display the channel number when input TV RF (2) Display input source when input the other sources. Channel (频道) Press or to browse through the TV channels。 Volume (音量) Press + or – to adjust the volume. Return(回复) To display the previously selected TV channel.
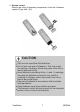
3. Remote control: Remove the cover of the battery compartment. Insert the 2 batteries supplied (Type AAA 1.5V). CAUTION Only use the specified AAA batteries. Do not mix new and old batteries. This may result in cracking or leakage, which may pose a fire risk or lead to personal injury. Insert batteries according to the (+) and (-) markings. Inserting the batteries incorrectly may result in cracking or leakage, which may pose a fire risk or lead to per-sonal injury.
PREPARATION 1. Assembly Take out TV and base from carton, assembled by three pieces screws, which you could find from the accessory box.
2. Place the TV on a solid surface. Ensure that the TV is placed in a position to allow free flow of air. Do not cover the ventilation openings on the back cover. To prevent any unsafe situations, no naked flame sources, such as lighted candles, should be placed on or in the vicinity. Avoid heat, direct sunlight and exposure to rain or water. The equipment shall not be exposed to dripping or splashing. 3. Insert the aerial plug firmly into the aerial socket at the back of the TV. 4.
TO USE THE MENUS 1. 2. 3. 4. Press the MENU button to display or close main menu. Use the cursor up/down to select a menu item. Use the cursor left/right to enter a submenu or enable/disable the function. Press the MENU button to exit the menu. MAIN MENU Press the MENU button to enter the main OSD (On Screen Display). Adjust items including Sound Setup, Picture Setup, Function Setup and TV setup.
Sound Setup (Same for all modes) 1. The range of adjusting volume, bass and treble is from 0~100. 2. Select “ON” or “OFF” in Audio selection to control the sound output. 3. The range of adjusting Balance is -50~+50; when adjusting from 0 to -50, the sound from the right track fades until silence; when adjusting from 0 to +50, the sound from the left track fades until silence. 4. AVL: you can set it “ON” or “OFF”. The function is to adjust the input sound automatically.
Picture Setup When the input source is in PC mode, shown in the figure below: 1. Brightness and Contrast: The range can be adjusted from 0~100. 2. Position: There are two options, Horizontal and Vertical, which can be adjusted from -50 to +50. 3. Video noise: There are two options, Phase and Clock, which can be adjusted from -50 to +50. 4. Sharpness: Select from six options Softest, Soft, Normal, Sharp, Sharpest and Auto. You may adjust the above options according to your preference. 5.
When the input source is TV, YPbPr, AV or S-VIDEO mode, shown in the figure below: 1. 2. 3. 4. 5. 6. 7. 8. Brightness and Contrast: The range can be adjusted from 0~100; use Brightness and Contrast options to adjust the brightness of picture. Color: The range can be adjusted from 0~100; use this option to adjust the color saturation of picture. Sharpness: Select from six options: Softest, Soft, Auto, Sharp, sharpest and Auto. You can adjust the sharpness of picture using any option above.
Function Setup, shown in the figure below: 1. OSD time out: could set OSD display time from 10 seconds to 60 2. Language: could set OSD language to English, simplfied Chinese or traditional Chinese 3. Sleep timer: set the time after which the product will enter standby status automatically 4. Reset to default: It is used to reset the OSD settings. 1. Sleep timer:Start to count down after the sleep timer set, could choose from 5 min. to 120 min.
TV setup The following menu appears only in the TV mode. o 1. Program no. : Shows the current channel number 2. Color system: shows the current picture input system(shows auto after auto search) 3. Sound system: shows the current sound input system(shows auto after auto search) 4. Auto search: Used to auto search and storage program 5. Frequency: Shows the frequency of current channel. Could adjust frequency slightly by the right and left button to get the result what you want 6 .
HEADPHONE 1. The headphone jack is located at the right side of the TV. 2. The MUTE key on the remote control works on both internal speaker and the headphone. 3. Use volume key to adjust the volume. TIPS Care of the screen Do not rub or strike the screen with anything hard as this may scratch, mar, or damage the screen permanently. Unplug the power socket before cleaning the screen. Dust the TV by wiping the screen and the cabinet with a soft, clean cloth.
Appendix Specifications Panel Type 20” TFT-LCD Active Matrix wide-XGA, 1360x 768 Color Viewing angles Input signal Anti-glare coating 160° H/ 160° V Video Fh: 32-48KHz, Fv: 50-60Hz VGA input*1 TV system antenna Composite Video input*1 S-Video*1 Component video*1 (YPbPr / YCbCr) Audio Audio input*1 RCA*1 for AV and S-Video RCA*1 for YPbPr / YCbCr Compatibility PC Up to 1360x768 Non-interlaced Resolution Supported 640x480 @60Hz 800x600 @56Hz 800x600 @60Hz 1024x768@60Hz 1280x768@60Hz 1280x720@60H
Storage Temperature -25℃ to 60℃ conditions Humidity 10% to 85%(no condensation) Dimension Physical 521.84mm(W) x 419.52mm(H) x 180.83mm(D) 20.55”(W) x 16.52”(H) x 7.12”(D) Package 595mm(W) x 512mm(H) x 226mm(D) 23.4”(W) x 20.2”(H) x 8.9”(D) Weight Net 6.9Kg (15.2 Ib.) Gross 9 Kg (19.9 Ib.
Troubleshooting No power • Make sure the LCD TV is properly connected. • Make sure the AC power cord is properly connected. • Make sure the AC power is ON, DC power button is ON (Green LED). • Plug another electrical device (like a radio) to the power outlet to verify that the outlet is supplying the proper voltage. Poor or no picture • The TV station may be experiencing problems. Try another channel. • The Cable TV signal may be scrambled or encoded. Please contact your local cable operator.
Cusomer Support For technical support or product service, see the table below or contact your reseller. Note: You will need the product serial number. Country/ Region Web Site Telephone Email China www.viewsonic.com.cn 800 820 3870 service.cn@cn.viewsonic.
Limited Warranty VIEWSONIC® LCD TV What the warranty covers: ViewSonic warrants its products to be free from defects in material and workmanship, under normal use, during the warranty period. If a product proves to be defective in material or workmanship during the warranty period, ViewSonic will at its sole option repair or replace the product with a like product. Replacement product or parts may include remanufactured or refurbished parts or components.