
Instruction manual


49
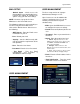
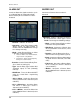
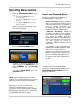
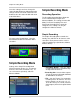
Recording Menu Controls
Recording Menu Controls
• Enter the RECORDING MENU screen
by:
z Pressing the SETUP button on the
Remote Control
z Pressing the SETUP button on the front
panel, or
z Selecting the SETUP option from the
On-Screen Menu.
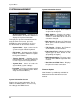
Enter the password if required using
the Virtual Keyboard.
• Select the RECORD MENU option.
• To enter a sub-menu, navigate to the
option and press the ENTER button. To
exit a SUBMENU, press the RETURN
button.
• To exit the MAIN MENU, press the
RETURN button.
NOTE: When configuring the Recording
Settings, it is recommended that you use the
Mouse or Remote Control for navigation.
Alternatively, you can use the Client
Software provided with this system to
change the System Settings and Recording
Configurations remotely. Please refer to the
Client Software Manual for details.
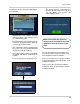
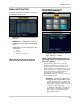
Simple and Advanced Modes
This System allows you to configure the
Recording Options in two ways:
• Simple Recording: Simple recording
will set all cameras to behave in the
same way, with the same resolution and
FPS. In Simple Recording, the
recording type can be set to either
Continuous, Motion, Alarm or None.
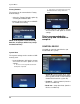
• Advanced Recording: Advanced
recording will allow you to configure
each camera to behave in a different
way, based on quality, FPS and
resolution. In Advanced Recording, the
menus are separated so that you can
set each camera to record in
Continuous, Motion and Alarm at the
same time.
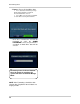
For example, set the system to record
in Continuous, Motion and Alarm at the
same time. A camera will be in
continuous recording, however when a
Motion or Alarm event is detected, the
onscreen indicator will switch to M or
A, and the event will be logged in the
system.
To switch between Recording Modes,
change the Recording Mode setting on the
RECORDING OPERATION tab to either
Simple or Advanced.