EN WINE CABINET FR ARMOIRE À VIN ES GABINETE DEL VINO USE AND CARE GUIDE GUIDE D’UTILISATION ET D’ENTRETIEN GUIA DE USO Y CUIDADO A18602501 October 2019
Finding Information Please Read and Save This Guide Make a Record for Quick Reference Thank you for choosing Vintec, the new premium brand in home appliances. This Use & Care Guide is part of our commitment to customer satisfaction and product quality throughout the service life of your new Wine Cabinet. We view your purchase as the beginning of a relationship. To ensure our ability to continue serving you, please use this page to record key product information.
Finding Information Questions? For toll-free telephone support in the U.S. and Canada: 1-800-325-1371. For online support and Internet product information: www.vintec.com Table of Contents Finding Information.................................. 2 Important Safety Information.................... 4 Features.................................................. 7 Installation............................................... 8 Controls and Settings............................ 11 Storage Features.......................
Important Safety Information Important Safety Instructions Safety Precautions Do not attempt to install or operate your unit until you have read the safety precautions in this manual. Safety items throughout this manual are labeled with a Danger, Warning or Caution based on the risk type. General Precautions WARNING RISK OF CHILD ENTRAPMENT. Before you throw away your old appliance, take off the doors and leave shelves in place so that children may not easily climb inside.
Important Safety Information DANGER DANGER Risk of fire or explosion. Flammable refrigerant used. Do not use mechanical devices to defrost refrigerator. Do not puncture refrigerant tubing. DANGER Risk of fire or explosion. Flammable refrigerant used. To be repaired only by trained service personnel. Do not puncture refrigerant tubing. CAUTION CAUTION Risk of fire or explosion. Flammable refrigerant used. Consult repair manual/owner’s guide before attempting to service this product.
Important Safety Information Electrical Information • • • • • • • The Wine Cabinet must be plugged into its own dedicated 115 Volt, 60 Hz., 15 Amp, AC only electrical outlet. The power cord of the appliance is equipped with a three-prong grounding plug for your protection against electrical shock hazards. It must be plugged directly into a properly grounded three prong receptacle. The receptacle must be installed in accordance with local codes and ordinances. Consult a qualified electrician.
Features Wine Cabinet F G A B C H D I E J K A Control Panel G Lock B Fan H Lighting C Air Filter I Door D Removable Shelf J Gasket E Fixed Shelves K Adjustable Feet F Lighting 7
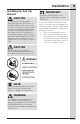
Installation Installation of Your Wine Cabinet Your Vintec Wine Cabinet has been designed for either free-standing or slot-in installation. In either case, the front grille must NOT be obstructed. • This appliance is designed to be for free standing installation or slot-in (fully recessed). (Refer to sticker located on the back of this appliance.) • This appliance is intended to be used exclusively for the storage of wine.
Installation Installing the Anti-Tip Bracket CAUTION You must use an anti-tip bracket installed as per these instructions. If the Wine Cabinet is removed from its location for any reason, make sure that the bracket is properly engaged when you push the Wine Cabinet back into the original location. If the bracket is not properly engaged, there is a risk of the Wine Cabinet tipping over, causing property or personal injury if you or a child stands, sits, or leans on an open shelf.
Installation Installing the Wine Cabinet Leveling the Unit Your Vintec Wine Cabinet has been designed for either free-standing or slot-in installation. When slot-in, the unit requires additional space: Top 2 inches (50mm) Back 1.18 inches (10mm) Sides .39 inches (30mm) In either case, the front grille must NOT be obstructed. 2" (50 mm) Wine Cabinet 1.18" (30 mm) .39" (10 mm) .39" (10 mm) Position the unit on a flat, level surface capable of supporting the entire weight of the unit when full.
Controls and Settings 11 Wine Cabinet Display Power On/Off Mode Selection Press Mode button to change between Single Temp, Multi-Temp, and Cellaring modes. Simultaneously press and hold the Mode button and the increase button for 5 seconds to turn the unit power off or on. When the power is turned back on, the display will show the previous temperature settings. Upper Temperature Set Press to decrease/increase the set temperature. Only the set temperature will be shown.
Controls and Settings Multi-Temp Multi-Temp provides flexibility to store all your varietals at a perfect serving temperature. In Multi-Temp mode, the cabinet creates a vertical temperature gradient, allowing you to arrange wines from top-to-bottom at the appropriate serving temperatures for each bottle in your collection. Refer to the diagrams for suggested ranges and to understand how the Multi-Temp distributes the temperature gradient based on settings.
Controls and Settings 13 Lights Behavior • Temperature display shows the light setting code: Lights Dim Level Bottom temperature display shows the light setting code. Press ∨ / ∧ to change the Dim Level. 1L: Lowest level / least bright (default) 2L:... 3L: Highest level / most bright Child Lock Press and hold Mode button for 3 seconds to activate/ deactivate child lock. Child lock indicator prevents changes to the UI until disabled.
Controls and Settings Reset to Factory Settings Simultaneously press and hold Mode and Upper Temp Set “∧” buttons for 5 seconds to reset wine cabinet to factory settings. Control Sounds Simultaneously press and hold the Lower Temp Set “∨” button and Light button for 5 seconds to toggle sounds off and on. Demo Mode Simultaneously press and hold the Mode and Light buttons for 10 seconds to activate/deactivate Demo mode.
Controls and Settings 15 Door Open Alert When the door stays open for at least 5 minutes, the Door Open icon turns On and the lights start to dim up and down (from lowest dim level to highest dim level). If the door is kept open an additional 2 minutes or more, an alert sound is played. Any interaction with the control panel will turn off the blinking lights and audio signal. The Door Open icon stays on as long the door is open and the lights go back to normal.
Storage Features Proper Storage Stocking Recommendations The wine racks allow for the proper horizontal storage of wine. The bottles are properly positioned so that the wine remains in contact with the cork to assure that the cork does not become dry. White and sparkling wines should be maintained on the bottom to middle racks and red wine on the top racks. Your Wine Cabinet should be stocked beginning with the bottom display rack at the back and working forward staggering the bottles.
Storage Features 17 Shelf Types Display (top) Shelf • Shipped flat inside cabinet • Angled on top two liner ribs for bottle display Fixed Shelf (Two Types) • Full Width –– Sits below Display Shelf and below telescopic shelves –– Fixed to liner rib with screws at the rear • ¾ Width –– Sits below all other shelves –– Fixed to liner rib with screws at the rear The telescopic shelves can be removed, but maximum shelf capacity cannot exceed 44 lbs. To remove the telescoping shelves: 1.
Care and Cleaning Maintaining Your Wine Cabinet Periodic cleaning and proper maintenance will ensure efficiency, top performance, and long life. The maintenance intervals listed are based on normal conditions. You may want to shorten the intervals if you have pets or other special considerations. Changing your Air Filter The air filter is located about 2/3 way up the back wall of the cabinet.
Troubleshooting 19 Before You Call for Service If Service is Required If the unit appears to be malfunctioning, read through this manual first. If the problem persists, check the Troubleshooting Guide below. Locate the problem in the guide and refer to the cause and its remedy before calling for service. The problem may be something very simple that can be solved without a service call. Consulting or contracting a qualified service technician may be necessary.
Troubleshooting Problem Alarm(s) will not shut off. • • • Power is not restored after power failure. • Possible Cause Door is ajar. Power has failed. Internal temperature is too high. Circuit breaker has tripped. • • • • • Door does not close properly. • • Door hinges are misaligned. Door gasket is not sealing properly. • • Remedy Press “Alarm” key to acknowledge alarm. Ensure door is closed firmly. Allow 24 hours for temperature to stabilize. Verify electrical supply.
Limited Warranty Warranty 21 1 Major Appliance Limited Your appliance is covered by a one year limited warranty. For one year from your original date of purchase, Electrolux will pay all costs for repairing or replacing any parts of this appliance that prove to be defective in materials or workmanship when such appliance is installed, used, and maintained in accordance with the provided instructions.