
Installation guide


© 2003 Directed Electronics, Inc. Vista, CA 39
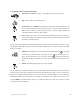
To program the features using the Valet switch:
1. Open a door. (The GREEN wire, H1/5, or the VIOLET, H1/7 must be connected.)
2. Key. Turn the ignition on and then back off.
3. Select Menu. Press and HOLD the Valet®/Program switch. When the LED flashes once and
the horn honks Menu One has been selected. Continue to hold the switch until the LED
flashes twice and the horn honks twice Menu Two has now been selected. Release the
switch after the Menu choice has been selected.
4. Choose. Within 10 seconds, press and release the Valet®/Program switch the number of
times corresponding to the feature number you want to program and then press and hold
the switch. (See Feature Menus.)
After a second, the LED will flash to indicate which feature you have accessed. For example, in Menu Two, groups
of eight flashes would indicate access to the activation pulse setting (Feature 2-8). The horn will also honk eight
times (if connected).
5. Transmit. The transmitter is used to select the desired setting. Pressing will change
the feature to the LED ON setting (or will flash once for features with more than 2 set-
tings). The horn will honk once (if connected). Pressing will change the setting to
the LED OFF setting (or will flash two or more times for features with more than 2 set-
tings).
6. Release. The Valet®/Program switch can now be released.
You can advance from feature to feature by pressing and releasing the Valet®/Program switch the number of
times necessary to get from the feature you just programmed to the feature you wish to access. For example, in
Menu One, if you just programmed Feature 1-2 and you next want to program Feature 1-3 to off, release the
Valet/Program switch. Press and release it once to advance from Feature 1-2 to Feature 1-3. Then press it once
more and HOLD it. The LED will flash in groups of 3 and the horn will honk 3 times (if connected) to confirm
that you have accessed Feature 1-3.