MODEL 550HF OWNER'S GUIDE Downloaded from: http://www.guardianalarms.
Table of Contents System Maintenance . . . . . . . . . . . . . . . . . . . . . . . . . . . . . . . . . . . . . . . . . . . . . . . . . . 3 Your Warranty . . . . . . . . . . . . . . . . . . . . . . . . . . . . . . . . . . . . . . . . . . . . . . . . . . . . . . . . 3 What Is Included . . . . . . . . . . . . . . . . . . . . . . . . . . . . . . . . . . . . . . . . . . . . . . . . . . . . . . 3 Transmitter Channel . . . . . . . . . . . . . . . . . . . . . . . . . . . . . . . . . . . . . . . . . . . . . . . . .
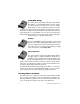
What is included ■ ■ ■ ■ ■ ■ ■ ■ The control module A pair of four-button transmitters A StingerTM DoubleGuard® two-stage shock sensor The RevengerTM Soft ChirpTMsix-tone programmable siren The red Status LED indicator light A push-button Valet® switch Your warranty card FailSafe® starter kill (Ready feature, may require additional labor). CONGRATULATIONS on your purchase of a state-of-the-art vehicle security system. This system has been designed to provide years of trouble-free operation.
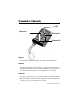
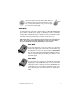
Transmitter Channels LED Channel I Channel II Channel III Channel I The arm/disarm and panic functions, are usually controlled by Button I. Channel II The Silent Mode™/trunk release function, is usually controlled by Button II. Silent Mode™ and Remote Valet® work by pressing Button II for less than one second. Trunk release requires you to press Button II for 1.5 seconds. Channel III The remote start function of your system is usually controlled by pressing Buttons I and II at the same time.
Using Your System Arming You can turn on, or arm, the system by pressing Button I of your transmitter for one second. When the system arms, you will hear a short siren sound, or chirp, and see the parking lights flash once. If the vehicle’s power door locks are controlled by the system, the doors will lock. While the system is armed, the Status LED will flash about twice a second, showing that the system is actively protecting your vehicle.
Arming While Driving Your system can be armed while driving the vehicle! Simply press Button I on your transmitter while the vehicle is running. The system will chirp once and then once more to indicate that the ignition is on. The system will not respond to any input except the door triggers and the starter kill relay (if installed) will not be activated. Once you have reached your destination, the system must be disarmed by pressing Button I on the transmitter once more.
Turn on the ignition. Push the Valet switch within 15 seconds. The system should now disarm. If it does not, you may have waited too long, so turn the ignition off and on and try again. Silent ModeTM To temporarily turn off the arm or disarm chirps, use Silent ModeTM. Simply press Button II briefly before arming or disarming, and the confirmation chirp(s) will be eliminated for that one operation only. If you want the arm/disarm chirps turned off permanently, your dealer can do this for you.
To enter or exit Valet® Mode with the Valet® switch: Turn ignition to "run" position, then turn to "off" position. Press and release the Valet® switch within 10 seconds. The Status LED will light steady if you have entered Valet® Mode, and it will go out if you exited Valet® Mode. Using Remote Valet® as you enter or exit the vehicle: Open any door. Press Button I (or the arm/disarm Button) Press button II (or the channel 2 button). Press Button I again.
Once the system has successfully started the motor, it will turn the climate controls on. If cooling or heating of the vehicle is desired, you must preset the controls to the desired temperature and turn the blower motor on. The motor will run for the selected time and the parking lights will flash or come on solid while the motor is running.
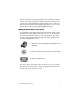
Timer Mode The system has a built-in timer that will start the vehicle's engine and run it for the programmed time, every three hours for a total of six operations. To enter timer mode: 1. Start the vehicle with the key. 2. Press and HOLD Buttons 1 & 2 on the transmitter (or press and HOLD optional momentary switch.) 3. Turn ignition OFF. (The vehicle will stop running.) 1 2 4. Release transmitter (or push-button.) 5. Engine will restart to confirm system is in timer mode.
Remote Start Take Over A vehicle equipped with this system can remain running after the key is removed. This feature is useful for those times when you will be out of the vehicle for short periods of time and would like to leave the motor running and the climate controls on. Before turning off the engine: 1 2 1. Press Buttons 1 & 2 on the transmitter and release (or press and release the optional momentary switch.) 2. Turn the ignition key OFF - engine will stay running. 3.
Safety Features This system has several important safety features to ensure proper operation of the motor and prevent accidental damage to the engine or its components. Over and Under Rev Protection The system monitors the engine speed and will shut the engine off if the RPMs rise above or fall below programmed levels. This prevents damage to the motor due to fuel delivery system failures or other problems which may cause the engine to race.
Diagnostics The microprocessor at the heart of your system is constantly monitoring all of the switches and sensors connected to it. It detects any faulty switches and sensors and prevents them from disabling the entire system. The microprocessor will also record and report any triggers that occurred during your absence. Arming Diagnostics If the system is armed with an input active (door open, sensor triggering, etc.) the unit will chirp once when arming and then one more time a few seconds later.
Table of Zones The zone number is the number of LED flashes used by the system to identify that input. The standard input assignments are listed below, along with spaces to write in any optional sensors or switches you have had installed. If the Warn Away® response is triggered, the LED will not report it.
High Frequency Your system transmits and receives at 434 MHz. This provides a cleaner spectrum with less interference and a more stable signal. Enjoy a phenomenal increase in range - even in areas with high radio interference. Programming Options Programming options control what your system does during normal operation, and require little or no additional parts. However, some may require additional installation labor. The following is a list of the programmable options, with the factory settings in Bold.
• Forced passive arming on or off. If your system is programmed for passive arming and the forced passive arming feature has been programmed on, the system will passively arm after one hour, even if a protected entry has been left open. Forced passive arming ensures that the system will be armed if a door has accidentally been left ajar when leaving the vehicle.
Glossary of Terms Control Unit The “brain” of your system. Usually hidden underneath the dash area of the vehicle. It houses the microprocessor which monitors your vehicle and controls all of the alarm's functions. FailSafe® Starter Kill An automatic switch controlled by the security system which prevents the vehicle’s starter from cranking whenever the system is armed. The vehicle is never prevented from cranking when the system is disarmed, in valet mode, or should the starter kill switch itself fail.
Security and Convenience Expansions Listed below are some of the many expansion options available. Please consult your dealer for a complete explanation of all the options available to you. Field Disturbance Sensor An invisible dome of coverage is established by the 508T “radar” sensor. Your system can react to any intrusions into this field with the triggered sequence. Backup Battery The 520T keeps the system armed, triggers the alarm and keeps the starter kill active if main battery power is disconnected.
✂ Cut along dotted line and fold where indicated for a quick and easy reference to keep in your purse or wallet. QUICK REFERENCE OPERATING CARD: Arming ▼ You can turn on, or arm, the system by pressing Button I of your transmitter for one second. When the system arms, you will hear a short chirp, and see the parking lights flash once. Arming While Driving ▼ Press Button I on your transmitter while the vehicle is running. The system will chirp once and then once more to indicate that the ignition is on.
System Reference Card ® The company behind DEI® is Directed Electronics, Inc. Since its inception, the company known as Directed Electronics, Inc. (DEI®) has had one purpose - to bring the proven advantages of microprocessor and I.C. technology to the automotive industry. As a recipient of numerous patents, DEI® has established new standards in electronic design, automated manufacturing, and dealer support. Its electronic products are sold and serviced worldwide.