
User manual


12 13
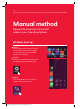
Manual method
Please follow the instructions that
relate to your Operating System
Windows 8 set up
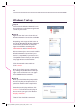
Step 01
From the Start menu move your mouse
cursor to the top-right or bottom-right
corner of the Start screen. A sidebar
with ve icons will open.
Step 02
Click the icon at the bottom of the side-
bar and the settings panel will open.
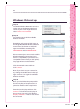
Step 03
Click the Available icon to show a list
of WiFi connections available.
Step 04
Depending on the type of device one
or two Virgin Broadband WiFi networks
(also known as SSID) will appear and
will be something like VM123456-2G
and/or VM123456-5G.
We recommend you connect to the
5GHz Wireless Network Connection
if your device is compatible (if your
device isn’t compatible it won’t show
you this option). See page 24 for
more information.
Click the network name and then
click Connect.
If you don’t see these in the list, click
Flight mode to On and then O to scan
again for available wireless networks.
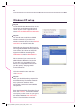
Step 05
Tick Connect automatically and click
Connect if you want this to be your
default wireless connection. Otherwise
just click Connect.
Step 06
Finally, you’ll be asked to enter the
Network Security Key (Passphrase)
for your Super Hub. This is printed on
the base of the unit. Once entered,
click Next (or click Next and just
press the WPS button on the front
of the Super Hub).
That’s it! You should be connected.
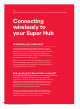
Settings
Connecting
Virgin_Broadband_Brochure_reskin_AW_v2.indd 12-13 06/05/2014 15:24