
Specifications


Chapter 3 - Operations 29
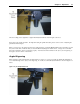
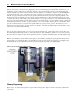
Turn the Vision Series 3 Controller on by flipping the switch on the back right side of the machine. Set up the job you
would like to engrave in the Vision Software or Vision Pro Software. (For more information on this, see the Vision
Engraving Software manual or Vision Pro Software manual.) Insert the material you would like to engrave into the MAX
Engraver as described in the next section. Use the X & Y jog keys on the Series 3 Controller to move the spindle out
over the material. Now press and hold down the Z down jog button until the bottom of the cutter just touches the
engraving material. Once the cutter touches the material, press the set surface button. The spindle will now move up
approximately 1/8”. The distance that the spindle moved up is the distance that the spindle will move up and down
between letters. If you would like a larger or smaller lift distance between characters, use the z jog up/down buttons to
move the spindle to the lift position you would like. Next, press the set surface button a second time. The spindle will
move up to the z home position. The surface is now set.
Since we are not using the nose cone to adjust the engraving depth, the depth must be set in the Vision or Vision Pro
engraving software. To do this, please see the section on Pass Depths in the Vision manual or the section on Creating
Tool Paths in the Vision Pro software manual. Send the job from the computer to the Vision Series 3 Controller. You
will notice that the light on the start button on the Vision Series 3 Controller will be flashing.
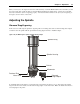
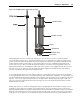
Since we are using a rotary cutter, we need to have the spindle rotate. On the Vision Series 3 Controller, press the
spindle button until the light on the button turns green. This will automatically turn the spindle motor on and off as the
machine is engraving. Now press start. The job should now engrave. If there are any problems, press the stop button
immediately.