Visioneer® OneTouch® 8100 Scanner FOR USB OR PARALLEL PORT CONNECTION Installation Guide
COPYRIGHT INFORMATION Copyright © 1999 Visioneer, Inc., a wholly owned subsidiary of Primax Electronics LTD. Reproduction, adaptation, or translation without prior written permission is prohibited, except as allowed under the copyright laws. The Visioneer brand name and logo are registered trademarks of Primax Electronics LTD. OneTouch is a trademark of Primax Electronics LTD. The PaperPort brand name and logo are registered trademarks of ScanSoft, Inc. Microsoft is a U.S.
TABLE OF CONTENTS i TA B L E O F C O N T E N T S Welcome . . . . . . . . . . . . . . . . . . . . . . . . . . . . . . . . . . . . . . . . . . . . . . 1 Please Use the Proper Section of This Guide . . . . . . . . . . . . . . . . . . . 1 What’s in the Box . . . . . . . . . . . . . . . . . . . . . . . . . . . . . . . . . . . . . . . 1 The Visioneer OneTouch 8100 Scanner . . . . . . . . . . . . . . . . . . . . . . 2 What You Need . . . . . . . . . . . . . . . . . . . . . . . . . . . . . . . . . . . . . . . . .
ii TABLE OF CONTENTS Scanning from the PaperPort Software . . . . . . . . . . . . . . . . . . . . . . 35 Scanning an Item with the Twain Button . . . . . . . . . . . . . . . . . 36 Adjusting the Brightness and Contrast . . . . . . . . . . . . . . . . . . . 39 Getting Help with the PaperPort Software . . . . . . . . . . . . . . . . 40 About the Predefined Scan Settings in PaperPort . . . . . . . . . . . . 41 Cleaning the Scanner Glass . . . . . . . . . . . . . . . . . . . . . . . . . . . . . . .
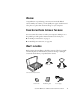
WELCOME Congratulations on purchasing your Visioneer OneTouch flatbed scanner. With your scanner, you can quickly scan paper documents and color photos to place their electronic images on your computer. PLEASE USE THE PROPER SECTION OF THIS GUIDE You can connect the scanner to either your computer’s USB port or to the parallel port. This guide contains instructions for both ports: ■ For USB port instructions, see page 5. ■ For Parallel port instructions, see page 10.
2 VISIONEER ONETOUCH 8100 SCANNER INSTALLATION GUIDE THE VISIONEER ONETOUCH 8100 SCANNER Document cover Document pad Glass Reference frame OneTouch button panel On/Off light On/Off switch Power jack ADF/TPA port Host Parallel port USB port (behind sliding latch) Printer Parallel port
THE VISIONEER ONETOUCH 8100 SCANNER 3 Document cover. Close the document cover after placing items on the scanner glass. Document pad. Helps to secure the document in place on the scanner glass. Glass. Place items face down on top of the glass in the upper left corner. Reference frame. Place items face down within this frame. Markings on the border of the frame show where to align various paper sizes. OneTouch buttons panel. Press a OneTouch button to scan, copy/print, email, or scan with custom settings.
4 VISIONEER ONETOUCH 8100 SCANNER INSTALLATION GUIDE WHAT YOU NEED To use the OneTouch scanner and software, you need the following: ■ IBM PC (or 100-percent compatible) Pentium or equivalent ■ Microsoft Windows 95, Windows 98, or Microsoft NT 4.
INSTALLING TO A USB PORT 5 Part 1: Installing INSTALLING TO A USB PORT This section of the guide contains instructions for connecting your OneTouch scanner to a USB port. Please see “Installing to a Parallel Port” on page 10 to connect the scanner to a parallel port. STEP 1: INSTALLING THE PAPERPORT SOFTWARE Note: You must install the PaperPort software before connecting the scanner to the computer. Otherwise the correct software to run your scanner will not be installed and it may not scan properly.
6 VISIONEER ONETOUCH 8100 SCANNER INSTALLATION GUIDE 3. Follow the instructions on the screen to install the PaperPort software on your computer. During installation, a message tells you to connect the scanner to the computer. 4. Follow the steps in the next section to connect the scanner. When you’re finished, click Finish in the dialog box above. STEP 2: CONNECTING TO A USB PORT The OneTouch scanner connects to any available USB port. Check your computer’s user’s guide for its USB port locations.
INSTALLING TO A USB PORT 7 To connect the OneTouch scanner to a USB port: 1. Plug one end of the USB cable into an available USB port. Some newer computers also have keyboards with USB ports. You can plug the scanner into the keyboard instead of the USB port on the computer. 2. Slide the latch on the back of the scanner to uncover its USB port. USB port 3. Plug the other end of the USB cable into the scanner’s USB port.
8 VISIONEER ONETOUCH 8100 SCANNER INSTALLATION GUIDE 5. Turn the scanner over to see the locking tab on the bottom. Slide the locking tab to the unlocked position. Unlocked position 6. Plug the power adapter into an AC (wall) outlet. The following diagram shows the scanner connected to a computer.
INSTALLING TO A USB PORT 9 7. Turn on the power to the scanner. The amber light comes on indicating the scanner is receiving power. Power On/Off switch Your computer recognizes that a scanner has been plugged into the USB port and automatically loads the appropriate software from the CD to run the scanner. When the software is finished loading, the Finish button on the dialog box on the computer screen becomes active. 8. Click the Finish button.
10 VISIONEER ONETOUCH 8100 SCANNER INSTALLATION GUIDE INSTALLING TO A PARALLEL PORT This section explains how to connect the OneTouch scanner to a parallel port. STEP 1: CONNECTING TO A PARALLEL PORT The OneTouch scanner connects to any available parallel (LPT) port on the back of your computer. To connect the scanner to a parallel port: 1. Save any open files, and then shut down Windows. 2. Turn off the power to your computer. 3.
INSTALLING TO A PARALLEL PORT 11 5. Plug the other end of the scanner cable into the parallel port on the back of your computer. On some older computers the serial port and parallel port both have 25-pin connectors that fit the scanner cable. Please make sure you plug the scanner cable into a parallel port. 6. If you unplugged a printer from the parallel port earlier, plug it into the “Printer” port on the scanner. 7. Plug the power adapter cable into the jack on the scanner.
12 VISIONEER ONETOUCH 8100 SCANNER INSTALLATION GUIDE 8. Turn the scanner over to see the locking tab on the bottom. Slide the locking tab to the unlocked position. Unlocked position 9. Plug the power adapter into an AC (wall) outlet. The following diagram shows the scanner connected to a computer.
INSTALLING TO A PARALLEL PORT 13 10. Turn on the power to the scanner. Power On/Off switch The amber light comes on indicating the scanner is receiving power. 11. Turn on your computer. You’re now ready to install the software. Note: The locking tab protects the scanner’s scan head by holding it securely in position. Lock the scanner when transporting it from one location to another, but always remember to unlock it before scanning. The scanner will not scan when locked.
14 VISIONEER ONETOUCH 8100 SCANNER INSTALLATION GUIDE Note: If the PaperPort CD does not automatically start, make sure the CD drive’s door is completely shut. If the CD still doesn’t start, the Autorun option on your computer is turned off. Click the Windows icon named My Computer. The window shows the drives available on your computer. Double-click the icon for your CD-ROM drive to see the list of files on the CD. Double-click the file named START32.EXE. The CD starts. 3.
CHECKING OUT YOUR SCANNER 15 To check the status of the scanner: 1. Place the mouse pointer on the scanner icon in the Windows taskbar. 2. Right-click the icon. The shortcut menu appears. 3. Choose About from the shortcut menu. A dialog box confirms that the scanner is properly connected. 4. Click OK to close the dialog box. That’s it. Your scanner is ready to scan. See “Scanning by Pressing the OneTouch Buttons” on page 19.
16 VISIONEER ONETOUCH 8100 SCANNER INSTALLATION GUIDE IF THE SCANNER IS NOT PROPERLY CONNECTED If the scanner icon on the Windows taskbar has a red “X” through it, the scanner is not properly connected. Check for one of these possible problems: • Is a cable loose or not plugged in securely? Inspect all cable connections. Make sure all the cables are plugged in securely. • Is the scanner’s power light on? Turn on the scanner’s power.
CHECKING OUT YOUR SCANNER 17 To connect the scanner: 1. After checking for all the above problems, right-click the scanner icon with the red X over it. The shortcut menu appears. 2. Choose Connect from the shortcut menu. The software finds the scanner and makes the connection. The scanner icon will no longer have a red X through it, and you’re ready to begin scanning.
18 VISIONEER ONETOUCH 8100 SCANNER INSTALLATION GUIDE Part 2: Scanning THREE WAYS TO SCAN You can scan items by pressing a OneTouch button, by clicking a button on the screen, or from the PaperPort software (or other Twain software). • Scan with the Scanner Buttons Press a button on the scanner’s front panel. • Scan from the Screen Click the scanner icon on the Windows taskbar. A panel representing the scanner buttons appears. Click a button on the panel on the screen.
SCANNING BY PRESSING THE ONETOUCH BUTTONS 19 SCANNING BY PRESSING THE ONETOUCH BUTTONS Pressing a scanner button scans the item, and then sends the image either to the printer, or to a software application on your computer. To scan by pressing a button on the scanner: • Place an item to scan on the glass, face down, and press one of the scanner buttons. The scanner starts scanning the item. A message just above the Windows taskbar shows the status of the scanning.
20 VISIONEER ONETOUCH 8100 SCANNER INSTALLATION GUIDE SCANNING FROM THE BUTTON PANEL ON THE SCREEN Scanning from the button panel on the screen is just like pressing a scanner button, except you click the button on the screen. The scanner scans the item, and then sends the image either to the printer, or to a software application on your computer. This method of scanning is especially helpful if the scanner is not located close to your computer. To scan from the screen: 1.
ABOUT THE ONETOUCH BUTTONS 21 ABOUT THE ONETOUCH BUTTONS The OneTouch buttons are preconfigured to scan items at various settings, and then send the scanned image to a preselected software application—called the Destination Application. You can change the settings for each button except the Stop/Cancel button. See “About the Configuration Dialog Box” on page 22. The following table lists the scanner’s preconfigured settings: Button Preconfigured Settings Scan Scans the item as an 8.
22 VISIONEER ONETOUCH 8100 SCANNER INSTALLATION GUIDE ABOUT THE CONFIGURATION DIALOG BOX The Configuration dialog box shows the current settings for each scanner button. The tabs across the top of the dialog box correspond to the buttons. Clicking a tab shows the current settings for the corresponding button on the scanner. For example, the following figure shows the current settings for the Custom button because the Custom tab is selected.
ABOUT THE ONETOUCH BUTTONS 23 To display the Configuration dialog box: 1. Right-click the scanner icon. Scanner icon The shortcut menu appears. 2. Choose Configure on the shortcut menu. The Configuration dialog box appears. The options on the Configuration dialog box are: Select Destination—the list of applications that can open to display the scanned image. Select the application that you want to automatically open to display or process the scanned image.
24 VISIONEER ONETOUCH 8100 SCANNER INSTALLATION GUIDE Select Format and Page(s)—a set of options for selecting a format for the scanned image and whether to scan a single page or multiple pages. The formats are bitmap and PaperPort. Use PaperPort for scanning any item. Bitmap is usually for photos or artwork. The page icons represent single or multiple page scanning.
ABOUT THE ONETOUCH BUTTONS 25 SELECTING NEW OPTIONS FOR THE BUTTONS You can select a new destination application, configuration, and image format for a scanner button to optimize it for the type of scanning you want to do. You use the Configuration dialog box to select new options. To select new options for a scanner button: 1. Press and hold down the button that you want to change (except the Stop/Cancel button). The Configuration dialog box appears.
26 VISIONEER ONETOUCH 8100 SCANNER INSTALLATION GUIDE 3. Click a selection in the Select Configuration list to choose a new scan configuration for the selected scanner button. The configurations in the list are preset for the application you select in the application list. If you select another application, the configurations are for that application. If you want to select a configuration prior to scanning, click the option, Configure before Scan.
ABOUT THE ONETOUCH BUTTONS 27 ADJUSTING SCAN SETTINGS AND PAGE SETTINGS When scanning using a configuration that you created yourself, you can adjust that configuration’s scan settings and page settings. For example, if the scanned image is too dark, you can adjust the brightness of the scan setting. Note: You cannot change the scan settings or page settings for any of the predefined scan configurations. You can only adjust settings for scan configurations that you create yourself.
28 VISIONEER ONETOUCH 8100 SCANNER INSTALLATION GUIDE 2. In the Select Configuration list, click the configuration that you want to adjust. For example, the following figure shows a configuration named Photograph for Editing (which you would have created earlier). 3. Click the Edit button. The dialog box appears for adjusting the scanning settings of the selected configuration.
ABOUT THE ONETOUCH BUTTONS 29 4. Adjust the scan settings that you want. Mode—Select Black/White to scan in black and white. For example, letters and memos are usually scanned in black and white. Select Grayscale to scan items such as documents containing drawings or black and white photographs. The scanning produces an image in varying shades of gray. Select Color to scan color photographs and other color items.
30 VISIONEER ONETOUCH 8100 SCANNER INSTALLATION GUIDE 5. Click the Page Settings tab to adjust the scan page settings. Page Size—Choose a page size from the drop-down list. The outlines on the picture represent the various page sizes. Clicking one of those outlines also selects it as the page size for the scan. If you select the Custom option from the drop-down list, boxes appear in place of the picture. Enter the horizontal and vertical page dimensions in the boxes.
ABOUT THE ONETOUCH BUTTONS 31 The scanning may slow down a bit when this option is selected. You don’t need to select this option when scanning photographs. The DeScreen setting does not apply to the Black/White mode. Gamma—Drag the slider to improve how the colors in a scanned image look on your monitor. Gamma correction allows you to achieve precise color matching.
32 VISIONEER ONETOUCH 8100 SCANNER INSTALLATION GUIDE SETTING PREFERENCES The preferences apply to each button and to the scanner. To set preferences: 1. On the Configuration dialog box, select the tab for a button to set its preferences. 2. Click the Preferences tab on the Configuration dialog box. Preferences tab The Preferences dialog box appears. The dialog box shows which button you selected for new preferences.
ABOUT THE ONETOUCH BUTTONS 33 fall into these categories. For example, the destination applications for the email button are usually email applications. By selecting the Show All Destinations option as the preference for the email button, all the other types of applications are included in the list of email destination applications. Select Destinations—Select this option to individually choose the types of applications to include in the button’s list of destination applications.
34 VISIONEER ONETOUCH 8100 SCANNER INSTALLATION GUIDE Show Scanner Icon in Windows Taskbar—Select this option to see the small icon representing the OneTouch scanner in the Windows taskbar Scanner Lamp turns off—These options control when the scanner lamp powers goes off. ■ After idling for xx minutes—Select this option to automatically turn off the lamp if the scanner hasn’t been used for the specified time. This option saves energy and extends the lamp’s life.
SCANNING FROM THE PAPERPORT SOFTWARE 35 SCANNING FROM THE PAPERPORT SOFTWARE Instead of using a scanner button, you can scan directly from the PaperPort software. This is particularly helpful when you’re using PaperPort to file and save your scanned items. Note: You can also scan directly with other software that meets the Twain standards for scanning, which includes many graphics and imaging applications available for your computer.
36 VISIONEER ONETOUCH 8100 SCANNER INSTALLATION GUIDE SCANNING AN ITEM WITH THE TWAIN BUTTON The following steps explain how to scan an item using the Twain button in the PaperPort software. You can scan many types of items, from small business cards to A4-sized pages. Note: Your Visioneer OneTouch scanner is initially set to scan from the PaperPort software with the setting Color Document—Faster. To scan a black-and-white image, select one of the other settings.
SCANNING FROM THE PAPERPORT SOFTWARE 37 Select one of these preset options if it’s appropriate for how you want to use the scanned item. If you don’t want to use a preset option, select new settings here to manually configure the scan. Click Preview to see what the image will look like. The Preview image appears in the window. If the image is what you want, click Scan. If not, adjust the settings or select a new preset option and click Preview again. 4. Select the options that you want for the scan.
38 VISIONEER ONETOUCH 8100 SCANNER INSTALLATION GUIDE Mode—Choose a scan mode from the drop-down menu to select the mode for scanning. The symbols next to the menu options indicate black and white, grayscale, or color. Res—This is the resolution setting for the scan in dots-per-inch (dpi). The higher the dpi, the sharper the image. Higher dpi settings also produce larger files sizes. Usually the higher resolution settings are used for precision work, such as photographs or fine artwork.
SCANNING FROM THE PAPERPORT SOFTWARE 39 8. When you’re satisfied with the image settings, click the Scan button. The scanner now re-scans the item and displays the final image as a thumbnail on the PaperPort Desktop. The small icon in the lower left corner of the thumbnail indicates the sample photo was scanned as a bitmap image. Thumbnail image Bitmap icon Please see the PaperPort Getting Started Guide and PaperPort User’s Guide on the CD for more information about using the PaperPort software.
40 VISIONEER ONETOUCH 8100 SCANNER INSTALLATION GUIDE You can adjust the brightness and contrast at which grayscale and color items are scanned. You can only adjust the brightness for black-andwhite items. If an item is currently displayed in the preview area, the changes you make using the Brightness and Contrast sliders are reflected in the preview item. To adjust the brightness and contrast: 1. Click the Twain icon on the Command Bar, or choose Acquire from the File menu.
SCANNING FROM THE PAPERPORT SOFTWARE 41 ABOUT THE PREDEFINED SCAN SETTINGS IN PAPERPORT Selecting the proper scan setting before final scanning provides the best results for a scanned item. The scan setting determines the sharpness of the item and the number of possible shades of gray or color. These selections also affect the speed of the scan and the file size. The following table describes PaperPort’s predefined scan settings.
42 VISIONEER ONETOUCH 8100 SCANNER INSTALLATION GUIDE 4. Drag the Contrast slider to the left to decrease the contrast or to the right to increase the contrast. See the Help for more details about the Advanced Settings dialog box. CLEANING THE SCANNER GLASS Scanning items that have excessive amounts of dirt or dust may dirty the scanner’s glass. To ensure the best quality scanned item, wipe the scanner glass with a soft clean cloth to rid the glass of dust or other debris.
VISIONEER ONETOUCH SCANNER SPECIFICATIONS 43 VISIONEER ONETOUCH SCANNER SPECIFICATIONS Bit Depth Scanning resolution Maximum Item sizes Scanner dimensions Height Width Length Weight Operating temperature Relative humidity Power supply Input voltage/frequency Output voltage/watt Safety and agency certifications Hardware warranty 36-Bit color (internal), 10-Bit gray (internal), 1-Bit line art/text Optical resolution: 600 x 1200 dpi Maximum resolution (interpolated): 9600 x 9600 dpi 8.5 x 11.
44 VISIONEER ONETOUCH 8100 SCANNER INSTALLATION GUIDE