
User Guide

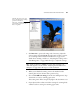
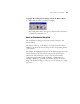

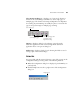
Table Of Contents
- Table of Contents
- Welcome
- What’s in the Box
- The Visioneer 9020 USB Scanner
- What You Need
- STEP 1: Installing the PaperPort Software
- STEP 2: Connecting the Scanner
- STEP 3: Checking Out Your Scanner
- Three Ways to Scan Paper Items
- Scanning Paper Items with the OneTouch Buttons
- Scanning Paper Items from the Button Panel on the Screen
- Scanning 35mm Slides and Negatives
- Configuring the Scanner
- Scanning from the PaperPort Software
- Adjusting the Settings on the Scan Manager Pro
- Troubleshooting
- Cleaning the Scanner Glass
- How to Uninstall Your Scanner
- Contacting Visioneer America Technical Support
- Contacting Visioneer—International Technical Support
- Visioneer PhotoPort 9020 USB Scanner Specifications
24 VISIONEER 9020 USB SCANNER INSTALLATION GUIDE
See “Setting Preferences” on page 31 to set Preferences.
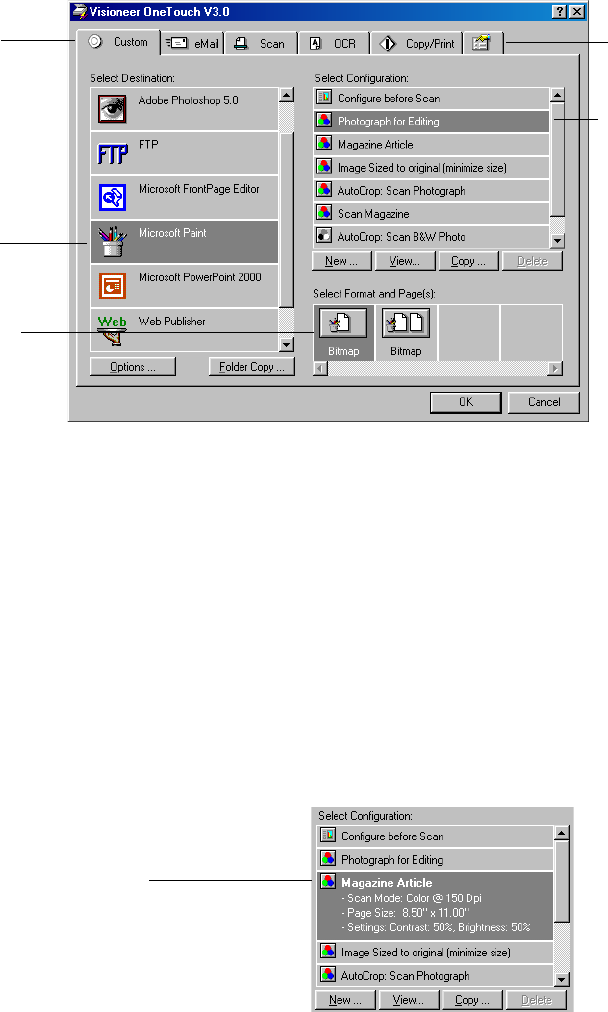
The options on the Configuration dialog box are:
Select Destination—the list of applications that can open to display the
scanned image. Select the application that you want to automatically
open to display or process the scanned image.
Select Configuration—the list of the button’s scan configurations. The
configuration settings include: color, black and white, or grayscale,
resolution in dots per inch (dpi), page size, brightness, and contrast. To
see the details about a configuration, click its icon in the list. Click the
icon again to close the detailed information.
Select a software
application to
send the scanned
image to that
application.
Select a setting
for scanning
the item.
Select format
and page(s)
options for the
button.
Click this
tab to set
preferences.
Click the tab
that corresponds
to the scanner
button you want
to configure.
Clicking an icon expands
the configuration to show
its settings