
User Guide
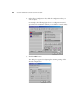
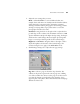
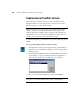
Table Of Contents
- Table of Contents
- Welcome
- What’s in the Box
- The Visioneer 9020 USB Scanner
- What You Need
- STEP 1: Installing the PaperPort Software
- STEP 2: Connecting the Scanner
- STEP 3: Checking Out Your Scanner
- Three Ways to Scan Paper Items
- Scanning Paper Items with the OneTouch Buttons
- Scanning Paper Items from the Button Panel on the Screen
- Scanning 35mm Slides and Negatives
- Configuring the Scanner
- Scanning from the PaperPort Software
- Adjusting the Settings on the Scan Manager Pro
- Troubleshooting
- Cleaning the Scanner Glass
- How to Uninstall Your Scanner
- Contacting Visioneer America Technical Support
- Contacting Visioneer—International Technical Support
- Visioneer PhotoPort 9020 USB Scanner Specifications
36 VISIONEER 9020 USB SCANNER INSTALLATION GUIDE
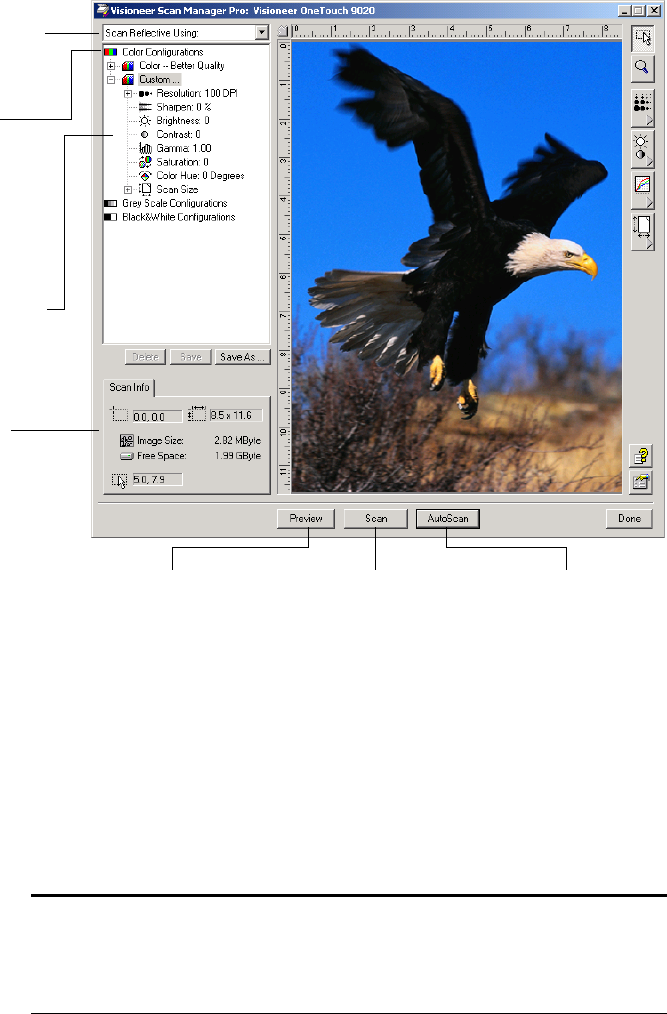
You can now scan manually by previewing the image and adjusting the
scan settings to your liking, or you can click AutoScan.
The AutoScan feature uses your preset scan settings and the scanner’s
automatic image analysis capabilities to find the optimum combination
of settings for the item you’re scanning.
Click an icon to select a
configuration—Color, Grey
Scale, or Black&White. This
example shows the Color/
Custom configuration is
selected. Clicking the “+” sign in
front of Custom shows
Custom’s scan settings as a list.
Click a setting in the list if you
want to change it. The setting’s
options appear on the right side
of the Scan Manager Pro where
you can select new options if
necessary.
Click AutoScan to
scan with your preset
scan choices.
If the image is what you
want, click Scan. If not,
adjust the settings or select
a new configuration and
click Preview again.
Click Preview to see what
the image will look like.
The Preview image appears in
the window.
Check the Scan Info to
make sure your computer
has sufficient space for the
image. Warning icons on
this box appear if your
computer does not have
enough space for the
scanned image’s file.
Choose a scanning option. Scan
Reflective Using is for scanning
paper items. The other options
are for transparencies.
Note: The appearance of the Scan Manager Pro window depends on
your computer monitor’s screen resolution. Therefore, what you see
on your computer screen may be slightly different than the examples
shown in this Guide.