Mobility with Eye-Fi Scanning Guide
Scan and Transfer Images Wirelessly with Eye-Fi This document is to be used in addition to the scanner’s user guide located on the installation disc. The instructions in this guide are for using your Visioneer Mobility scanner with the Eye-Fi card provided in the box.
VISIONEER MOBILITY WITH EYE-FI SCANNING GUIDE INSTALL THE EYE-FI CENTER APPLICATION Before you begin installing the software, make sure you have an active Internet connection. The Eye-Fi software will look for updated software during installation and you will be prompted to install any available updates. You can use either a standard memory card reader or install the software with the Eye-Fi card in the scanner, connected and powered on.
SCAN AND TRANSFER IMAGES WIRELESSLY WITH EYE-FI 4 8. Follow the installation prompts on-screen to install the Eye-Fi Center application. Windows—at the end of the installation the Eye-Fi Helper Firewall Tuning utility will open. Read the instructions on screen and follow the steps to configure Windows Firewall to allow access for the EyeFi Helper. 9. The Eye-Fi Center automatically opens when you click on Close or Finish at the end of the installation.
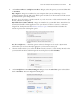
VISIONEER MOBILITY WITH EYE-FI SCANNING GUIDE LOG IN AND ACTIVATE THE EYE-FI CARD Make sure the Eye-Fi card is in a memory card reader or in the scanner with the power on before you continue. When the Eye-Fi Center opens the first time after installation, a login window is displayed. If you already have an Eye-Fi account please login now. Your new Eye-Fi card will be activated to your existing account. If this is your first time using Eye-Fi, you need to create an account.
SCAN AND TRANSFER IMAGES WIRELESSLY WITH EYE-FI 4. 5. 6. 6 At the Choose where to send photos & videos dialogue, select the options you want and then click on Continue. My computer—images are transferred to your computer when you are within range of your configured wireless network. This is the default option and the rest of the instructions in this section proceed from this option being selected.
VISIONEER MOBILITY WITH EYE-FI SCANNING GUIDE 7. Click on Close Window on the final Eye-Fi card activation dialogue. If you want to see a test scan using the Eye-Fi card, you need to disconnect the scanner from the computer and then power cycle the scanner before you do a sample scan and transfer. 8. If you created an account, an email is sent to you. Click the link in the email to verify the account. A welcome email is then sent to you.
SCAN AND TRANSFER IMAGES WIRELESSLY WITH EYE-FI 8 THE EYE-FI CARD SETTINGS This section describes configuring the Eye-Fi card settings for scanning and wireless transfer of images. For any options not described here-in, clicking on the help button in the Eye-Fi center window will open the online help site for the Eye-Fi Center application. Many of the options discussed in this section will have already been configured based on your selections while registering and activating the card.
VISIONEER MOBILITY WITH EYE-FI SCANNING GUIDE 1. Click the Networks tab, then the Private Networks tab. Wireless networks that are already configured for the Eye-Fi card are displayed in the lower part of the screen. 2. Click on the drop menu arrow and select a wireless network from the list. This list includes all wireless networks within range of the Eye-Fi card. To refresh the list select Refresh Network List. Input the network password and fill in any other fields required to access the network.
SCAN AND TRANSFER IMAGES WIRELESSLY WITH EYE-FI • 10 Scan and Send Files to an Android Mobile Device on page 22 TRANSFERRING PHOTO FILES (JPG FILES) Note: you do not need to have the Eye-Fi card connected to the computer to change these settings. The Eye-Fi Helper utility will route the files to the appropriate locations based on the settings you choose in this window. Click on the Photos tab to select where you want JPG files transferred.
VISIONEER MOBILITY WITH EYE-FI SCANNING GUIDE Click on the RAW tab to select where you want PDF files transferred. The PDF scan functions are indicated on the scanner with page icons. • Computer—select Upload RAW files to this computer option to have files transferred to your computer when the scanner is in range of a wireless network you configured for the Eye-Fi card. Select the other options in this dialogue as needed for where you want files saved on your computer.
SCAN AND TRANSFER IMAGES WIRELESSLY WITH EYE-FI 12 Select Send items to my Eye-Fi View to have all scanned files also sent to your online account for you to access from any computer. With the free Eye-Fi account the files are available for up to 7 days. Note that if you enable this option Transfer Mode is automatically enabled. TRANSFER MODE Selective Transfer—the options in this window are for choosing how you want protected files to be transferred.
VISIONEER MOBILITY WITH EYE-FI SCANNING GUIDE SCAN AND SEND FILES TO A COMPUTER When images are transferred, they are copied to the computer/device. The original images remain on the Eye-Fi card until deleted from the card. So even if the images do not transfer as expected, they can be accessed from the card later. Before scanning, make sure you have configured your Eye-Fi card for wireless image transfer as described in the previous section. 1. Turn on the scanner power. 2.
SCAN AND TRANSFER IMAGES WIRELESSLY WITH EYE-FI 14 2. Double-click the icon that displays the images for that date. The folder expands to display the images as icons. 3. Double-click an image icon to view the image. SCAN TO A MAC COMPUTER On a Mac computer, when the Eye-Fi software is running in the background and scanning is performed within the wireless network, the images are transferred automatically to the computer. There is no visual indicator that the transfer is taking place. 1.
VISIONEER MOBILITY WITH EYE-FI SCANNING GUIDE 3. Log in. 4. Select the specific card from the drop-down list on the left side instead of the device or My Activity. 5. Click an image icon to access the folder.
SCAN AND TRANSFER IMAGES WIRELESSLY WITH EYE-FI 16 SCAN AND SEND FILES TO AN IOS MOBILE DEVICE (IPAD, IPOD, AND IPHONE) Important: make sure Wi-Fi access is enabled on your mobile device. DOWNLOAD AND INSTALL VISIONEER DOCAIR 1. 2. 3. 4. Open the App Store from your mobile device. Open the search field and then input: Visioneer DocAir Tap Search. Select the Visioneer DocAir and follow the on-screen steps to download the mobile application to your device. 5. Tap DocAir to open the application. 6.
VISIONEER MOBILITY WITH EYE-FI SCANNING GUIDE Tip: the scanner automatically powers off after 2 minutes to conserve battery power. Tap the function button occasionally to keep the scanner powered on while initiating the connection between your mobile device and the scanner. Alternatively, if you have a memory card reader, you can insert the Eye-Fi card into the card reader for configuring the connection between your mobile device and the Eye-Fi card’s Direct Mode network. 1.
SCAN AND TRANSFER IMAGES WIRELESSLY WITH EYE-FI 18 10. Tap your Eye-Fi card in the Eye-Fi Cards list. The next screen displays your Eye-Fi card’s network information, including the password for the Direct Mode Network. You can either write down the Direct mode Wi-Fi password, or you can press, hold, then release your finger on the password to highlight it, and then tap Copy when that prompt displays. 11. Tap Settings to return to the Settings screen. 12. Tap Done on the Settings screen. 13.
3. 4. 5. 6. 7. VISIONEER MOBILITY WITH EYE-FI SCANNING GUIDE When the scanner power is back on, insert a photo in the scanner. The scanner scans saves the image to the Eye-Fi card, and the card starts transmitting the image. Open the DocAir application. The scanned image file will now start transferring into the DocAir application. When the scanned image appears in the document list you know that the Direct Mode connection is working as intended.
SCAN AND TRANSFER IMAGES WIRELESSLY WITH EYE-FI 20 Deleting Documents 1. In the Documents list, tap the Edit button. A selection circle will be displayed next to each time in the documents list. 2. Tap on each file name that you want to send. 3. Tap the trash can icon. 4. Tap the option to confirm that you want to delete the files you selected. SCANNING TO DOCAIR After you have successfully configured your mobile device, you can then scan any time following these simple steps: 1.
VISIONEER MOBILITY WITH EYE-FI SCANNING GUIDE ICLOUD AND DOCAIR You can connect DocAir to iCloud to have your scanned files synchronized between DocAir and other devices you have configured to connect to your iCloud account. • You need to enable iCloud in the Settings for your mobile device and log into your iCloud account. • Turn on Photo Stream to synchronize JPG files. • Turn on Documents & Data to synchronize PDF files.
SCAN AND TRANSFER IMAGES WIRELESSLY WITH EYE-FI 22 SCAN AND SEND FILES TO AN ANDROID MOBILE DEVICE DOWNLOAD AND INSTALL THE EYE-FI MOBILE APPLICATION 1. 2. 3. 4. 5. On your Android device, access the Google Market application. Search for the Eye-Fi application. You want the free one by Eye-Fi, Inc. Download the application to install it. Upon installation, touch the Open button to launch the application. Input your Eye-Fi account email address and password, and then tap Login.
VISIONEER MOBILITY WITH EYE-FI SCANNING GUIDE Tip: the scanner automatically powers off after 2 minutes to conserve battery power. Tap the function button occasionally to keep the scanner powered on while initiating the connection between your mobile device and the scanner. Alternatively, if you have a memory card reader, you can insert the Eye-Fi card into the card reader for configuring the connection between your mobile device and the Eye-Fi card’s Direct Mode network. 1.
SCAN AND TRANSFER IMAGES WIRELESSLY WITH EYE-FI 24 Note: if you have configured a wireless network for the Eye-Fi card, you will need to either temporarily disable your wireless network if possible, or remove the wireless network from the Eye-Fi card and then add it back again when you are done. If the Eye-Fi card is within range of a configured wireless network the scanned images will be transferred using the wireless network. Please refer to Adding or Removing Private Wireless Networks on page 8.
4. VISIONEER MOBILITY WITH EYE-FI SCANNING GUIDE Tap the function button on the scanner to cycle through the scan options until the LED is lit next to the option you want to use to scan. Scans in color at 300dpi and creates a JPG (*.jpg) file. (note that a thumbnail of the image is displayed in the document view for this file type) Scans in black & white at 300dpi and creates an Adobe PDF (*.pdf ) file.
SCAN AND TRANSFER IMAGES WIRELESSLY WITH EYE-FI 26 PDF FILE TRANSFER USING EVERNOTE Evernote is an application that allows you to store notes and content. Using Eye-Fi and Evernote, you can scan and send PDF files from your scanner to your iPad or any other mobile device. You can also configure Eye-Fi to send scans automatically to Evernote, after which you simply need to email them to your computer or device. CONFIGURE EYE-FI TO SHARE WITH EVERNOTE 1. 2. 3.
VISIONEER MOBILITY WITH EYE-FI SCANNING GUIDE 4. Select Evernote, and click Share Now. The images are sent to your Evernote account, as shown here. 5. Send them by email to your computer/device.
SCAN AND TRANSFER IMAGES WIRELESSLY WITH EYE-FI 28 ACCESS AND DELETE IMAGES FROM EYE-FI CARD To copy or delete the images from the card manually, connect the scanner to a computer and turn it on. The scanner will be detected as a disc drive. Open the option on your computer to display the disc drives and then open the drive for your scanner. You can also remove the card from the scanner and insert it into a memory card reader in the computer.
VISIONEER MOBILITY WITH EYE-FI SCANNING GUIDE TROUBLESHOOTING AND ERROR MESSAGES Inserted device does not belong to this account—this message means that the user account was open on one computer while the card was added to the user account on another computer. Log out and in again as prompted. Not in range, secured with WPA/WPA2 PSK—this message appears in the Wi-Fi networks on an Android device, for example.
INTELLIGENT SCANNING SOLUTIONS Copyright ©2012 Visioneer, Inc.