
USB Scanner Installation Guide Strobe XP 200
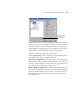
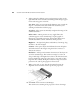
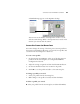
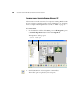
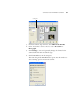

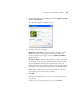
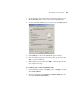
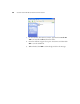
Table Of Contents

28 VISIONEER STROBE XP 200 SCANNER INSTALLATION GUIDE
8. Adjust settings by checking options and setting new values on the
right-hand side of the Visioneer Scan Manager. The changes appear
in the Scan Setup pane on the left.
Auto Trim—This option automatically eliminates areas outside the
edges of a document. Select Auto Trim if the document you’re
scanning is smaller than a full-size page.
Straighten—This option automatically straightens the image of the
scanned document.
Reduce Moire—Moire patterns are wavy, rippled lines that
sometimes appear on the scanned images of photographs or
illustrations, particularly newspaper and magazine illustrations.
Select Reduce Moire to limit or eliminate moire patterns.
Brightness—To adjust the lightness and darkness of an image, drag
the slider to the left and right.
Contrast—This option adjusts the difference between the lighter
and darker shades in the images. Drag the slider to increase or
decrease the contrast.
Resolution —This option determines the amount of detail you can
see in the scanned image. The resolution setting for a scan is in
dots-per-inch (dpi). The higher the resolution, the finer the details,
however, higher dpi settings also take longer to scan and produce
larger files sizes. Usually the higher resolution settings are used for
precision work, such as photographs or fine artwork.
9. When you’re ready to scan, align the document between the
alignment arrows and insert it, face up, into the paper feed.
10. Click Scan on the Visioneer Scan Manager.
The scanner starts scanning and a progress box shows the image.