
Installation and Operating Instructions


Wireless transmissions
A supervisory message is transmitted at 128-second intervals. If the signal is not received, the
control panel determines that the detector is missing.
The detector transmits the following:
• Idle (normal operation): The detector is in normal state without any faults or
alarms.
• Heat Alarm: Active when the detector is above 135°F (57.5°C) or the rate of
rise of temperature is above 15°F/min (8.3°C/min).
• Tamper / Tamper Restore: (tamper switch activated). 10 second
maximum delay on restore before transmission.
• Pre-low battery: Low battery state is sent to panel, but detector not chirping.
• Low Battery: (battery voltage falls below threshold). Battery voltage is
tested & transmitted at the time of supervisory or other transmissions.
• Fault: (detector fault limit reached). Troubles are transmitted at the time of
occurrence (one trouble per supervisory interval).
Tamper
Removing the detector from the mounting plate initiates a tamper transmission. The tamper
condition is restored after the detector is mounted on the plate.
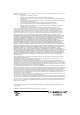
Battery
A: Battery compartment
The wireless heat alarm is powered by a CR123A or
DL123A battery. The detector regularly checks for a
low battery. If a low battery is detected, the transmitter
sends a message to the control panel, which displays
the detector's ID at low battery. In addition, the yellow
LED of the detector blinks every twelve seconds. The
detector's sounder chirps every 48 seconds and the
yellow LED continues to blink until the battery is
replaced. Pressing the hush button silences the chirps
for twelve hours if no other trouble conditions exist. The
battery should be replaced with a new battery when the
chirps begin.
At low battery, the test button is disabled.
NOTE: If the alarm does not sound, contact the installer or dealer for service.
Battery Installation and replacement
CAUTION: Risk of explosion if battery is replaced by an incorrect type. Dispose of used
battery according to the manufacturer's instructions.
To replace battery, complete the following steps:
1. Twist the detector counterclockwise to remove the detector from its mounting base. To
remove battery, carefully lift it from the + end using a flathead screwdriver. Dispose of
the battery according to local regulations.
2. To ensure a proper power-down sequence, wait a minimum of 30 seconds before
installing the new battery.
3. Insert a new CR123A or DL123A battery, available from a local Panasonic or Duracell
dealer, in the battery compartment. Insert the battery by inserting the - end first. If the
battery is incorrectly inserted, carefully remove and correctly re-insert it following the
procedure described in step 1.
4. To re-install the detector on its mounting base, turn the detector clockwise until the
mating marks align.
5. After the power-up sequence, the green LED blinks twice every 12 seconds to indicate
normal operation. If the battery is not installed correctly, the detector will not operate,
and the battery may be damaged. If the detector does not power up, check that the
battery is installed correctly and fully charged.
6. Test the detector as described in this document.
CAUTION: CONSTANT EXPOSURES TO HIGH OR LOW TEMPERATURES OR HIGH
HUMIDITY MAY REDUCE BATTERY LIFE.