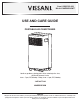
Item #1008 582 683 Model #VAP09R1AWT USE AND CARE GUIDE PORTABLE AIR CONDITIONER Questions, problems, missing parts? Before returning to the store, call Vissani Customer Service 8 a.m. - 7 p.m., EST, Monday - Friday, 9 a.m. - 6 p.m., EST, Saturday 1-855-847-7264 HOMEDEPOT.COM THANK YOU We appreciate the trust and confidence you have placed in Vissani through the purchase of this air conditioner. We strive to continually create quality products designed to enhance your home.
Table of Contents Safety Information. . . . . . . . . . . . . . . . . . . . . . . . . . . . . . . . . . . 2 Pre-Installation. . . . . . . . . . . . . . . . . . . . . . . . . . . . . . . . . . . . . . 5 Tools Required. . . . . . . . . . . . . . . . . . . . . . . . . . . . . . . . . . . . . 5 Hardware Included. . . . . . . . . . . . . . . . . . . . . . . . . . . . . . . . . . 5 Package Contents . . . . . . . . . . . . . . . . . . . . . . . . . . . . . . . . . . 6 Installation . . . . . . . . . . . . . . . . .
Safety Information (continued) CAUTION: □ Be sure the air conditioner has been securely and correctly installed according to the installation instructions in this manual. Save this manual for possible future use in removing or installing this unit. □ Plug in power cord plug properly. Otherwise, it may cause electric shock or fire due to excess heat generation. □ Do not modify power cord length or share the outlet with other appliances as it may cause electric shock or fire due to overheating.
Safety Information (continued) CAUTION: □ Hold the plug by the head of the power plug when taking it out. Otherwise, it may cause electric shock and damage. □ Ensure that the installation is properly secured to prevent the product from potentially falling. □ Do not place heavy objects on the power cord and ensure that the cord is not compressed. Otherwise, there is danger of fire or electric shock. □ If water is spilled on the unit, turn off the unit and switch off the circuit breaker.
Pre-Installation TOOLS REQUIRED Phillips screwdriver Measuring tape or ruler Flat blade screwdriver Scissors or knife HARDWARE INCLUDED NOTE: Hardware not shown to actual size.
Pre-Installation (continued) PACKAGE CONTENTS A B G C H D I J K E L M F Front Rear Part Description A Control Panel B Remote Signal Receptor C Horizontal Louver Control D Vertical Louver Control E Panel F Caster G Handle (both sides) H Air Filter I Upper Air Intake J Drain Outlet K Air Outlet L Lower Air Intake M Bottom Tray Drain Outlet 6
Pre-Installation (continued) DESIGN NOTICE In order to ensure the optimal performance of our products, the design specifications of the unit and remote control are subject to change without prior notice. AMBIENT TEMPERATURE RANGE FOR OPERATION MODE Temperature Range Cool 17-35°C (62-95°F) Dry 13-35°C (55-95°F) EXHAUST HOSE INSTALLATION The exhaust hose and adaptor must be installed or removed in accordance with the usage mode. For COOL, or AUTO mode exhaust hose must be installed.
Pre-Installation (continued) WHAT SHOULD I LOOK FOR FIRST WHEN PURCHASING A PORTABLE AIR CONDITIONER? The right air conditioner helps you cool a room efficiently. An undersized unit won’t cool adequately while one that’s too large will not remove enough humidity, leaving the air feeling damp. To find the proper air conditioner, determine the square footage of the room you want to cool by multiplying the room length by its width.
Installation 1 2 Prepare the Exhaust Hose assembly □ Press the exhaust hose (BB) (or extended exhaust hose) into the window slider adaptor (CC) (or wall exhaust adaptor) and unit adaptor (AA). Clamp automatically by elastic buckles of the adaptors. 3 Install the Exhaust hose assembly to the unit □ Push the Exhaust hose (BB) into the air outlet opening of the unit along the arrow direction. Preparing the Adjustable Window Slider □ Choose the window sliders according the size of your window.
Installation (continued) 4 Install Adhesive Foam Seal □ Cut the adhesive Foam Seal A (II) and B (DD) strips to the proper lengths, and attach them to the window sash and frame as shown. DD II II 5 DD Install Window Slider □ Insert the window slider (GG and HH) assembly into the window opening. HH GG 6 HH GG Cut Foam to Length □ Cut the non-adhesive Foam Seal C (EE) strip to match the width (or height) of the window.
Installation (continued) 7 Install Security Bracket (optional) □ Install the security bracket (FF) with 2 screws as shown. FF FF 8 Install Window Slider Adaptor □ Insert the window slider adaptor (CC) into the hole of the window slider (GG). NOTE: To ensure proper function, DO NOT overextend or bend the hose. Make sure that there is no obstacle around the air outlet of the exhaust hose (in the range of 500mm) in order to the exhaust system works properly.
Operation NOTE: The following control panels are for explanation purpose only. The control panel of the unit you purchased may be slightly different according to the models. Your machine may not contain some indicators or buttons. The actual shape shall prevail. 1 Using the Control Panel Cool MODE CONSTANT FAN(Press 3s) MODE CONSTANT FAN(Press 3s) Fan Dry MODE button Selects the appropriate operating mode.
Operation (continued) LED display Shows the set temperature while on cool, heat or auto mode. While on DRY and FAN modes, it shows the room temperature. Shows Error codes: □ E0-EEPROM error. □ E1-Room temperature sensor error. Power indicator light Either Timer or Wireless indicator light Timer indicator light(only set by remote controller) □ E2-Evaporator temperature sensor error. □ E3-Condenser temperature sensor error (on some models). □ E4-Display panel communication error.
Operation (continued) 5 Water Drainage □ During dehumidifying modes, remove the drain plug from the back of the unit, install the drain connector (5/8” universal female mender) with 3/4” hose (locally purchased). For the models without drain connector, just attach the drain hose to the hole. Place the open end of the hose directly over the drain in your basement floor. □ When the water level of the bottom tray reaches a predetermined level, the unit beeps 8 times, the digital display area shows “P1”.
Using the Remote Control Model RG51H2(1)/CEFU1-M Rated Voltage 3.0V (Dry batteries R03/LR03×2) Signal Receiving Range 8m Environment 23°F~140°F (-5°C~60°C) Before you begin using your new air conditioner, make sure to familiarize yourself with the remote control. The following are brief instructions to the remote control itself. For instructions on how to operate your air conditioner, refer to the How to Use Basic Functions section of this manual. TEMP Decreases temperate in 1°F (1°C) increments.
Using the Remote Control (continued) 1 2 Using Cool Mode □ In AUTO mode, the unit will automatically select the COOL, FAN, or HEAT operation based on the set temperature. IMPORTANT: Before operation, please ensure the unit is plugged in and power is available. □ Press the MODE button to select AUTO. □ Press the MODE button to select COOL mode. □ Set your desired temperature using the TEMP TEMP Using Auto Mode □ Set your desired temperature using the TEMP TEMP or button.
Using the Remote Control (continued) 3 4 Using Fan Mode □ Press the MODE button to select FAN mode. Using Dry Mode □ Press the MODE button to select DRY. □ Press FAN button to select the fan speed: AUTO, LOW, or HIGH. □ Set your desired temperature using the TEMP TEMP □ Press the ON/OFF button to start the unit. or button. □ Press the ON/OFF button to start the unit. NOTE: You can’t set temperature in FAN mode. As a result, your remote control’s LCD screen will not display temperature.
Using the Remote Control (continued) 5 Using the Timer □ Use the time to set the amount of time after which the unit will automatically turn on/off. TIMER ON setting □ Press TIMER ON button to initiate the ON time sequence. □ Press TEMP up or down button for multiple times to set the desired time to turn on the unit. □ Point remote to unit and wait 1sec, the TIMER ON will be activated. TIMER ON x5 1sec TIMER OFF setting □ Press TIMER OFF button to initiate the OFF time sequence.
Using the Remote Control (continued) 5 Using the Time (continued) EXAMPLE □ Keep in mind that the time periods you set for both functions refer to hours after the current time. □ If current timer is 1:00 PM, to set the timer as above steps, the unit will turn on 2.5h later (3:30 PM) and turn off at 6:00 PM. xn xn TIMER ON TIMER OFF Unit turns Timer starts Current time 1PM Unit turns OFF ON 2:00PM 3:00PM 3:30PM 4PM 5PM 6PM 2.
Using the Remote Control (continued) 8 Using the LED Display □ Press the LED Display button to turn on and turn off the display on the indoor unit. 9 Using the Short Cut setting □ Used to restore the current settings or resume previous settings. □ Push this button when remote controller is on, the system will automatically revert back to the previous settings including operating mode, setting temperature, fan speed level and sleep feature (if activated).
Using the Remote Control (continued) 11 NOTE: The device could comply with the local national regulations. Inserting and Replacing Batteries □ Your air conditioning unit may come with two batteries (some units). Put the batteries in the remote control before use. □ In Canada, it should comply with CAN ICES-3(B)/NMB-3(B). □ In USA, this device complies with part 15 of the FCC Rules.
Maintenance SAFETY PRECAUTIONS □ Always unplug the unit before cleaning or servicing. □ DO NOT use flammable liquids or chemicals to clean the unit. □ DO NOT wash the unit under running water. Doing so causes electrical danger. □ DO NOT operate the machine if the power supply was damaged during cleaning. A damaged power cord must be replaced with a new cord from the manufacturer.
Troubleshooting Problem Unit does not turn on when pressing ON/OFF button Unit does not cool well The unit is noisy and vibrates too much The unit makes a gurgling sound Solution Possible Causes P1 Protection Code □ The Water Collection Tray is full. Turn off the unit, drain the water from the Water Collection Tray and restart the unit.
Questions, problems, missing parts? Before returning to the store, call Vissani Customer Service 8 a.m. - 7 p.m., EST, Monday - Friday, 9 a.m. - 6 p.m., EST, Saturday 1-855-847-7264 HOMEDEPOT.COM Retain this manual for future use.