GENERAL INFORMATION Owner's Record Important Safety Do's and Don'ts 3 Instructions 4 5 INSTRUCTIONS \INSTALLATIONSite Selection ~ 6 Electrical Requirements and Installation OPERATION INSTRUCTIONS Filling Getting " '., 6 Your StartedSpa Se . Starting tting 11 Filter 1me " ' : :.
This Owner's Manual tions and general has been designed maintenance. We suggest it. Please keep this m.anua;J available If you have any questions contact your Authorized to familiarize you with your Vita Spa opera- that you take some time to carefully review for reference. ., regarding your Vita Spa set-up, operation, or maintenance, Vita Spa Dealer.
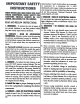
WHEN INSTALLING AND USING THIS ELECTRICAl EQUIPMENT, BASIC SAFETY PRECAUTIONS SHOULD ALWAYS BE FOLLOWED, INCLUDING THE FOLLOWING: READ AND FOLLOW INSTRUCTIONS. metal surface if each metal surface is permanentIy connected by a minimum No.8 AWG (8.42mm2) solid copper conductor attached to the wire connector on the terminal box that is provid ed for this purpose). National Electrical Code ANSI/NMH> A70-1993. 7. DANGER. RISK OF ELECTRICAl SHOCK.
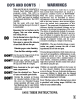
Make sure the spa is connected to a Ground Fault Interrupter (GFCI) protected circuit. This GFCI is required by the National Electrical Code (NEC) and must be installed by a licensed electrician. Test GFO monthly. DO Prolonged immersion in -water that is warmer than normal body temperature can result in a dangerous condition known as HypoTHERMIA.
and approved by a local building / electrical inspection authority. 1) The spa must be permanently connected (hard wired) to the power supply. No extension cords or SITE SELECTION/PREPARATION: plug-type connections are to be used in conjuncThe spa must be installed on a structurally strong, tion with the operation of the spa. Failure to supsolid and reasonably level surface.
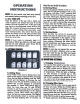
when the next switch is touched. NOTE: For best results, read each step carefully and entirely before proceeding to the next. I) FILL YOUR SPA Wipe the interior of the spa with a damp, soft cloth to remove any residue that may be 9n the surface. Fill with a garden hose. As the spa is filling, check in the equipment access area for any leaks. On occasion, it may be necessary to hand tighten a union fitting that may have come loose during transit.
becausethe current hour has an "F" in the display, you may turn off the filter by removing the "F". The filter will continue to run, however, if the heater is on. C. Changing Heater DaJs Your spa has been preset to heat the water to the set temperature every day of the week. If you wish to eliminate heating on one or more days, touch the HEATER switch once to enter the heater set mode. While the HEATER light is flashing, review each day of the week by touching the UP or DOWN switches.
6) ADD START UP CHEMICALS Carefully follow the directions and add the startup chemicals recommended to you by your dealer. Contact your dealer to clarify any questions you may have. 7) JET OPERATION Your Vita Spa is designed with a unique jet system to allow you to select a wide variety of massage patterns. The following is a description of the various types of jets and their operation you may use to tailor your spa to your specific massageneeds. tional massage jets will be operational.
pump systems). Water is jet regions by rotating the ed clock positions. When the three Ofclock position, diverted to various outer rim to assortthe jet is turned to sector RA Rjets will operate. At nine o'clock, sector RBRjets will function. At six o'clock, both RAR and RBRsectors will perform simultaneously. And at the twelve o'clock, the water is routed through the turbo massage jet itself. (See specific spa spec sheet insert for details on how to use the 4Way Turbo Diverter). c.
spa to the rain and sun, it is recommended to seal the redwood cabinet once or twice a year with a wood sealant. Vita's specially formulated redwood sealer is available at your VITA SPA dealer. Spa water maintenance consists of dime separate, easily developed programs: 1. Sanitizing and maintaining a safe level of sanitizer in the spa water. 2. Balancing the pH and maintaining the recommended mineral content level. 5. MARINE VINYL COVER Your cover is manufactured from a durable marine grade, U.
SYMPTOM PROBABLE CAUSE SOLUTION Power Failure outside of Spa O1eck power source Breaker and GFCI; Reset breaker / GFO. Call Electrician if it will not reset. Spa side locked Lockout light is flashing. Unlock. Overheat Let water temperature cool down to lO4F and reset by holding HEATER switch for 5 seconds, or until display returns to normal. H HIl1 messagereturns, call for ~re. Display: BJ2P Blower / Pump purge Normal if this occurs twice daily.